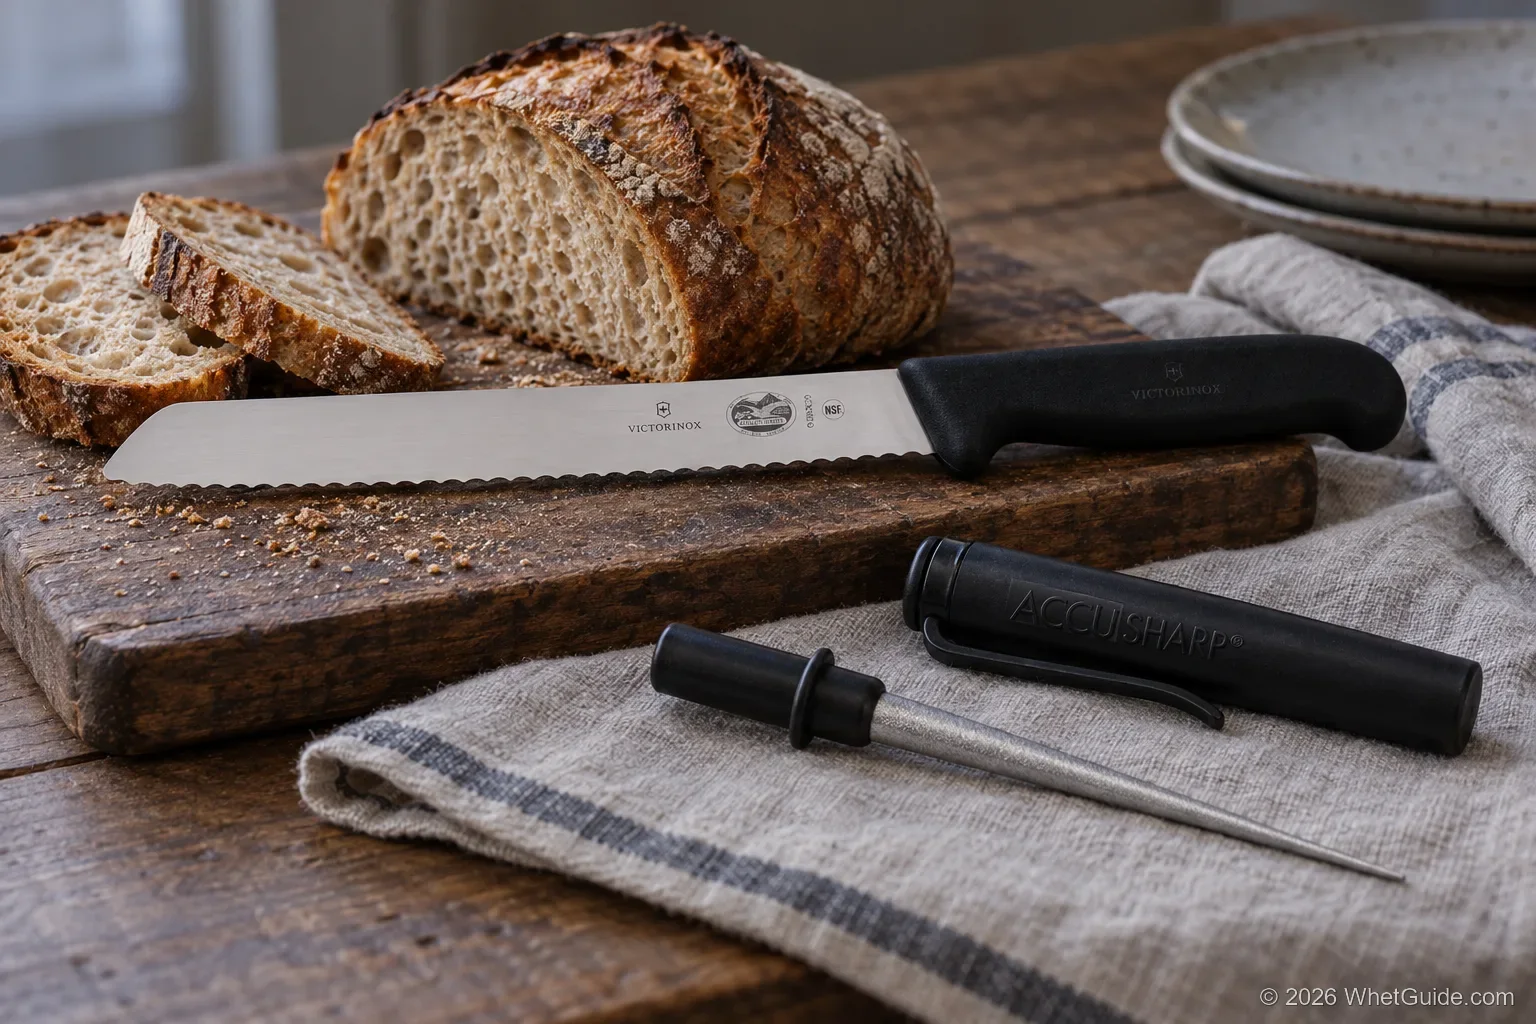
Here's how to sharpen a bread knife. First wash it and make sure it's really dull. Then run a tapered rod through each scallop on the beveled side at the existing angle until a slight burr forms on the flat back. Take that burr off with one or two light passes on the flat side. It takes about 15 minutes. Most bread knives don't need it for years, and if yours is a cheap one, buying a new knife is often the better deal.
↑ SectionsQuick answer: three bread knives, three fixes
Which fix you need depends on what's wrong with the knife, and the first one costs nothing.
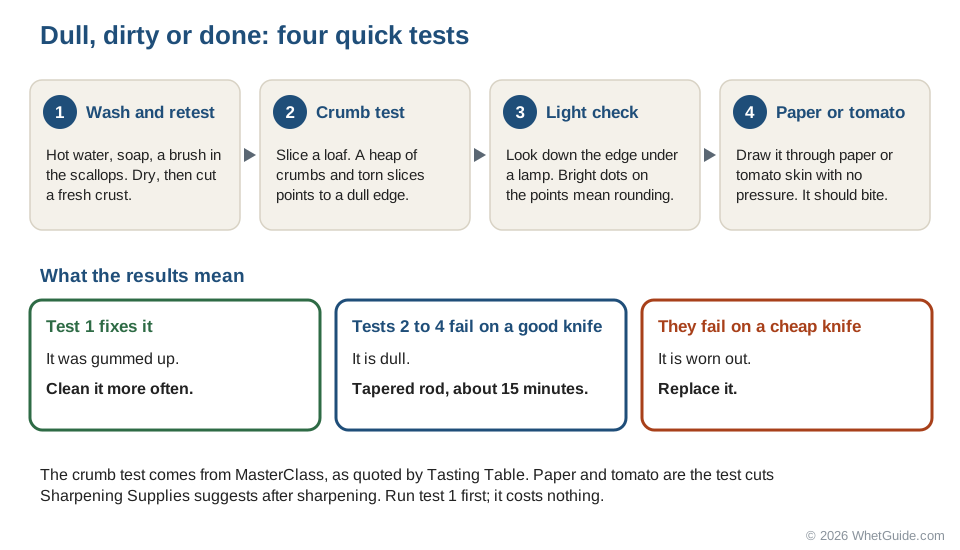
| What you find | What it means | Fix |
|---|---|---|
| Cuts cleanly once it's washed in hot soapy water with a brush through the scallops | It was gummed with starch and dough | Wash it after every loaf. No sharpening. |
| Still tears a fresh crust; a good knife | The points are rounded | Tapered rod on the beveled side, about 15 minutes, or a sharpening service |
| Still tears; a cheap or stamped knife, or points missing | Not worth the time | Replace it. Knivesandtools says buying new is often the better option. |
Should you sharpen it at all?
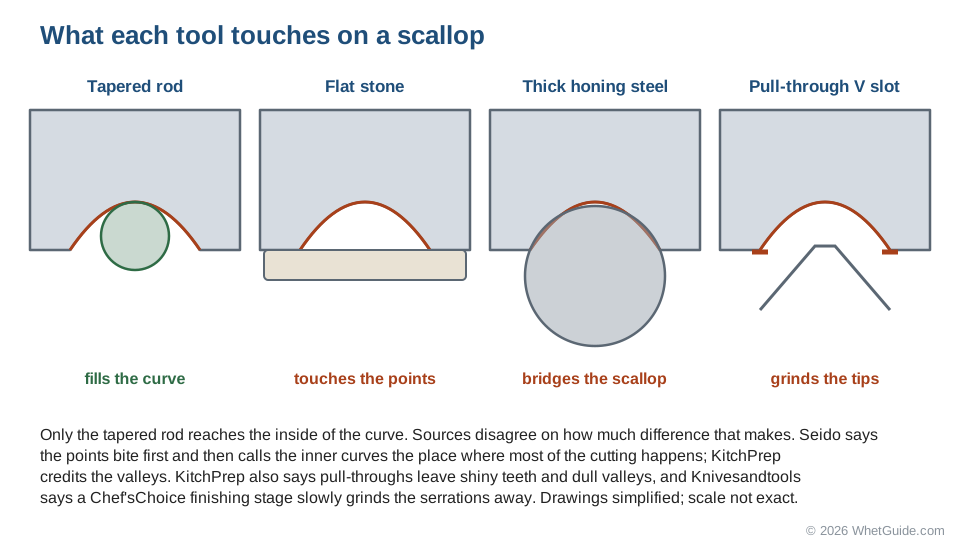
Usually not yet. A bread knife holds up well because of its shape: the tips of the serrations meet the crust and the board first, and the scallops between them sit back where nothing touches them. Sources split on which part does most of the actual cutting. Seido Knives says the points bite first, then calls the inner curves the place where most of the cutting happens; KitchPrep credits the valleys. Either way, the curves are protected, and a good bread knife keeps working for years (the schedule below has the published numbers).
The catch is that a gummed knife and a dull one fail the same way on the first slice. Both skid on the crust and crush the crumb. So before you buy anything, run the chart below.
What counts as "good"? A knife you'd be annoyed to lose: a forged blade, a brand that offers its own sharpening service, or simply one you like using. A thin stamped knife from a supermarket block falls on the other side, and so does any knife with several points snapped off.
↑ Back to all sectionsIs it dull, or just dirty? Four tests
Run these in order. The first costs nothing, and none of them needs a tool. Starch and fat from bread collect in the scallops and on the bevel, and a dried film of it is enough to make a crisp point feel soft.
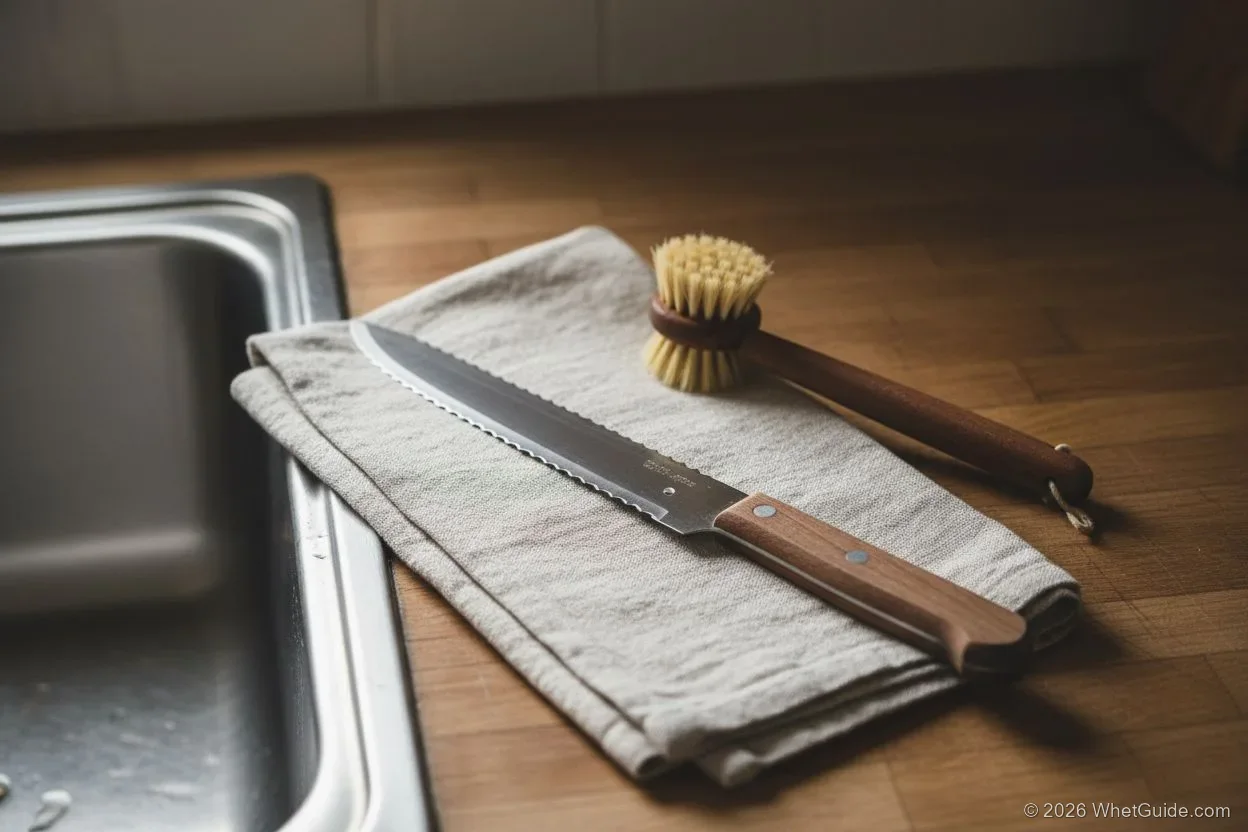
- Wash the blade in hot, soapy water, run a small brush along the scallops on both faces, then rinse it and dry it. Cut a fresh, crusty end, not the squashed slice you tested on before. If it now bites into the crust and glides through, there's nothing to sharpen.
- Do the crumb test. Tasting Table passes on a simple check from MasterClass: slice a loaf, and if you're left with a lot of crumbs, it's time to sharpen. A sharp bread knife saws through the crust with a few crumbs; a dull one tears it into a heap. Use a loaf with a firm crust, since soft sandwich bread squashes even under a good edge.
- Look at the points under a light. Hold the knife edge-up under a lamp and look straight down the edge. A sharp point is too fine to reflect, so it disappears. A rounded one shows as a bright dot or a short line of light. If most points along the middle of the blade (the part that does the most work) show bright and the ones near the heel don't, the knife is dull from use.
- Try paper or a tomato. Sharpening Supplies suggests paper, tomato or rope as test cuts after sharpening, and they work before it too. Draw the knife across a sheet of printer paper or the skin of a ripe tomato with almost no pressure. A sharp bread knife catches and starts the cut at once. A dull one skates until you push.
Find the beveled side before you start
Almost every mistake on a bread knife comes from working the wrong face. Most bread knives are ground on one side only, which Sharpening Supplies describes as a chisel grind: the scallops are cut into one face, and the other stays flat right to the edge. You sharpen the beveled face. The flat back only ever gets a light deburring pass.
To find it, tilt the blade under a light. The beveled side shows a row of small ground crescents along the edge, one per scallop. The flat side reflects as a single smooth band.
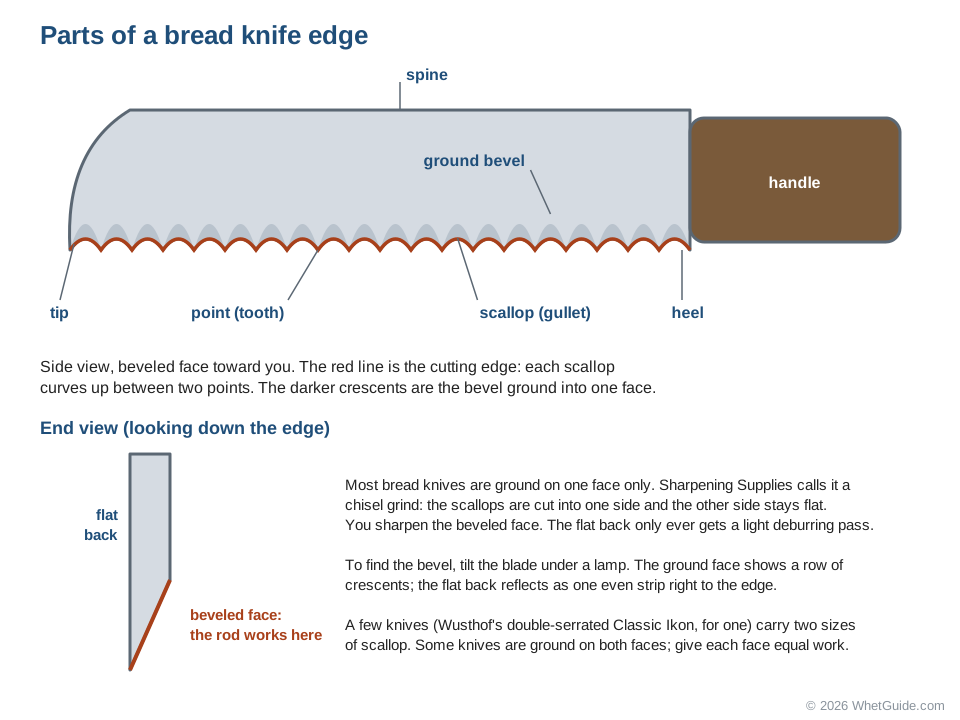
A few bread knives are ground on both faces. If you see crescents on both sides, give each face the same light rod work, and skip the flat-back deburr step, since there is no flat back.
↑ Back to all sectionsScalloped, wave or double-serrated: which edge do you have?
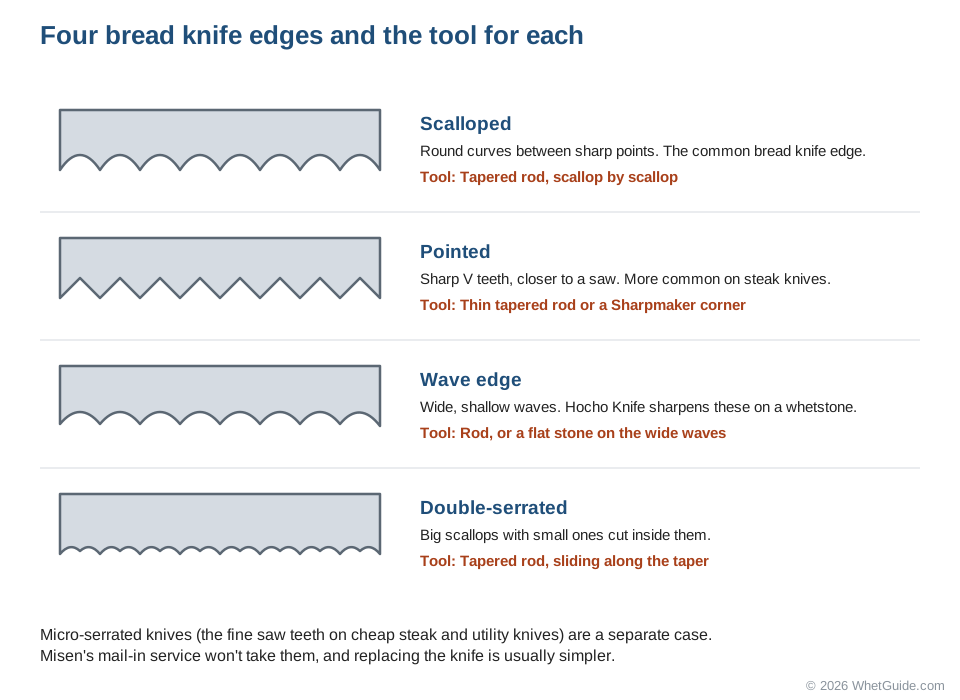
Bread knife edges come in a few patterns, and the pattern decides which tool can reach it.
| Edge | What it looks like | Sharpen with | Worth it? |
|---|---|---|---|
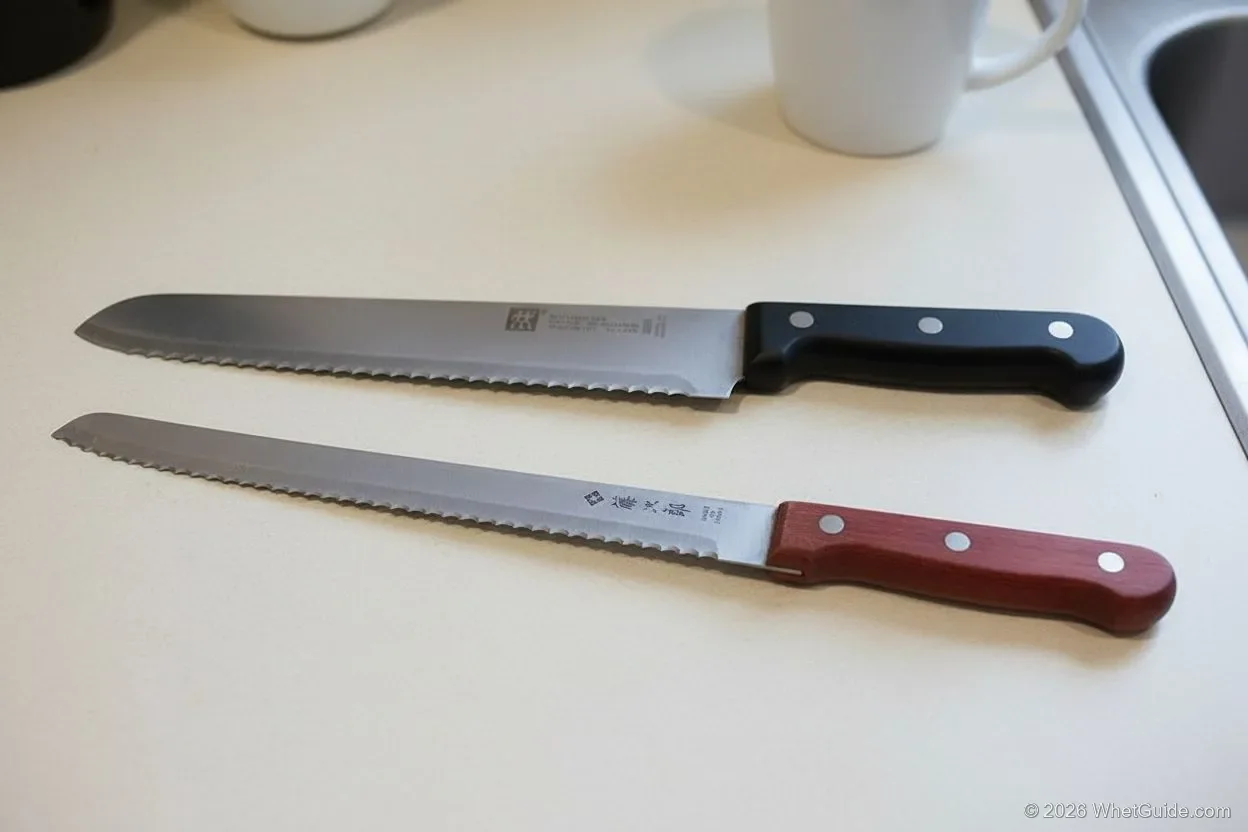
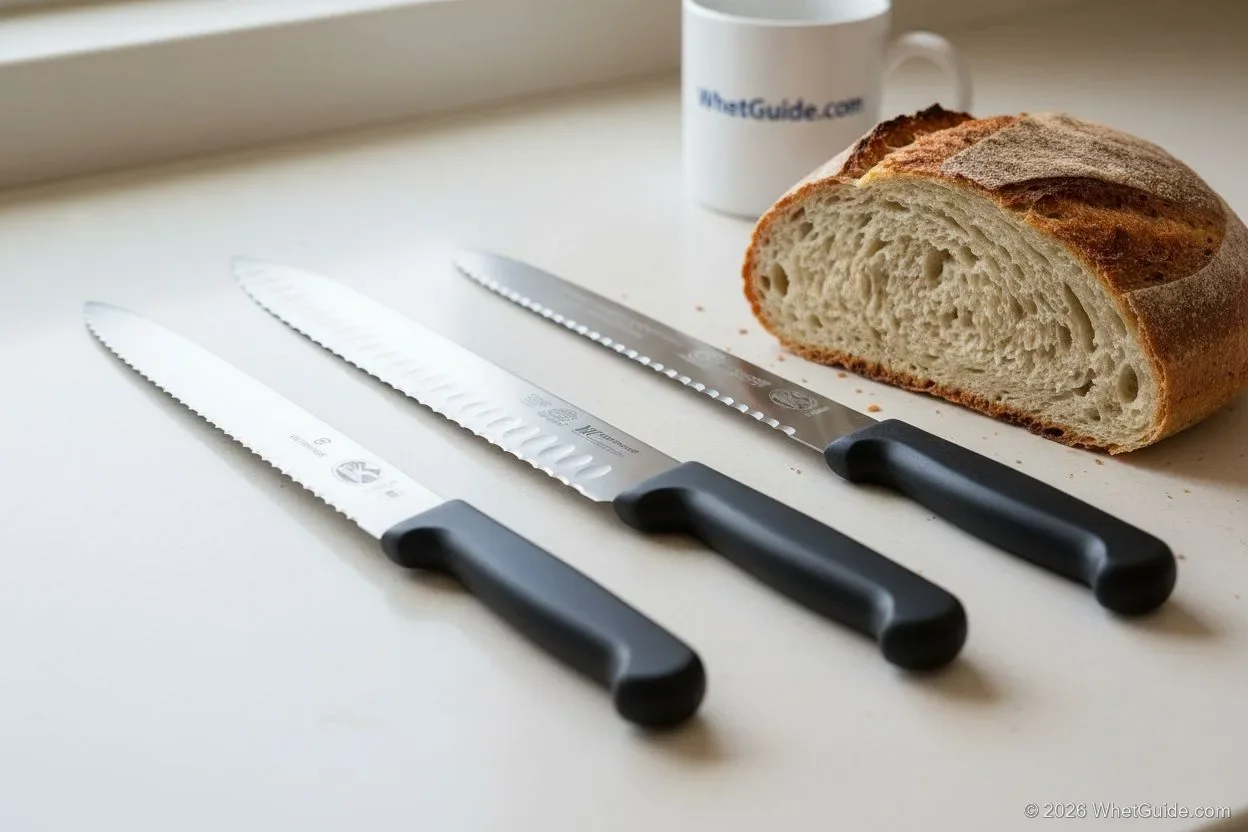
| Scalloped | Round curves between pointed tips; the Victorinox Fibrox bread knife is a familiar example | Tapered rod, one scallop at a time | Yes, on a decent knife |
| Pointed | V-shaped teeth closer to a saw | Thin end of a tapered rod, or a Sharpmaker corner | Yes, slowly |
| Wave edge | Wide, shallow waves; Mercer's Millennia wavy bread knife has one | Rod, or a whetstone on the wide waves (Hocho Knife's method) | Yes |
| Double-serrated | Large scallops with small ones cut inside them, as on Wusthof's Classic Ikon | Tapered rod, sliding along the taper as sizes change | Yes, on a premium knife; slow |
| Micro-serrated | Fine saw teeth you can barely see | Not realistic at home | No; Misen's mail-in service won't take them either |
If your knife is a steak knife, a serrated utility knife or a combination edge on a folder, the same ideas apply, but the details differ; our serrated knife guide covers those. This page stays on the bread knife.
↑ Back to all sectionsWhere the published advice agrees, and where it splits
The pages that rank for this question are mostly retailers and makers, and they differ more than you'd expect. They agree on the basics: work the beveled side, one scallop at a time, with a round rod, then deburr the flat back. They split on almost everything else, and it helps to know where, because you'll read conflicting advice.
| Question | One side says | The other says |
|---|---|---|
| Which part cuts? | Points bite first (Seido) | The curves or valleys do most of it (Seido later in the same article; KitchPrep) |
| Rod material | Ceramic is best; diamond may be too coarse (Knivesandtools) | Diamond for a very dull knife (KitchPrep); Seido offers either |
| Flat stones | Avoid them (KitchPrep) | A whetstone works on wave edges (Hocho Knife); one pass for the burr is fine (Knivesandtools) |
| Burr removal | Run the rod back through the scallops (Knivesandtools) | Swipe the flat side with the hone (Work Sharp), or strop it (Chowhound, KitchPrep) |
| Home sharpening at all | Rod method works (most guides) | Home stones and handhelds generally won't restore it (a professional quoted by Martha Stewart) |
Underneath the disagreements, every source is trying to sharpen the curve without rounding the points. Read that way, they all point to a rod that fits and a light hand that takes off as little steel as the job needs. Where this page picks a side, it says which source it's following.
↑ Back to all sectionsMatch the rod to the scallop
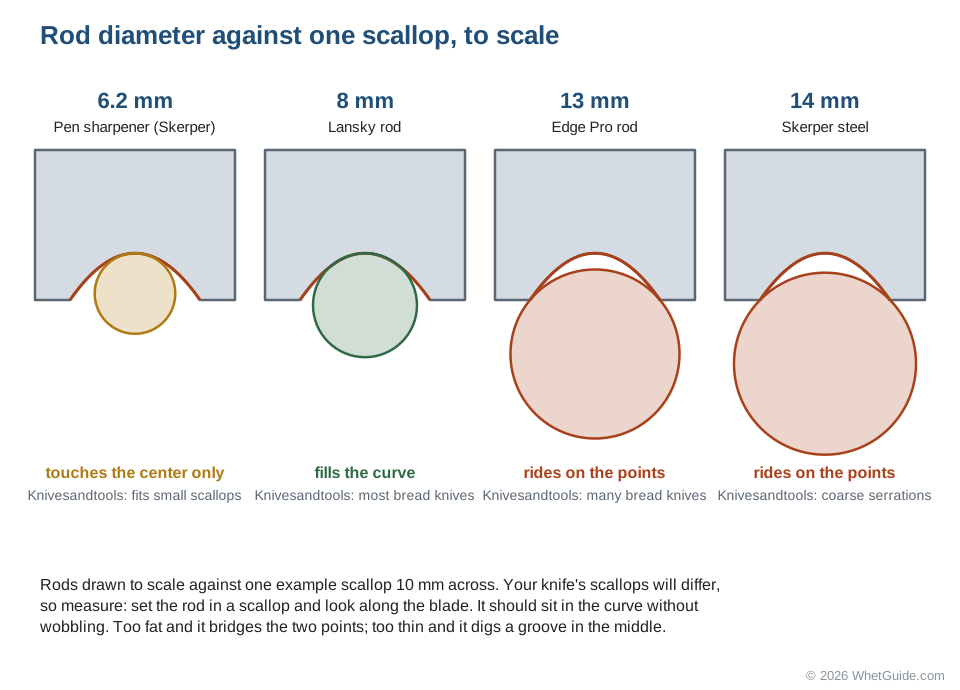
The rod has to fit inside the curve. Too thick and it can't enter, so it rides on the two points either side and rounds them. Too thin and it only touches the bottom of the curve, cutting a groove there. Knivesandtools lists these examples, which show how much rods vary:
| Rod | Diameter | Fits |
|---|---|---|
| Pen-style sharpener (Skerper) | 6.2 mm | Small serrations |
| Lansky rod | 8 mm | Most bread knives; slower on coarse serrations |
| Edge Pro rod | 13 mm | Many bread knives |
| Skerper steel | 14 mm | Coarse serrations |
A tapered rod avoids most of the sizing problem, because the thin tip enters small scallops and the thicker part handles larger ones. Sharpening Supplies' John Carmona describes the DMT Diafold the same way: the taper lets one rod fit different serration sizes, and you work only the beveled side. The DMT Diafold serrated sharpener lists 4 inch cone tapers from 1/4 inch down to 1/16 inch and a fine 600 mesh diamond surface. The AccuSharp diamond tapered rod lists a 280 grit diamond-coated steel rod, and the Lansky folding diamond tapered rod is another folding taper. Diamond cuts quickly, and Knivesandtools notes it can be too coarse on delicate serrations, so use light strokes.
Open the DMT listing to see the cone sizes laid out next to each other
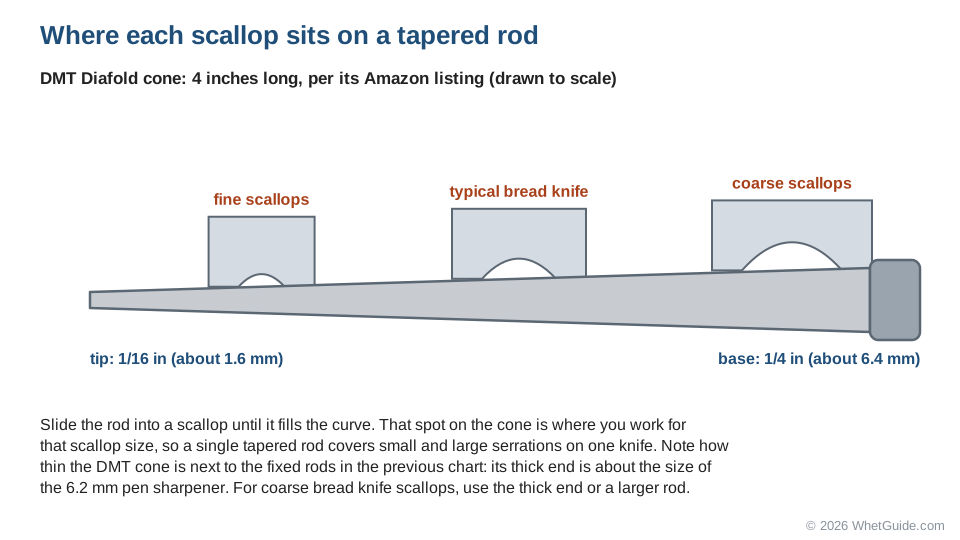
Put the two charts side by side and one thing stands out: the DMT cone tops out at about 6.4 mm, roughly the size of the smallest fixed rod in the Knivesandtools list. That's fine for most bread knives, whose scallops seat somewhere along the cone. On a knife with very coarse, deep scallops, the thick end of a small cone may still only touch the bottom of the curve. Those knives want a larger rod, such as an 8 mm or bigger, or a Sharpmaker corner.
↑ Back to all sectionsDiamond or ceramic?
Pick by how dull the knife is. Diamond removes steel fast, which is what a knife with flattened or nicked points needs and exactly what a lightly dull knife doesn't. Ceramic cuts slowly to a finer finish, and it's harder to overdo, but it can take a long time on a badly worn edge.
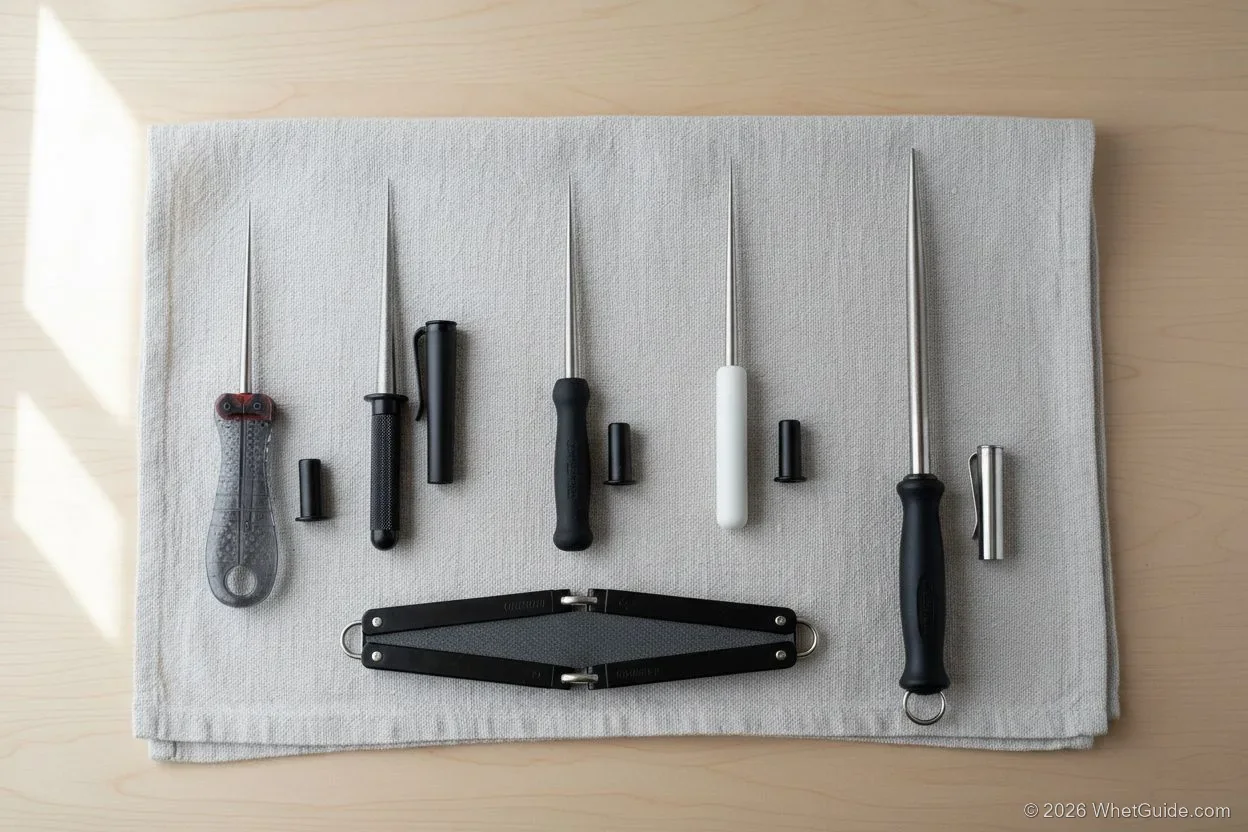
| Source | Recommends |
|---|---|
| Knivesandtools | Ceramic is the best method; diamond may be too coarse for fine serrations |
| Seido Knives | Ceramic rod of about 1,000 to 2,000 grit, 6 to 14 mm; diamond as an alternative |
| KitchPrep | Tapered ceramic for routine sharpening, tapered diamond for chipped edges |
| Made In | Quotes bladesmith Sergio Menchaca of Texas Sage Forge: ceramic "will remove some metal, but you will get more of that desired sharpening effect" |
Where to start, by what the tests showed
- Fails only the crumb and paper tests: ceramic.
- Points show bright under a light along most of the blade: a fine diamond like the DMT's 600 mesh, then a few strokes on ceramic if you have one.
- Bent or nicked points: a coarse diamond like the AccuSharp's 280 grit, for the repair only.
Rods and kits worth buying for a bread knife
You don't need much. A tapered rod and a marker cover the sharpening on every bread knife on this page. The table sorts the options by what they're good at; prices move, so check the listing.
| Tool | What the listing says | Best for |
|---|---|---|
| DMT Diafold serrated | Fine diamond, 25 micron (600 mesh), 4 inch cone from 1/4 to 1/16 inch, folds into its handles | The standard bread knife rod |
| 4.5 inch tapered diamond rod pair | Two rods, one 320 grit and one 600 grit | A coarse rod for repair plus a finer one |
| Wamery retractable diamond rod | Tapered diamond rod that reaches scallops and micro-serrations, plus a flat section | Cheap, small, for fine scallops |
| Smith's Diamond Retractable Sharpener | A retractable diamond rod in a pen-style body | Keeping in a kitchen drawer |
| SHARPAL 178N pocket sharpener | 3-in-1 pocket sharpener, 4 inch, 600 grit | A spare for the camp or knife roll |
| Work Sharp Kitchen Ceramic Honing Rod | Ceramic rod with angle guidance; lists serrated kitchen knives | Light upkeep on larger scallops; it's a straight rod, not tapered |
| Arkansas 4.5 inch ceramic rod | Small straight ceramic rod, half an inch wide | Large scallops; test the fit first |
| Spyderco Tri-Angle Sharpmaker | Stones set at 30 or 40 degrees in the base; rounded stone edges for serrations; medium and fine ceramic | Several serrated knives, set angle |
| Work Sharp Precision Adjust Elite | Dedicated conical ceramic rod for serrated blades, plus 320-grit and 600-grit diamond plates | Someone who also sharpens plain knives |
| BeaverCraft leather strop | 3 by 8 inches, two-sided, with polishing compound | Taking the burr off the flat back; any fine stone you own also works |
Step by step with a tapered rod
Set aside 15 minutes and a well-lit table. The method below follows Sharpening Supplies' Diafold steps and the Knivesandtools guide, with the stroke counts other sources publish.
- Wash and dry the knife. Lay it flat on a table edge or a towel, beveled side up, so it can't slide.
- Color the bevel of every scallop with a permanent marker. The ink shows exactly where the rod is cutting and where it isn't.
- Start at the heel. Set the rod in the first scallop and slide it along until its thickness fills the curve.
- Tilt the rod until it lies on the bevel at the angle the knife already has. Bread knife bevels tend to be steeper than a chef's knife, and Knivesandtools says the knife may need to be held more slanted.
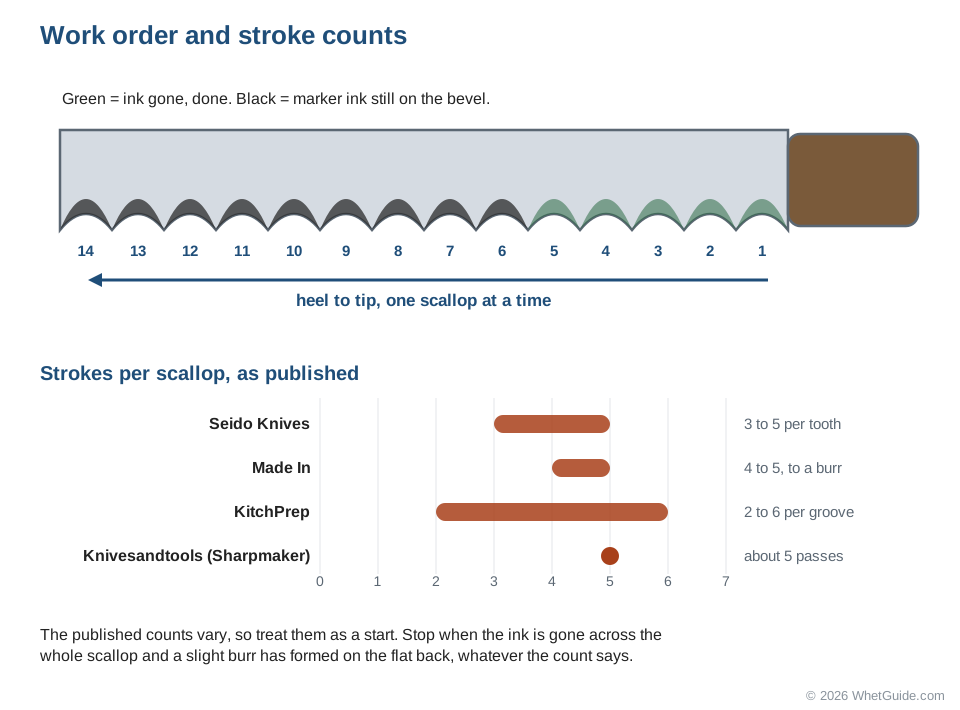
- Make short, light strokes from the spine side out toward the edge, rolling the rod a little so it sweeps the whole curve. Three to five strokes per scallop is a fair start.
- Stop when the ink is gone across the whole scallop. Move to the next one and keep the same angle all the way down the blade.
- When you reach the tip, turn the knife over. Feel for a slight burr on the flat back by drawing a fingertip off the edge, never along it.
- Remove the burr. The gentlest method, per Knivesandtools, is to run the rod back through each scallop, which leaves the flat back alone. A single light pass flat on a fine stone also works (see the burr).
- Test on a crusty loaf. If it still slips in places, re-ink those scallops and repeat.
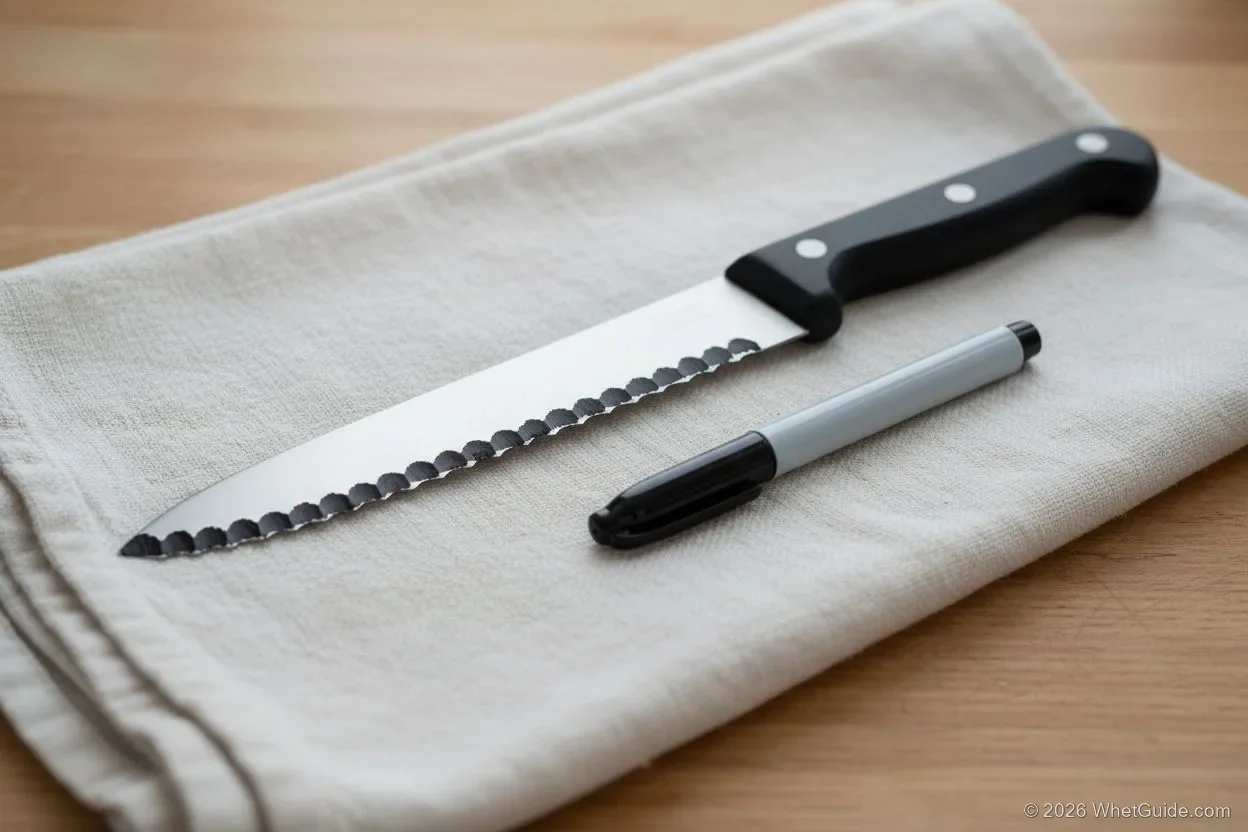
Why the marker? Because on a 10-inch blade with dozens of scallops, it's the only way to know which ones you've done and whether the rod reached the edge. If the ink comes off only at the top of the bevel, the rod is too flat. If it comes off only at the very edge, it's too steep. Adjust and re-ink.
Angle and pressure, stroke by stroke
Match the bevel that's already there. Sharpening Supplies puts the typical serrated edge at "around 20°", and Seido gives roughly 20 degrees too, but you don't need to measure it: lay the rod on the inked bevel, make two light strokes, and read the ink. Changing the angle on a bread knife only creates a second bevel you'll have to sharpen past next time.
| Setting | What to do | Why |
|---|---|---|
| Angle | Whatever the bevel already has, about 20 degrees on most | Ink gone only at the top means too flat; only at the edge means too steep |
| Pressure | Light; Sharpening Supplies says plainly that light pressure is best | The points are the thinnest steel on the knife, and a heavy stroke that slips out of the scallop rounds one. If the rod skips, you're pushing too hard. |
| Strokes | Two to six per scallop in published guides | Knives arrive in different states. Count only so you treat every scallop alike; stop on the ink and the burr. |
| Direction | From the spine side out toward the edge | That's the way the bevel was ground. Sawing back and forth on a diamond rod clogs it and tears at the points. |
The burr: why it forms on the flat back and how to take it off
Every stroke on the beveled face pushes a tiny ribbon of steel over to the far side. On a bread knife that far side is the flat back, so that's where the burr builds up. Feel for it by drawing a fingertip from the flat back across and off the edge: a slight catch means it's there. A burr left on is a common reason a freshly sharpened knife still tears, because the floppy ribbon folds into the cut.
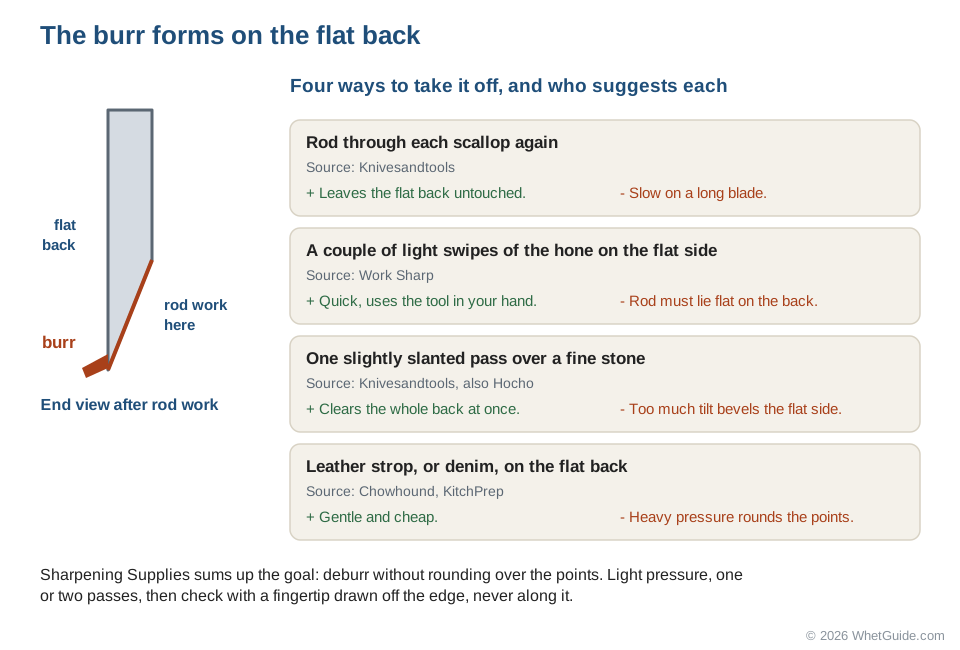
Which one to use depends on what you have and how careful you're willing to be. Running the rod back through the scallops (Knivesandtools' first choice) is slowest but can't mark the flat back. Work Sharp's couple of swipes with the hone on the flat side is quickest, as long as the rod lies flat. A single pass with the back held almost flat on a fine stone, which Knivesandtools also describes, clears the whole length at once; tilt it more than slightly and you start grinding a bevel on the flat side. A leather strop is gentle, and Chowhound suggests denim if you have nothing else, but pressing hard on a soft strop rolls the points.
Sharpening Supplies sums up the goal: "The goal is to deburr without rounding over the points." One or two passes, then feel again.
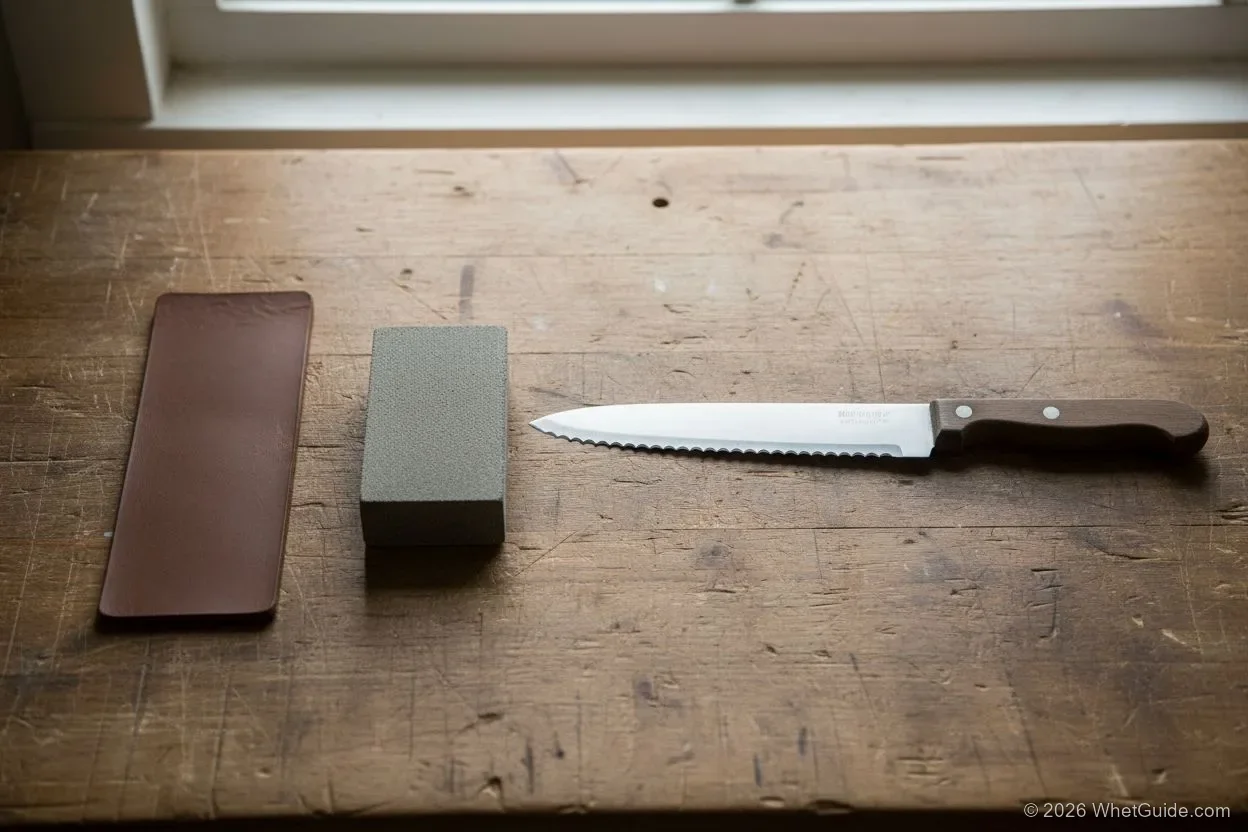
Bent or worn tips
Work Sharp's guide adds a case the others skip: if the serration tips are bent or the edge is damaged, work backward to reshape the points into a uniform, sharp profile. Then do the normal pass.
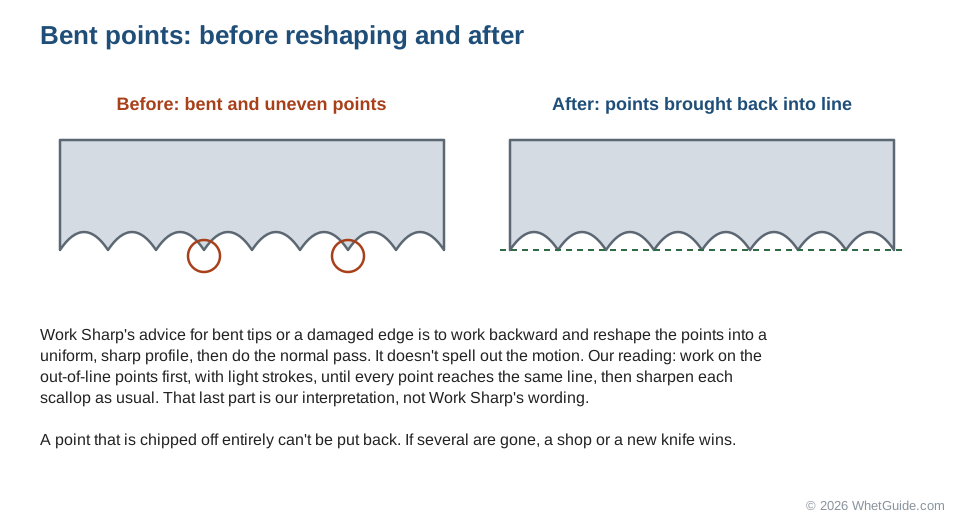
When is a knife past this? If a point is snapped off, there's no steel left to reshape, and grinding every other point down to match would cost the whole blade some height. One or two missing points on a knife you like are worth living with. Several missing, and a shop or a new knife makes more sense. On a coarse diamond rod like the AccuSharp, reshaping goes quickly, which is also why it's easy to take off too much; check after every few strokes.
↑ Back to all sectionsWhere a flat stone helps
A flat whetstone can't reach into scallops, so it won't sharpen a normal bread knife. It does two jobs. It removes the burr from the flat back if you lay the back completely flat and make one or two light passes. And on a wave-edge bread knife with wide, shallow curves, the Hocho Knife blog uses a whetstone, honing the back side and finishing lightly. Don't try this on narrow serrations, which a stone will flatten into the points.
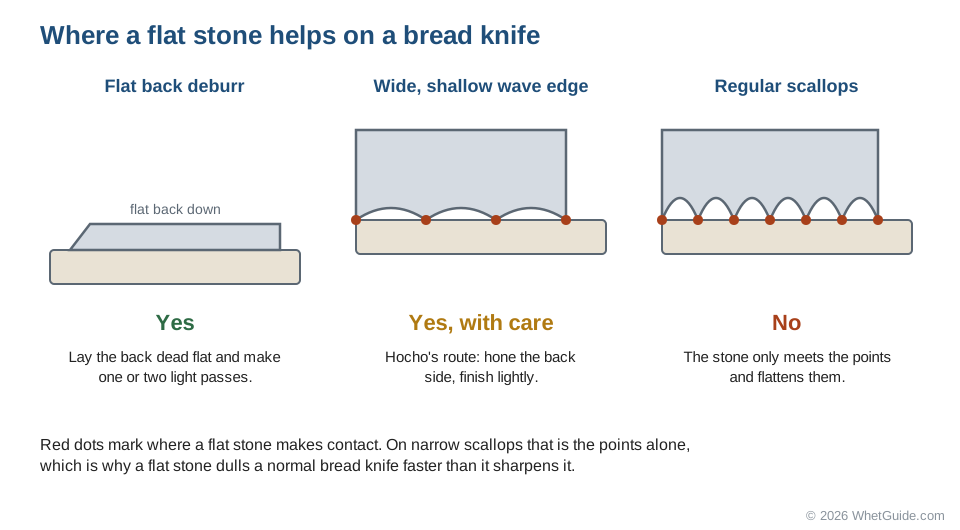
Hocho's post dates from 2014 and gives no grit. If you go that route, use a fine stone you already own and the lightest touch you can manage; the waves on these knives are shallow, so there isn't much steel to spare. For rods that also suit your plain-edge knives, see the best diamond honing rod guide, the ceramic vs steel honing rod comparison and our honing rod roundup.
↑ Back to all sectionsAn easier route with a Spyderco Sharpmaker
If you'd rather not hold the angle yourself, the Spyderco Tri-Angle Sharpmaker does it for you. Its listing describes keyed holes that set the stones at 30 or 40 degrees, and rounded stone edges for serrated blades. The listing describes simple vertical strokes, and Knivesandtools explains the bread knife method: use the corner of the triangular stone on the serrated side, move more slowly than you would with a plain edge, about five passes, then one pass along the flat face of the stone on the flat side for the burr.
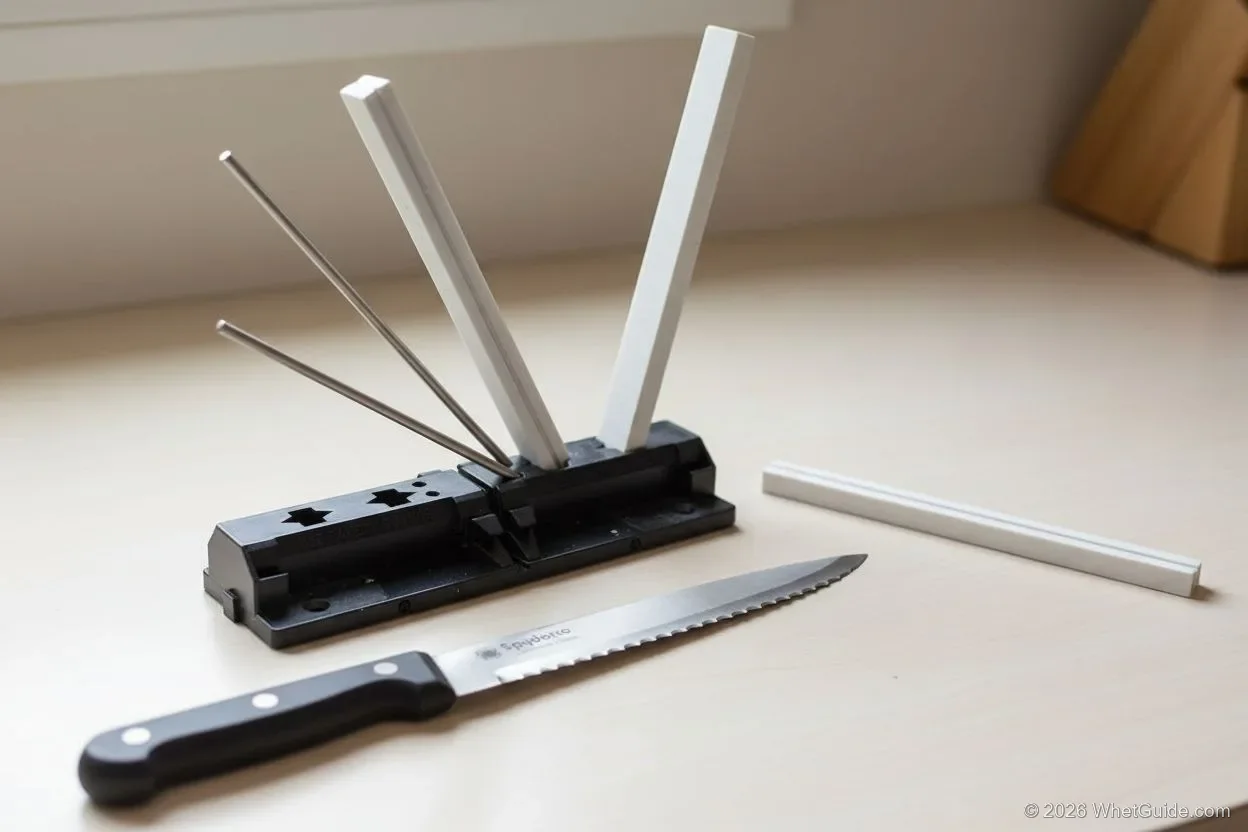
The corner is the trade-off. It's a fixed radius, so it suits scallops roughly its size and does less in very large ones. It shines when you have several serrated knives, because the set angle makes each one faster after the first. Two add-ons exist: diamond stones for very dull edges and ultra fine stones for a polished finish. A bread knife rarely needs either. Our Sharpmaker review covers the rest of what it does.
↑ Back to all sectionsGuided kits and electric sharpeners
The Work Sharp Precision Adjust Elite lists a conical ceramic rod for serrated blades, which makes it the easiest guided option. The Lansky professional kit includes a serrated medium hone alongside its flat stones. Both are worth it if you also sharpen plain-edge knives; neither beats a $30 tapered rod for a single bread knife. Our Precision Adjust review goes into the clamp and angle settings.
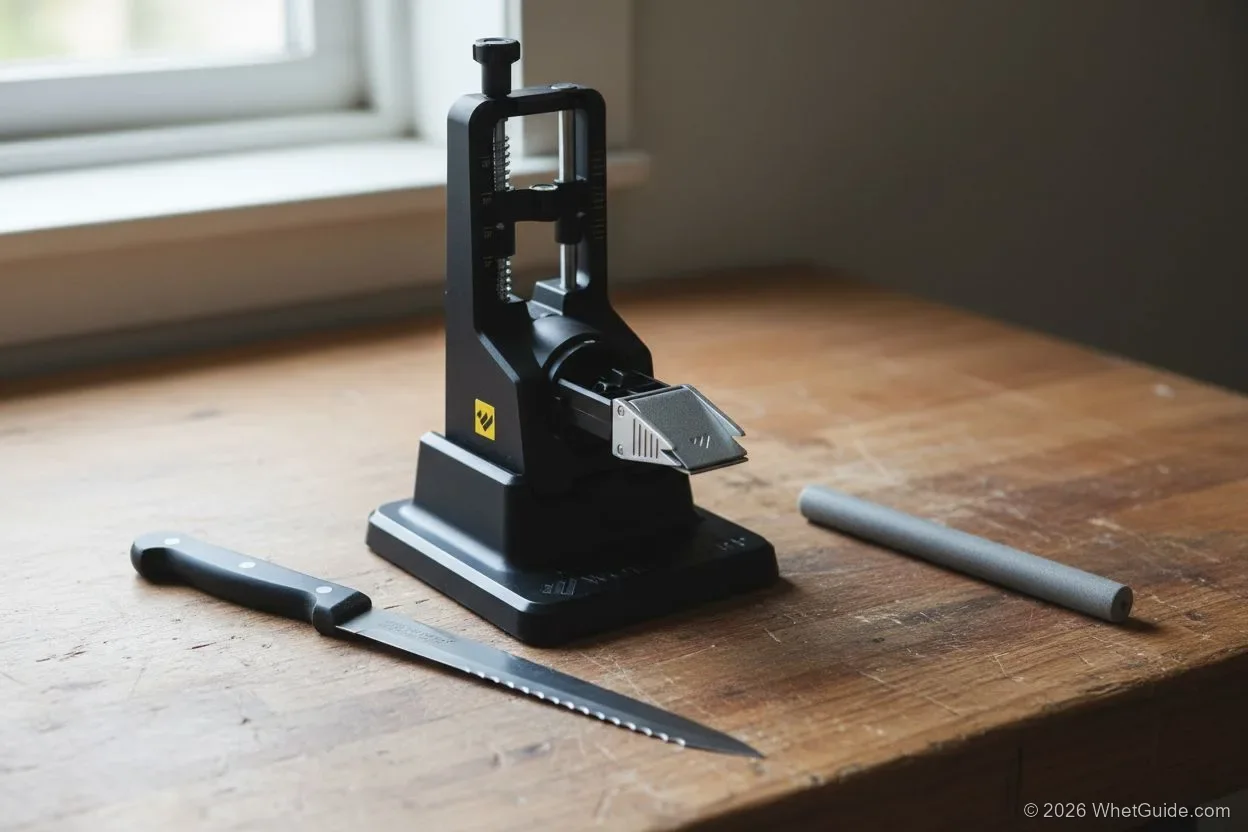
Electric and pull-through sharpeners are a different story. Some Chef'sChoice electric models list serrated support, but Knivesandtools warns that passing a bread knife through the final polishing stage gradually grinds away the serrations, so the knife loses them over time. KitchPrep describes what a pull-through leaves behind: shiny teeth and dull valleys. Use an electric or pull-through only on a knife you'd replace anyway, and accept that each session shortens its life. See best knife sharpener for serrated knives for tools that work on more blades, and are pull-through knife sharpeners bad for the wider argument.
↑ Back to all sectionsWhen to send it out, and when to replace it
A good bread knife that has really gone dull, or one with bent points you don't want to touch, is a fair job for a professional. A professional quoted in a 2023 Martha Stewart article, Enrico Cassatelli of Knife Sharpening of Bergen County in New Jersey, describes the shop method: a grindstone raises a burr on the flat side, and a leather wheel removes it. He also said home stones and handhelds generally won't restore a serrated knife and that a very dull one can take close to an hour.
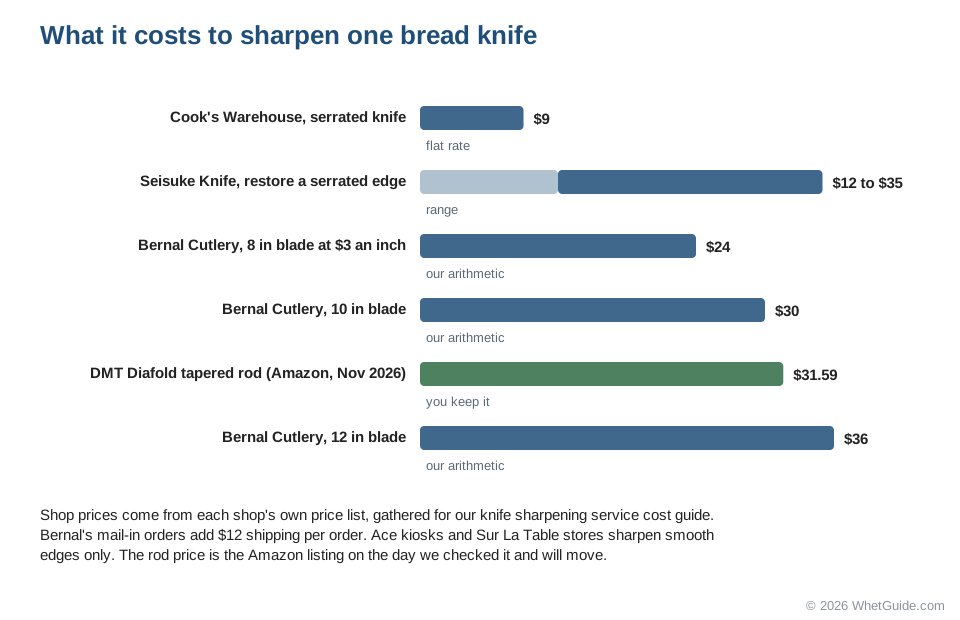
Ask before you send it. Not every service takes serrated knives. From our knife sharpening service cost survey:
| Shop | Serrated price | Note |
|---|---|---|
| Bernal Cutlery | $3 an inch | Plus $12 shipping per mail-in order; a 10-inch bread knife works out to $30 |
| Cook's Warehouse | $9 | Atlanta stores |
| Seisuke Knife | $12 to $35 to restore | $40 to $60 to re-grind a serrated edge |
| Misen mail-in | Won't take micro-serrated knives | Ask about scalloped bread knives |
| Ace kiosk, Sur La Table stores | Smooth edges only | Not an option |
The arithmetic is simple. If a service quotes close to the price of a new knife, replace the knife. If it quotes well under and you like the knife, pay it. Use the time until the next visit to learn the rod method on it. Seido estimates a professional serrated sharpening at $20 to $50 a knife and suggests it every two to three years, which lines up with the shop prices above.
Safety: where the cuts happen
On a bread knife the two things that draw blood are a knife that slides and a rod that slips. Lay the knife flat on the edge of a table, as Knivesandtools advises, rather than holding it in the air. If your rod is long, Chowhound suggests resting its tip on a stable surface so it can't skate. Keep every stroke moving away from you and out off the edge, never toward the hand holding the knife. And feel for the burr only by drawing a fingertip from the flat back off the edge; a scalloped edge drawn along a finger opens it in several places at once. Cut-resistant gloves are optional but sensible on the hand holding the knife the first time; they don't stop a determined push, so keep the strokes light anyway.
↑ Back to all sectionsMistakes that ruin a bread knife
| Mistake | What happens | Instead |
|---|---|---|
| Sharpening both sides of a one-sided knife | Grinds a bevel onto the flat back and changes the edge | Rod on the beveled side; flat back gets a deburr only |
| Rod too wide for the scallop | Rides on the points and rounds them | Use a taper or a smaller rod that seats in the curve |
| Rod too thin, pressed hard | Cuts a groove in the bottom of the scallop | Slide to the part of the taper that fills the curve |
| Taking off too much metal | Shrinks the points and shortens the knife's life | Stop when the ink is gone and a slight burr forms |
| Sawing on a diamond rod | Clogs the rod and tears at the points | One direction, spine side out to the edge |
| Pull-through or electric on a good knife | Grinds the serrations away over time (Knivesandtools) | Rod or Sharpmaker |
| Flat stone on regular scallops | Flattens the points | Stone only on the flat back or a wide wave edge |
| Learning on your favorite knife | Mistakes cost you the knife you care about | Practice the motion on a cheap serrated knife first |
Bread knife myths, checked against the sources
| You'll hear | What the sources say |
|---|---|
| "Bread knives can't be sharpened." | They can. Four of the sources on this page publish a rod method. It's slow, which is a different complaint. |
| "Bread knives never get dull." | They do dull, just slowly. MasterClass's crumb test exists because they do, and Seido still puts a pro sharpening every two to three years. |
| "Your honing steel will do it." | Only a rod thin enough to enter the scallops. Work Sharp passes a round hone through each scallop; a thick steel bridges them and touches the tips alone. |
| "Sharpen both sides like any knife." | Not on a one-sided grind. Knivesandtools says to sharpen only the side the serrations are set on. |
| "The serrated slot on my electric is made for it." | Knivesandtools warns that the finishing stage slowly grinds the serrations away. Fine on a knife you'd replace; not on one you want to keep. |
| "Whetstones are useless on serrated knives." | Mostly true for regular scallops, but Hocho Knife uses one on wave edges, and a fine stone is one of the accepted ways to clear the burr from the flat back. |
| "A diamond rod will wreck it." | A fitted rod with light pressure won't. Knivesandtools prefers ceramic and warns diamond can be too coarse on fine serrations, so pick a fine grit and stop on the ink. |
How often a bread knife needs sharpening
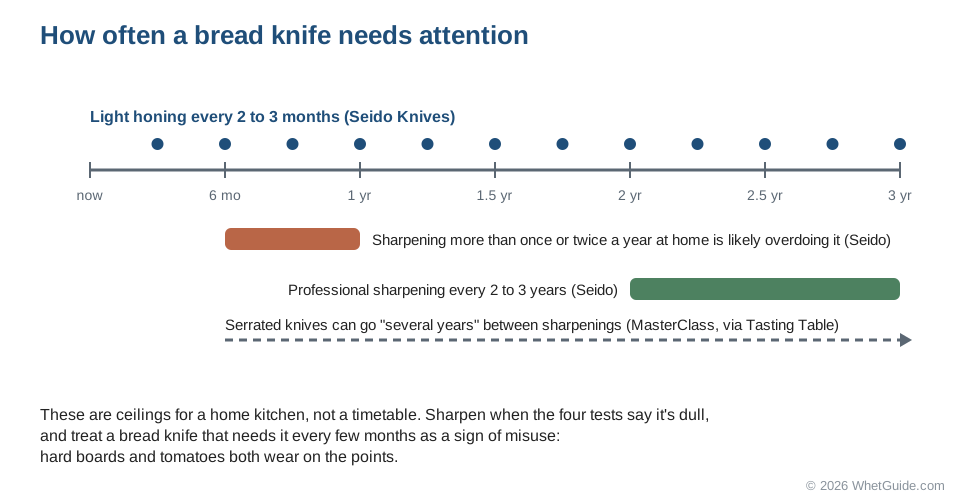
Much less often than your other knives. Seido Knives suggests light honing every two to three months, says sharpening more than once or twice a year with regular home use is likely overdoing it, and puts professional sharpening at every two to three years. MasterClass, as quoted by Tasting Table, says a serrated knife can go several years between sharpenings. "Light honing" here means a few passes of the rod through the scallops with almost no pressure, on the beveled side, with no marker and no burr hunt. If your bread knife needs a full sharpening every few months, look at how it's being used before you buy a better rod. Our how often to sharpen knives guide puts the bread knife next to the rest of the block.
↑ Back to all sectionsKeep it sharp longer
Cut on wood or a soft plastic board; hard surfaces like glass or stone flatten the points quickly. Wash it by hand and dry it right away and keep it out of the dishwasher; Seido and Made In both say so. Use it for bread, as Work Sharp puts it bluntly: "Serrated bread knives are for bread." Work Sharp counts tomatoes and other jobs among the things that dull it.
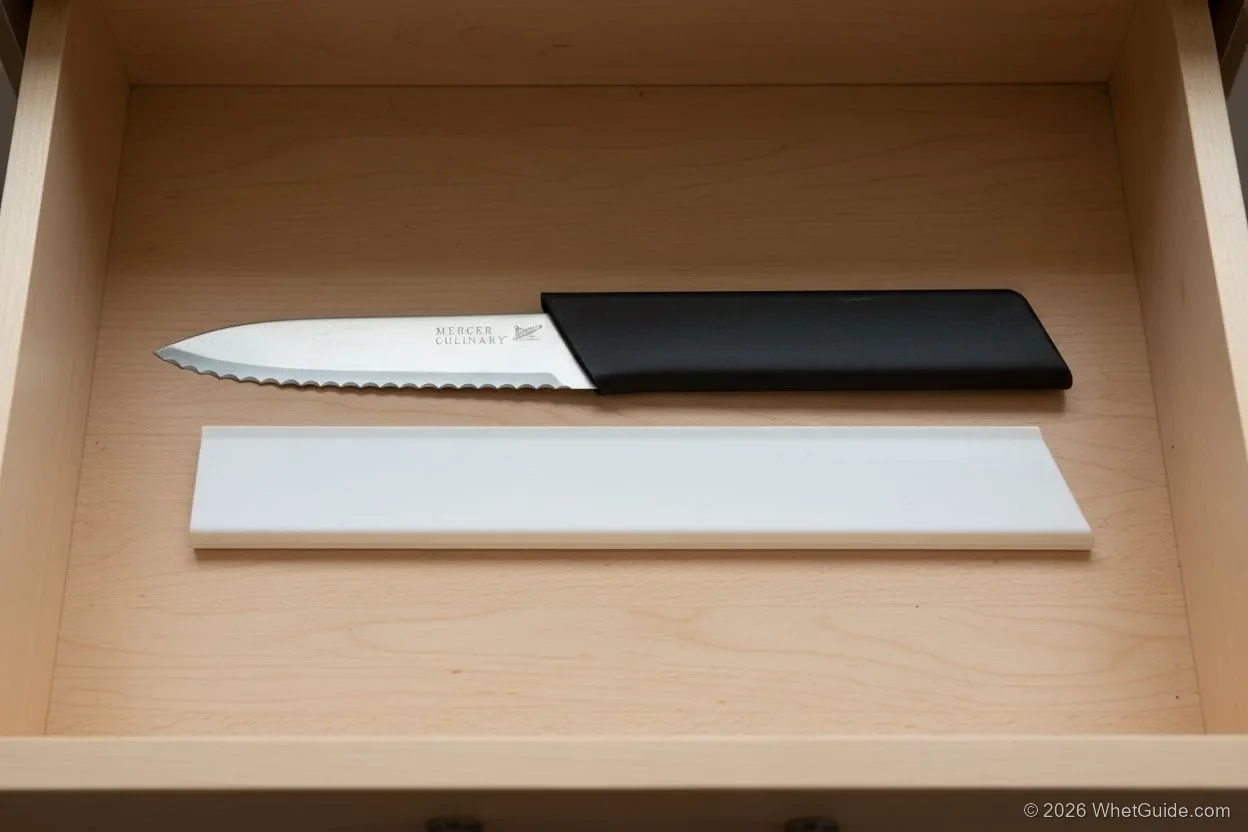
Storage matters more for a bread knife than most, because the points are the first thing to hit another utensil in a drawer. A block, a magnetic strip or a guard all work. A Mercer knife guard in the 8 by 2 inch size fits shorter bread knives; for a 10-inch blade, measure before you buy. Our knife care guide covers washing and storage in full.
↑ Back to all sectionsThree bread knives, worked through
A five-year-old scalloped knife that has started making crumbs
Say it's a 10-inch stamped knife with a plastic handle, the kind that sits in a lot of kitchens. It fails the crumb test, and after a hot wash and a brush it still skids on a fresh crust. Under a lamp, the points along the middle of the blade show bright dots; the ones near the heel don't. That's ordinary dulling from years of use. The points are all there, and the scallops are an ordinary size, so a tapered rod is the right tool. Start on a fine diamond like the DMT, ink every scallop, and expect about a quarter hour. At $3 an inch, Bernal Cutlery would charge about $30 for the same knife plus shipping, so if you plan to keep it, the rod pays for itself on the first job.
A forged double-serrated knife with two bent points
A premium knife, say a Wusthof Classic Ikon with its double row of scallops, has hit something hard and now has two points knocked out of line. Here the order matters. Follow Work Sharp's advice and bring the bent points back into line first, with light strokes on a coarse rod and frequent checks. Then do the normal pass, sliding along the taper as the scallop size changes between the large and small curves. If you'd rather not risk it on an expensive knife, Seisuke Knife's listed $12 to $35 to restore a serrated edge is cheap insurance; ask first, since not every shop takes double-serrated blades.
A cheap wavy-edge knife that tears everything
A thin wave-edge knife bought for very little fails every test, and two of its waves have flattened. Knivesandtools' advice applies: in many cases a new knife is the better option. If you want to try anyway, this is the one knife where a flat stone is a reasonable choice, following Hocho Knife's wave-edge method on the wide curves. It's also the right knife to practice the rod method on before you touch a better one.
↑ Back to all sectionsTroubleshooting: still tears after sharpening?
| Symptom | Likely cause | Fix |
|---|---|---|
| Cuts well near the heel, poorly near the tip | Scallops missed or rushed as you went | Re-ink the tip half and look for ink left behind |
| Catches and drags, then cuts | Burr still on the flat back | One light deburr pass, then feel again |
| Ink gone, but the points still show bright under a light | Rod too flat; you polished the bevel above the edge | Steepen the rod a little and re-ink |
| A groove at the bottom of some scallops | Rod too thin for those scallops | Slide to a thicker part of the taper |
| Scratches on the flat back | Stone tilted during deburring | Cosmetic; keep the back flat next time |
| No burr after many strokes | Angle wrong, or diamond clogged | Check the ink pattern; clean the rod |
Cheat sheet
- Wash the knife with a brush through the scallops, dry it, then retest on a fresh crust. Still tears, and the knife is worth it? Carry on.
- Find the beveled face, the one with crescents along the edge. Only that face gets the rod.
- Slide the tapered rod in until it fills the curve without wobbling.
- Ink the bevels and work heel to tip with light strokes out toward the edge, at the existing angle (about 20 degrees), until the ink is gone.
- Deburr the flat back with one or two light passes, then feel off the edge.
- Test on a crusty loaf, paper or tomato skin.
What to do
Wash it and test it first. If it still tears and it's a knife you'd replace for less than a rod costs, replace it. If it's a good knife, buy a tapered rod such as the DMT Diafold and give it 15 minutes, or send it to a shop that takes serrated edges if the points are bent. Then wash it after every loaf, keep it off hard boards, and expect to do this again in years, not months.
Technique follows the published guides named above; product details are from Amazon listings. How we research · Affiliate disclosure