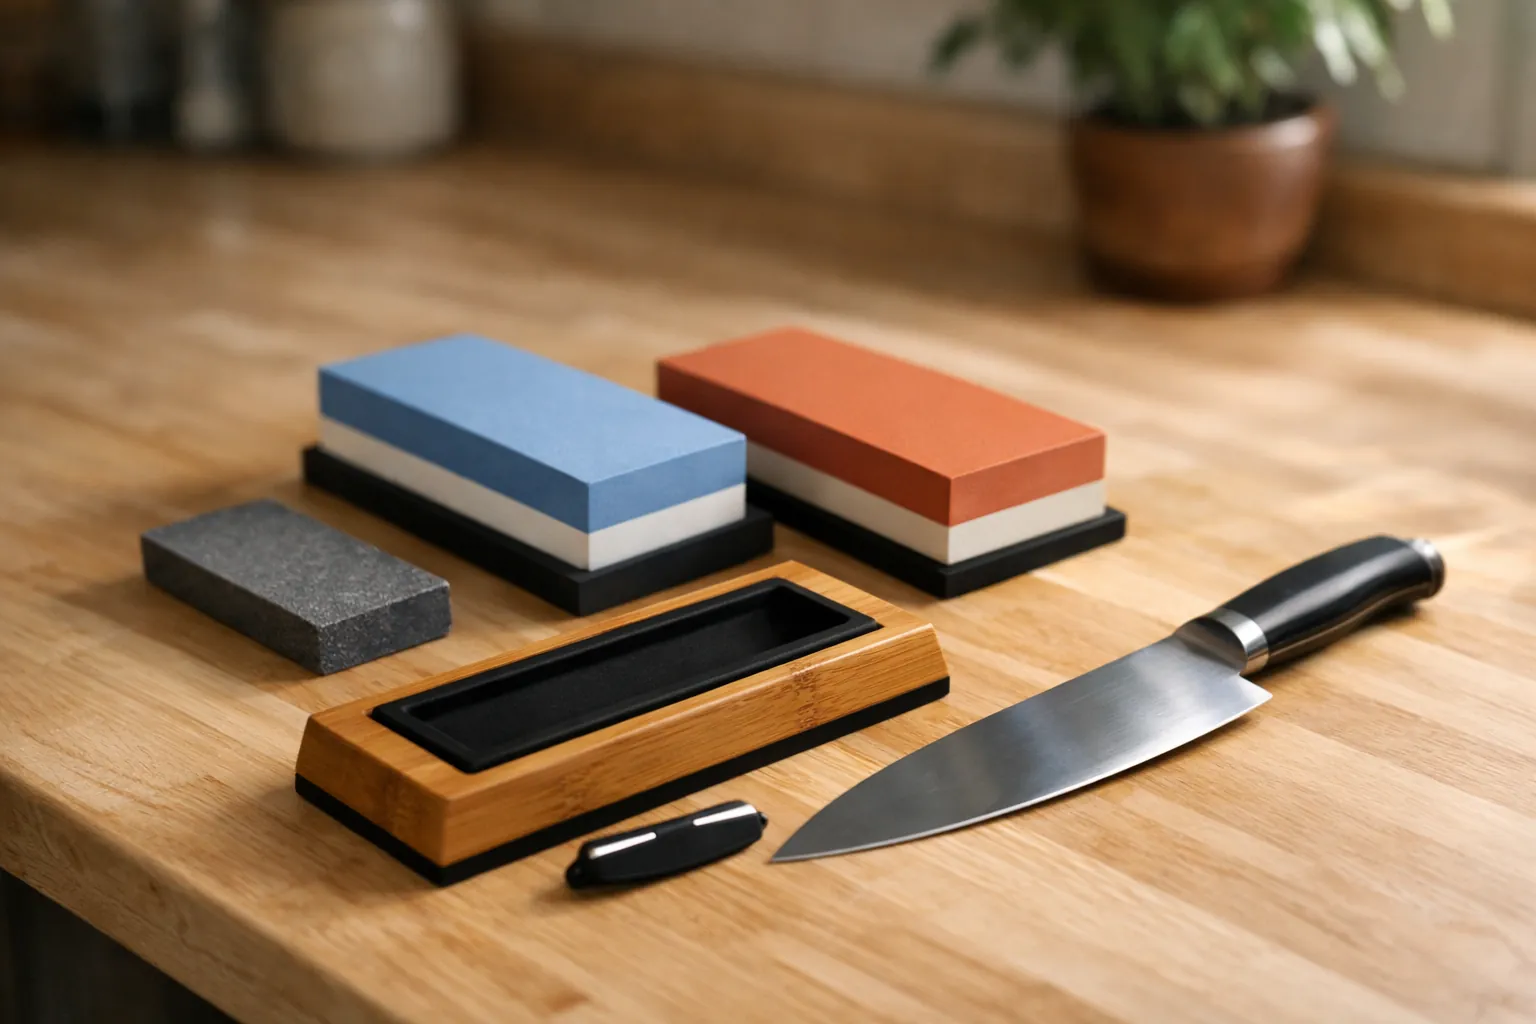
Quick answer: which kit to buy
Start with the Sharp Pebble 1000/6000 kit. It gives you the two grits that matter most, a non-slip bamboo base and an angle guide, and more than 25,000 people have rated it. Badly dull or chipped knives need a coarse stone too, so get a four-grit kit like the Intelitopia 400/1000 + 3000/8000, which also packs a flattening stone and a strop. Shapton's splash-and-go pair is the upgrade: ready the moment it's wet.
A combination stone is one block with a different grit on each side. The Sharp Pebble and the King KW65 are both 1000/6000 combinations, so one block covers sharpening and finishing. If you'd rather buy a single stone than a kit, start with our best whetstone hub. If you want a guided holder and strop in the box, the best knife sharpening kit has options. Not sure 1000 grit is enough to start? Read is a 1000 grit whetstone enough?
| Your knives | Grits | Start with |
|---|---|---|
| Dull but undamaged kitchen knives | 1000 / 6000 | Sharp Pebble 1000/6000 |
| Chipped, neglected, or a mixed drawer | 400 / 1000 / 3000 / 8000 | Intelitopia set or Amazon Basics set |
| Tightest budget, dull knives | 400 / 1000 | KEENBEST 400/1000, add a finisher later |
| Japanese knives, quick sessions | 1000 / 5000, no soaking | Shapton Kuromaku A-set |
| You want a classic Japanese brand on a budget | 1000 / 6000 | King KW65 |
| Just one cheap practice knife to learn on | 1000 is enough | Any 1000 side above; see one stone or a kit |
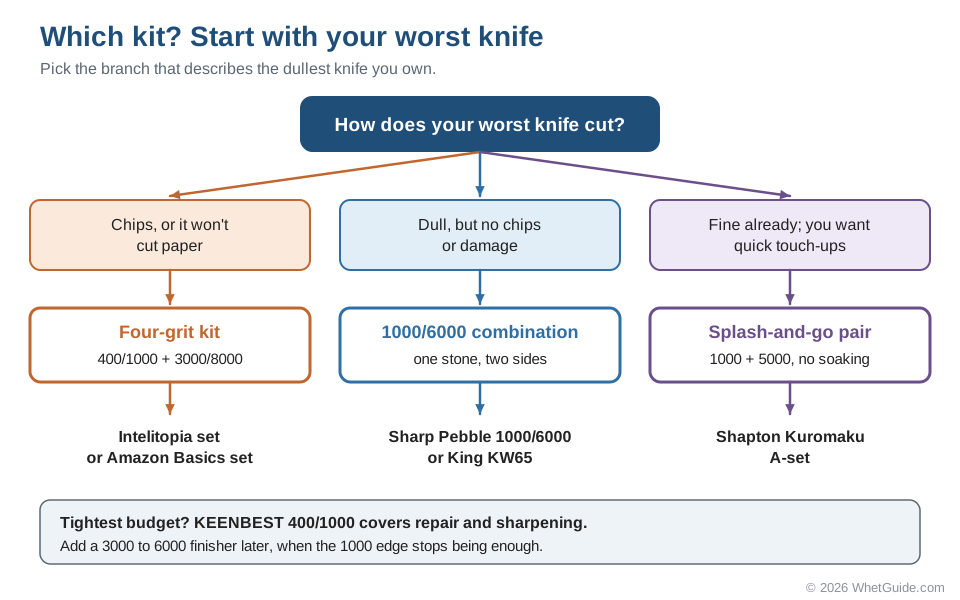
Quick picks
| Best overall for beginners | Sharp Pebble 1000/6000 Whetstone Kit | Amazon |
|---|---|---|
| Most complete kit | Intelitopia Complete Sharpening Stone Set | Amazon |
| Best value 4-grit kit | Amazon Basics Whetstone Set | Amazon |
| Best classic Japanese stone | King KW65 1000/6000 Combination Stone | Amazon |
| Cheapest that works | KEENBEST 400/1000 Whetstone | Amazon |
| Best step-up for Japanese knives | Shapton Kuromaku A-Set (1000 + 5000) | Amazon |
How we picked these kits
We pulled Amazon "bought in the past month" counts and best-seller ranks on October 3, 2026. Two stones topped their categories: the KEENBEST 400/1000 was #1 in Sharpening Stones with 6,000+ purchases last month, and the Sharp Pebble 1000/6000 was #1 in Honing Stones with 3,000+. Sales numbers move every week, so read them as a sign of how many people learn on a stone, not as a ranking.
Then we checked contents and grits. A beginner kit should come with a base, and an angle guide and flattening stone are a real plus. For grits, you want 1000 to sharpen and a finer stone to finish. Neglected knives also need something coarse. Contents listed below come straight from each listing, and where a listing doesn't say something (whether a base ships with a stone, for example), we say so instead of guessing.
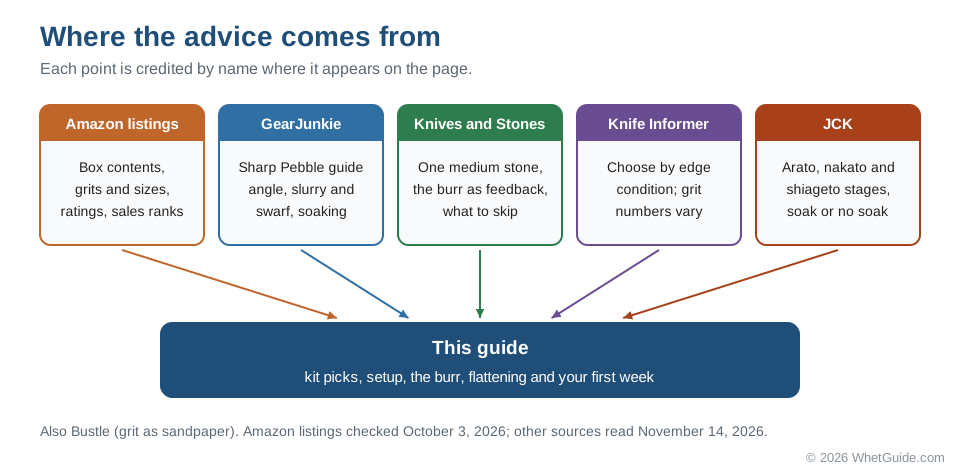
We also read the best beginner pages already out there. Knife Informer frames the choice by the knife's condition, and Knives and Stones, an Australian retailer, makes the honest case that one medium stone is enough to start. Japanese Chef's Knife (JCK) walks through the Japanese stage names, and GearJunkie's long review of the Sharp Pebble kit covers soaking and slurry as well as the kit's guide angle. Where a point on this page comes from one of them, it's credited where it appears. Recommendations come from listings and owner feedback, checked against standard sharpening practice; the details are in how we research.
↑ Back to all sectionsWhat a beginner set actually needs
Two things are not optional. A 1000 grit stone does almost all the sharpening a home kitchen needs, and a base, holder or damp towel keeps it from moving. A stone that slides is the quickest way to lose your angle and the most common reason a first session goes badly.
The next tier makes the edge better and the stone last longer. A finisher between 3000 and 6000 turns a working 1000 edge into one that glides through tomato skin. A flattening stone keeps the face true, because every water stone wears into a shallow dish with use.
The last tier is where kits pad the box. A 400 stone is worth having only if a knife is chipped or truly neglected. An angle guide helps for a few sessions and then sits in a drawer. A strop is a nice finish once the rest is easy.
| Your knives | Grits to buy | Our pick |
|---|---|---|
| Dull but undamaged kitchen knives | 1000 / 6000 | Sharp Pebble 1000/6000 |
| Neglected, chipped or mixed knives | 400 / 1000 / 3000 / 8000 | Intelitopia complete set |
| Tightest budget | 400 / 1000 | KEENBEST 400/1000 |
| Japanese knives, quick sessions | 1000 / 5000 splash-and-go | Shapton Kuromaku A-set |
Checklist: read any kit listing against this before you buy
- The grit on each side of each stone, written as numbers (for example 400/1000 and 3000/8000), not "coarse and fine".
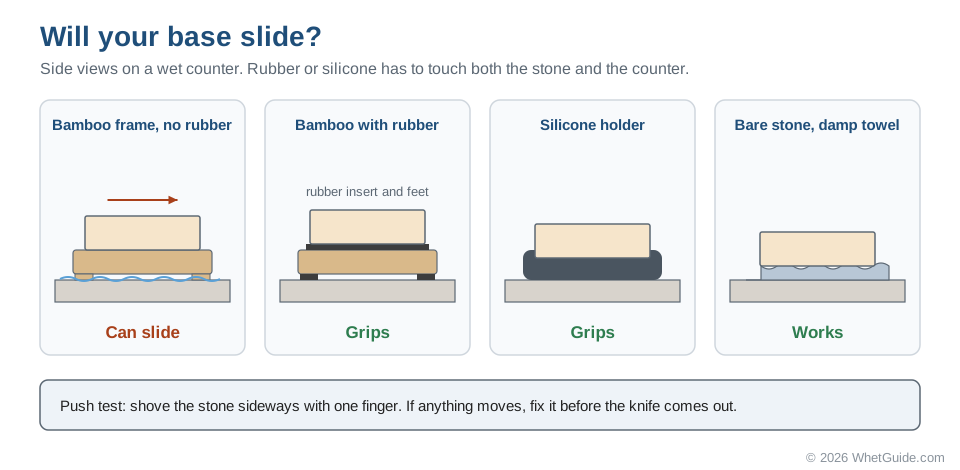
- Whether a base or holder is included, and whether it has rubber feet or a rubber insert. A bare bamboo frame on a wet counter can still slide.
- Whether a flattening stone is included, and its grit. A flattener is usually coarse, somewhere around 120 to 320.
- Whether the stone needs soaking or is splash-and-go. Listings usually say how long to soak.
- Stone length. About 7 to 8 inches is comfortable for a chef's knife.
- What the angle guide is: a clip that rides on the spine, a wedge, or nothing at all.
- Any warranty, and what it covers.
What's in each box, item by item
Every kit on this page, plus the two extra sets we link, in one matrix. A dash means the kit doesn't include it; "not stated" means we couldn't confirm it from the listing. The King starter set and the Sharp Pebble 400/1000 kit aren't full picks, but they come up whenever someone asks which King or which Sharp Pebble to buy.
| Kit | Stones and grits | Base | Angle guide | Flattener | Strop | Other |
|---|---|---|---|---|---|---|
| Sharp Pebble 1000/6000 | One stone: 1000 / 6000 | Bamboo, non-slip | Yes | - | - | Instructions |
| Intelitopia complete set | Two stones: 400/1000, 3000/8000 | Bamboo, non-slip | Yes | Yes | Yes, leather | Corundum (aluminum oxide) stones |
| Amazon Basics set | Two stones: 400/1000, 3000/8000 | Silicone + bamboo | Yes | Yes | - | 1-year limited warranty |
| King KW65 | One stone: 1000 / 6000 | Plastic | - | - | - | About 8 in long (listing) |
| KEENBEST 400/1000 | One stone: 400 / 1000 | - | - | - | - | Quick guide |
| Shapton Kuromaku A-set | Two stones: 1000, 5000 | Cases double as holders | - | - | - | Splash-and-go ceramic |
| King starter set | One Japanese-made stone: 1000 / 6000 | Not stated | Angle holder | Not stated | - | Wiping cloth |
| Sharp Pebble 400/1000 kit | One stone: 400 / 1000 | Not stated | - | Yes | - | Coarse start for neglected knives |
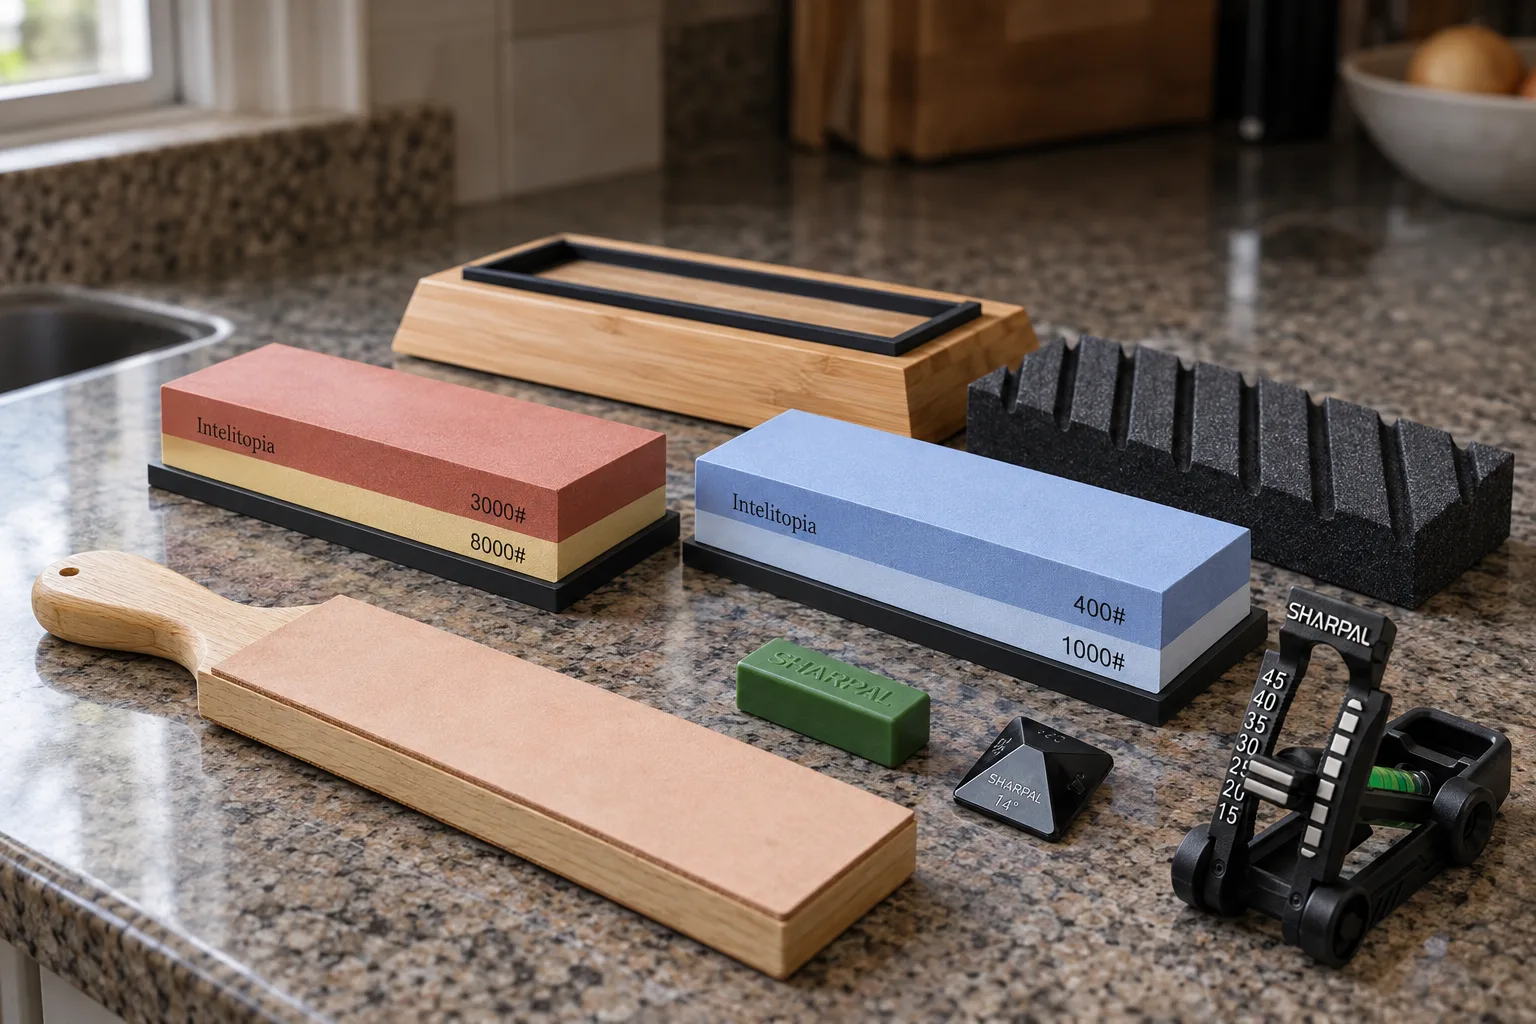
Read the matrix two ways. Across a row, it tells you what you'll still need to buy: a King KW65 owner needs a flattener sooner or later, and a KEENBEST owner needs a base or a damp towel on day one. Down a column, it shows which extras are common. Almost every kit includes a base. Flatteners show up only in the four-grit boxes and the Sharp Pebble 400/1000 kit.
One thing the matrix can't show is stone quality. Two "1000 grit" stones from different makers won't cut at the same speed or feel the same, which is why the grit numbers in the next section are bands, not exact points.
↑ Back to all sectionsThe grit ladder: what each number does
Lower numbers are coarser. A coarse stone removes steel fast and leaves deep scratches; a fine stone removes very little and leaves a polish. Bustle's old guide compared grit to sandpaper, and the comparison holds: you start coarse enough to fix the problem, then step finer to erase the scratches the coarse stone left.
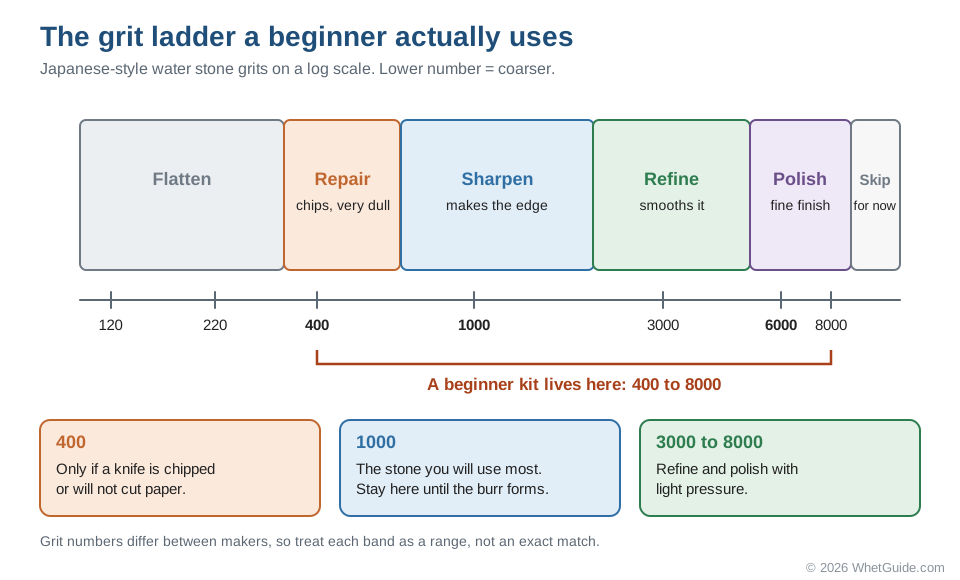
| Grit | Japanese name | Job | When a beginner uses it |
|---|---|---|---|
| 120 to 320 | - | Flattening other stones | Only on the stone, never on the knife |
| 400 | Arato (coarse) | Repair: chips, rolled edges, very dull knives | Now and then, for damage |
| 1000 | Nakato (medium) | Sharpen: makes a new edge on a dull knife | Every session |
| 3000 | Nakato to shiageto | Refine: removes the 1000 scratches | Most sessions, light pressure |
| 5000 to 8000 | Shiageto (finishing) | Polish: a smooth, keen edge for push cuts | When you want a finer finish |
| 10000 and up | Shiageto | Mirror polish | Skip it for now |
The Japanese names come from JCK's beginner guide, which walks through sharpening in those three stages. They're handy because shops and forums use them, and because they describe the job rather than a number that changes from maker to maker. Knife Informer makes the same warning about numbers: a 1000 from one brand isn't an exact match for a 1000 from another. Japanese and Western grit scales also differ. The grit chart converts between them, and which jumps between stones work is on the grit progression chart.
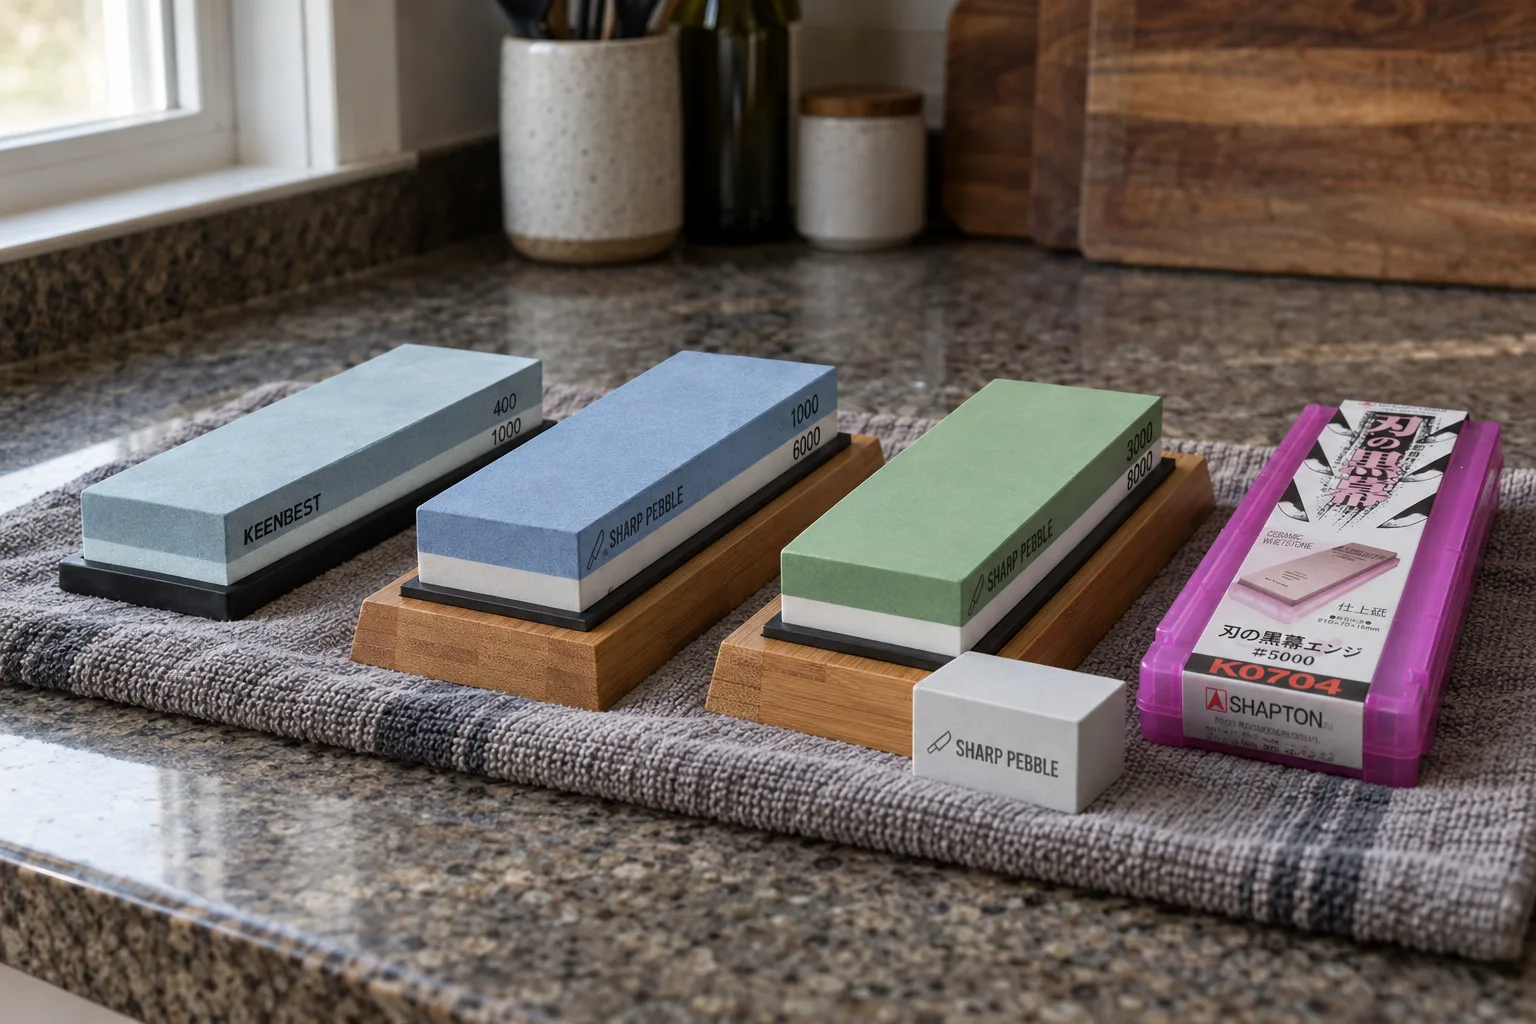
How big a jump can you make between stones? Steps like 1000 to 3000 and 3000 to 8000 work well. A 1000/6000 combination stone is a bigger jump, and it still works, because the 6000 side only has to refine an edge, not make one. It just takes a few more strokes on the 6000 to clear the 1000 scratches.
↑ Back to all sectionsMatch the kit to your knives
Knife Informer frames the choice by the knife's edge, not the grit, and that's the better way to choose. Pick up the worst knife you own and find its row.
| Knife condition | How to tell | First grit | What to skip | Kit |
|---|---|---|---|---|
| Chipped | Visible nicks; light glints off gaps in the edge | 400 | Nothing; you need the full ladder | Intelitopia or Amazon Basics |
| Very dull, neglected | Slides off tomato skin; won't start a cut in paper | 400, then 1000 | 8000 can wait | KEENBEST or a four-grit kit |
| Dull but healthy | Cuts paper with effort; a bright line shows along the edge under a light | 1000 | 400 | Sharp Pebble or King KW65 |
| Kept up, needs a touch-up | Cuts paper but drags in places | 1000 briefly, or straight to the finisher | 400 | Shapton A-set or any 1000/6000 |
| Hard Japanese steel | Thin, hard blade; maker lists a low angle | 1000 | Heavy pressure on 400 | Shapton A-set or a 1000/6000 |
A mixed drawer, where one knife is chipped and the rest are just dull, is what the four-grit kits are for. You'll use the 400 once or twice on the bad knife and then live on the 1000 and the finer stone.
If a knife has a chip deeper than you can see without squinting, or a broken tip, a 400 stone will get there but it takes patience. A coarse diamond plate is faster on damage like that; see whetstone vs diamond stone. For a knife you care about, a sharpening service is also a fair call; what knife sharpening costs compares the options.
↑ Back to all sectionsThe 6 best whetstone sets for beginners
Ranked for a first-time sharpener with ordinary kitchen knives. The first three are complete kits you can use the day they arrive. The King and KEENBEST are bare stones that need a base or a damp towel, and the Shapton pair is the one to grow into.
Sharp Pebble 1000/6000 Whetstone Kit
More people learn on this kit than any other here: 25,000+ ratings and 3,000+ purchases last month. Sharpen on the 1000 side, polish on the 6000, and a dull but healthy kitchen knife is done. The bamboo base keeps the stone from sliding. Clip on the angle guide for your first few sessions while your hand learns the angle.
- Grits1000 / 6000
- Lubricantwater
- Size7.25 x 2.25 x 1 in
- Includedbamboo base, angle guide, instructions
- Amazon rank#1 in Honing Stones
Why it stands out
- The two grits most home cooks need
- Base and angle guide included
- Huge owner base for tips and troubleshooting
Think twice if
- Your knives are chipped or very dull (no coarse stone)
- You want a flattening stone in the box
Intelitopia Complete Sharpening Stone Set
Everything comes in one box. Two dual-grit stones run from 400 through 8000, and a flattening stone keeps them true. You also get a non-slip bamboo base and an angle guide, and there's even a leather strop. Neglected knives start on the 400 side; the 8000 leaves a polished finish. With 3,000+ purchases last month and 7,000+ ratings, it's among Amazon's best-selling stone sets.
- Grits400/1000 + 3000/8000
- Materialcorundum (aluminum oxide)
- Includedflattening stone, bamboo base, angle guide, leather strop
- Amazon rank#2 in Sharpening Stones
Why it stands out
- Repair to polish in one kit
- Flattening stone and strop included
Think twice if
- Your knives just need a touch-up: two stones means more steps than a 1000/6000
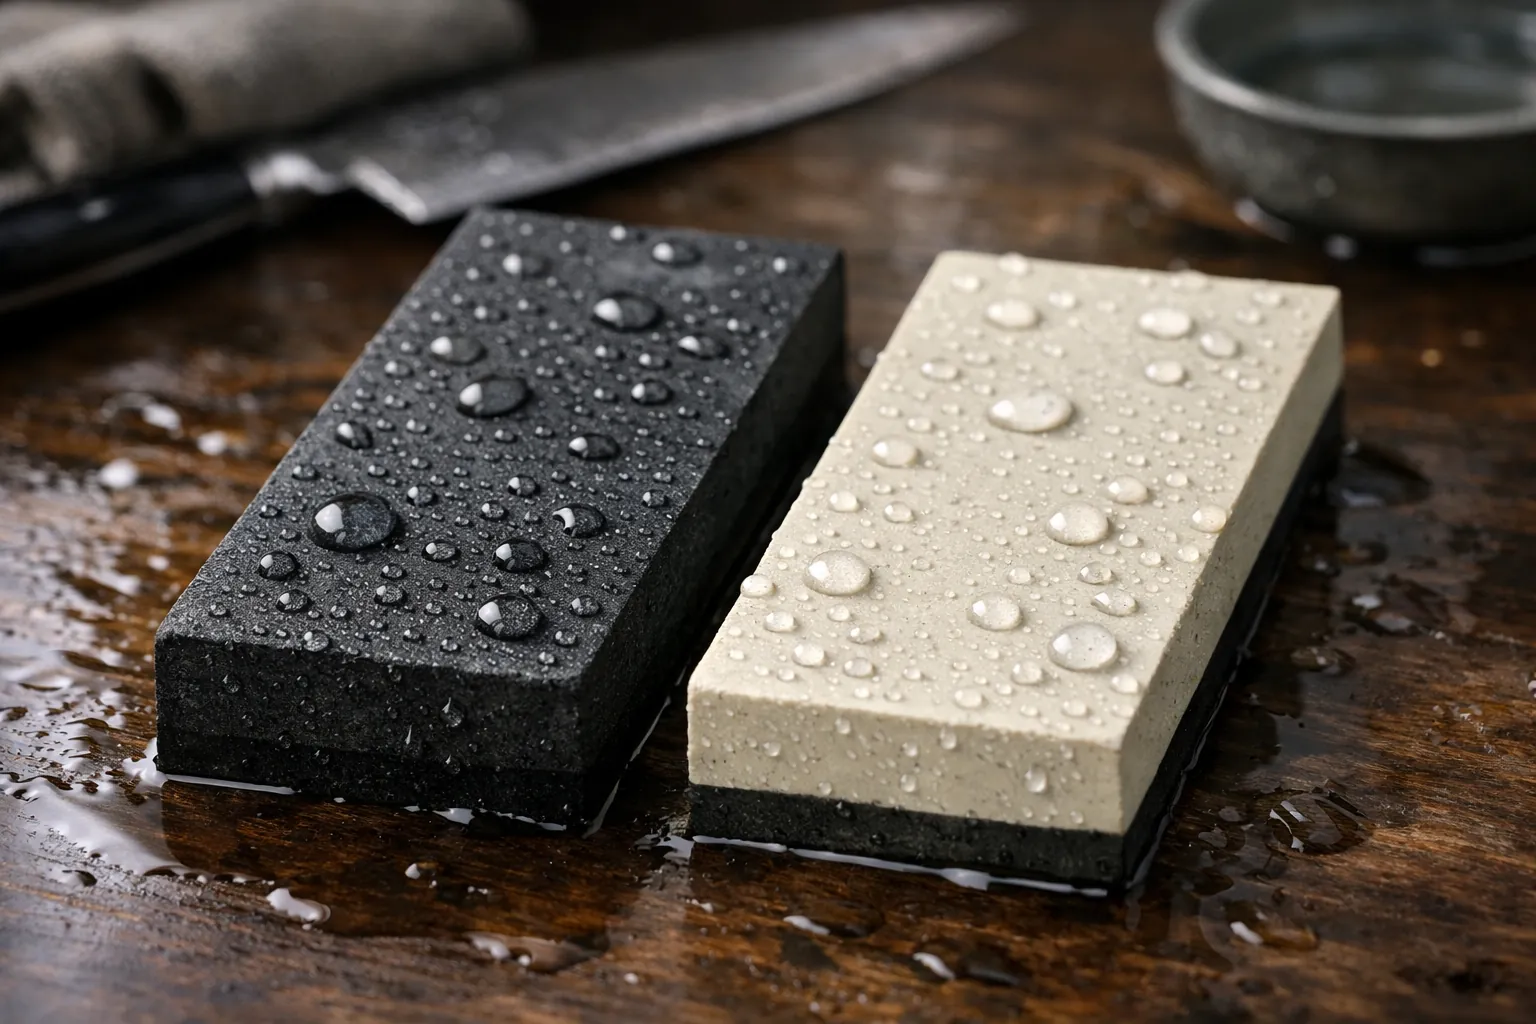
Amazon Basics Whetstone Set
Amazon's house brand copied the Intelitopia recipe closely: two dual-grit water stones and a flattening stone, with an angle guide and a non-slip base of silicone and bamboo. The strop is the one thing missing. You do get a one-year limited warranty. It ranked #3 in Sharpening Stones with 700+ purchases last month.
- Grits400/1000 + 3000/8000
- Lubricantwater
- Includedangle guide, silicone + bamboo base, flattening stone
- Warranty1-year limited
Why it stands out
- Four grits plus flattening stone
- One-year limited warranty
Think twice if
- You want a strop included
King KW65 1000/6000 Combination Stone
For a long time, a King was the stone every Japanese-knife beginner bought, and the KW65 is the classic 1000/6000 combination on a plastic base. It runs a little larger than most budget stones, so a long chef's knife has more room. Budget for your own angle guide and flattening stone, because neither is included.
- Grits1000 / 6000
- Size8 x 2.5 x 1 in (listing)
- Includedplastic base
- Lubricantwater
Why it stands out
- Long-trusted brand among sharpening hobbyists
- Generous 8-inch length
- 7,500+ ratings
Think twice if
- You want an all-in-one kit with guide and flattener
Prefer King with accessories? The King starter set adds an angle holder and a wiping cloth to a Japanese-made 1000/6000 stone. To soak the 1000/6000 without cracking the finishing side, follow the King whetstone review. Want a single stone from a Japanese maker instead of a kit? See the best Japanese whetstones.
KEENBEST 400/1000 Whetstone
Amazon sells more of this stone than any other: 6,000+ in the past month. The 400 side repairs dull edges and the 1000 side sharpens them, which is exactly what a drawer of neglected knives needs, for very little money. You get the bare stone and a quick guide. Put a damp towel under it in place of a base.
- Grits400 / 1000
- Size7 x 2.2 x 1.1 in
- Lubricantwater (soak 10–15 min)
- Amazon rank#1 in Sharpening Stones
Why it stands out
- Very low cost
- Coarse side for neglected knives
- 4.7 stars from 4,600+ ratings
Think twice if
- You want a finishing grit (add a 3000–6000 later)
- You want a base and angle guide included
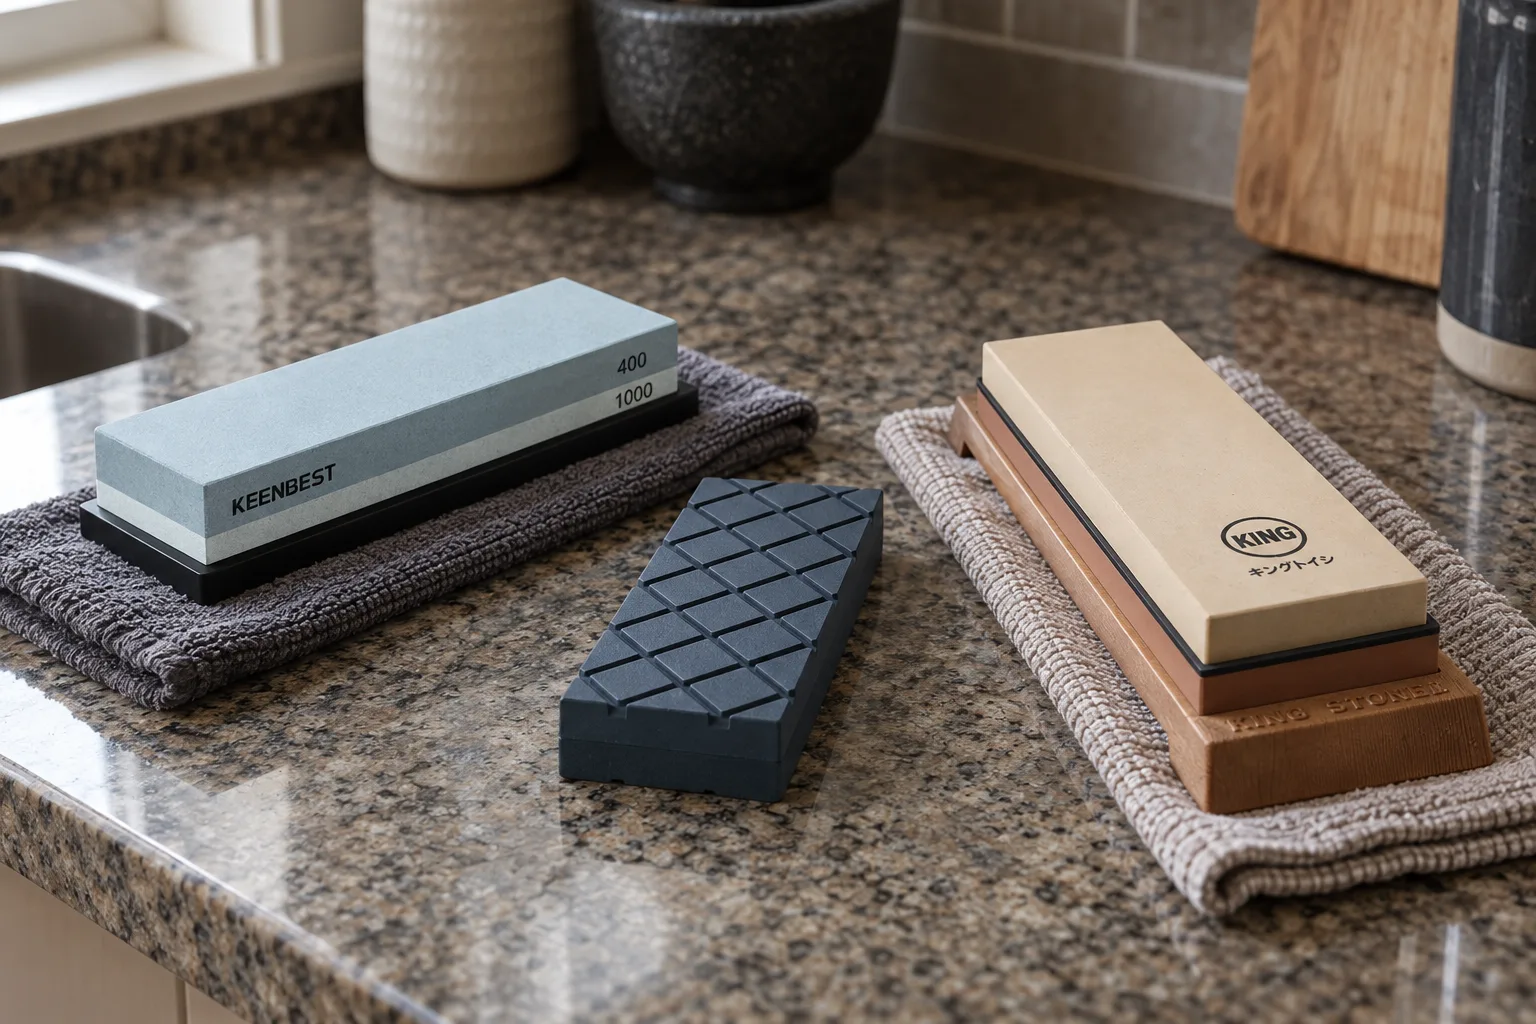
Shapton Kuromaku A-Set (1000 + 5000)
Once the habit sticks, this is where many sharpeners go next. Shapton's ceramic Kuromaku (Pro) pair handles sharpening and finishing on Japanese and Western knives. You splash them with water instead of soaking them, so a session starts in seconds (Shapton's instructions for your stones have the details). The ventilated plastic cases double as holders. A 4.8-star average makes it the best-rated set here.
- Grits#1000 medium + #5000 fine
- Working surface210 x 70 x 15 mm
- Includedplastic boxes that double as stone holders
Why it stands out
- Ready with a splash of water
- Ideal grit pair for Japanese knives
- Cases double as holders
Think twice if
- You're on a tight budget
- Your knives need repair grits
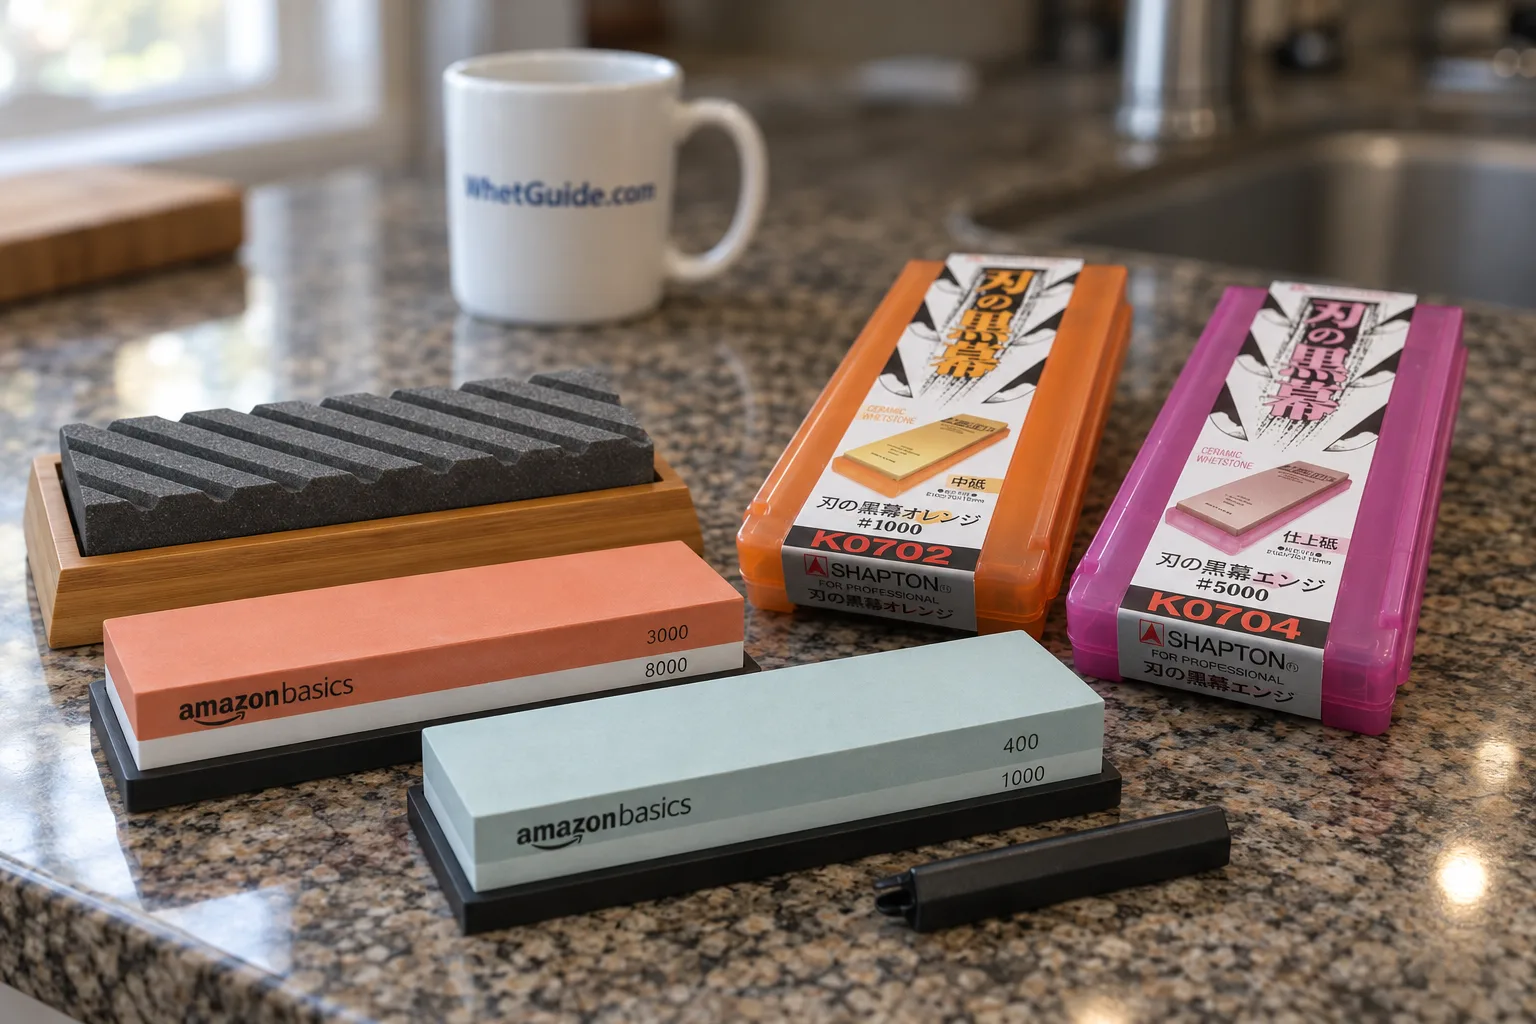
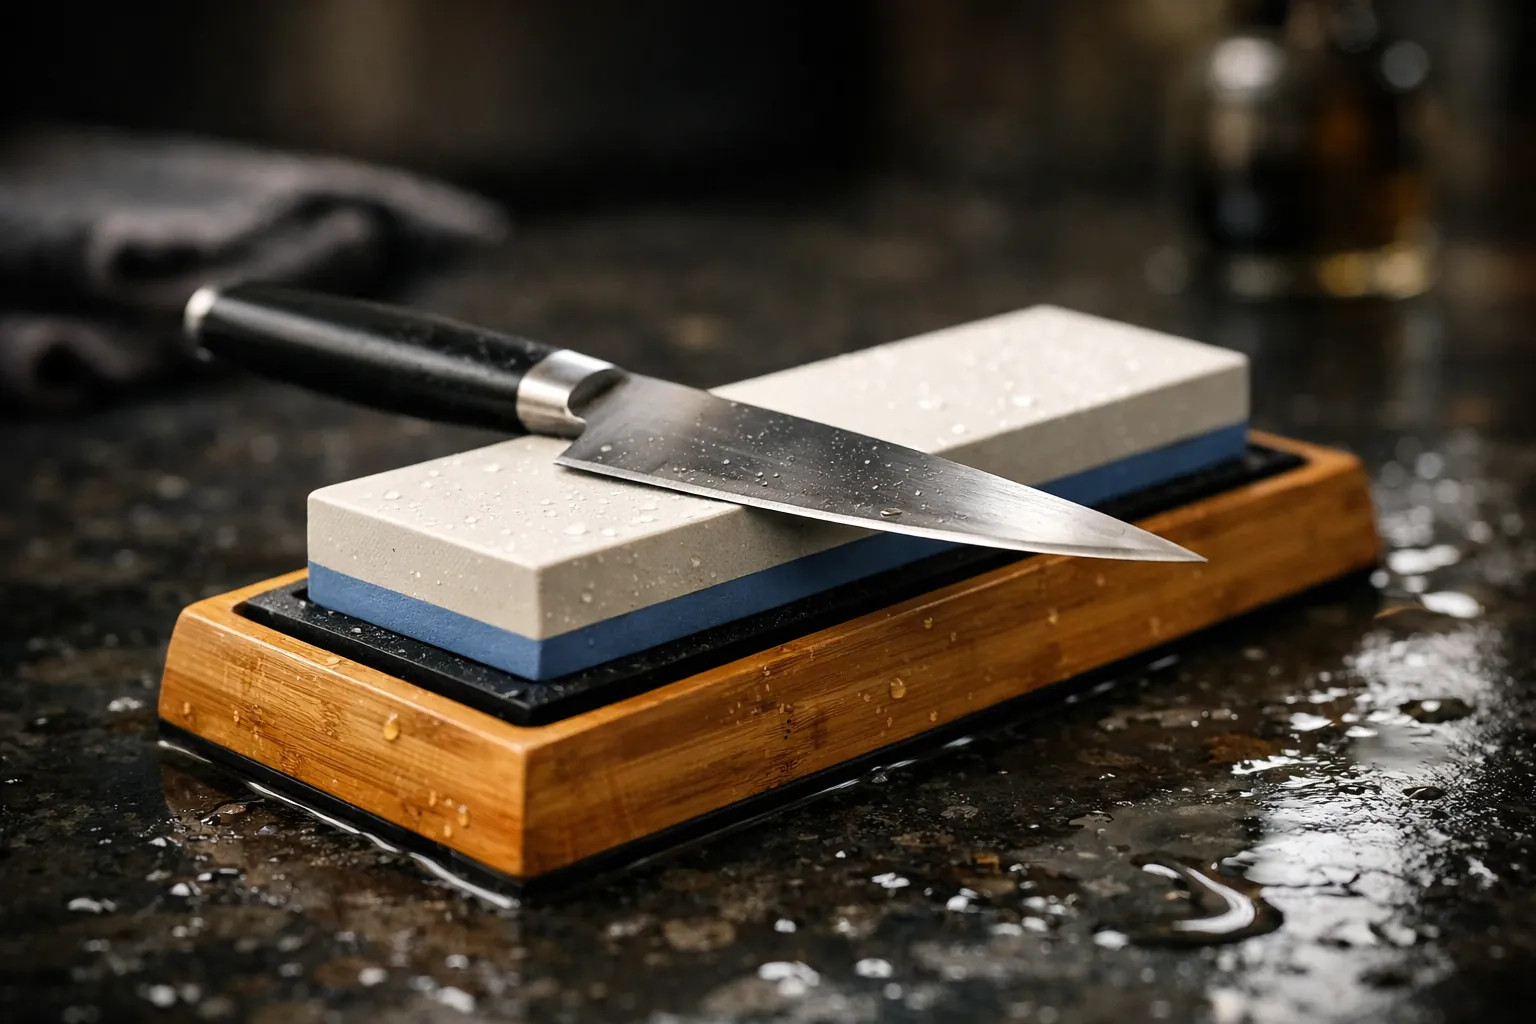
Two kits sit just outside the six. The Sharp Pebble 3000/8000, which comes with its own flattening stone, is the obvious finisher if you start on a KEENBEST 400/1000. The Amazon Basics 1000/6000 with an angle guide is the same grit pair as our top pick. Treat both as alternatives worth comparing, not ranked picks.
↑ Back to all sectionsSide-by-side comparison
| Kit | Grits | Base | Angle guide | Flattener |
|---|---|---|---|---|
| Sharp Pebble 1000/6000 | 1000, 6000 | Bamboo | Yes | No |
| Intelitopia set | 400, 1000, 3000, 8000 | Bamboo | Yes | Yes (+ strop) |
| Amazon Basics set | 400, 1000, 3000, 8000 | Silicone + bamboo | Yes | Yes |
| King KW65 | 1000, 6000 | Plastic | No | No |
| KEENBEST 400/1000 | 400, 1000 | No | No | No |
| Shapton A-set | 1000, 5000 | Case/holder | No | No |
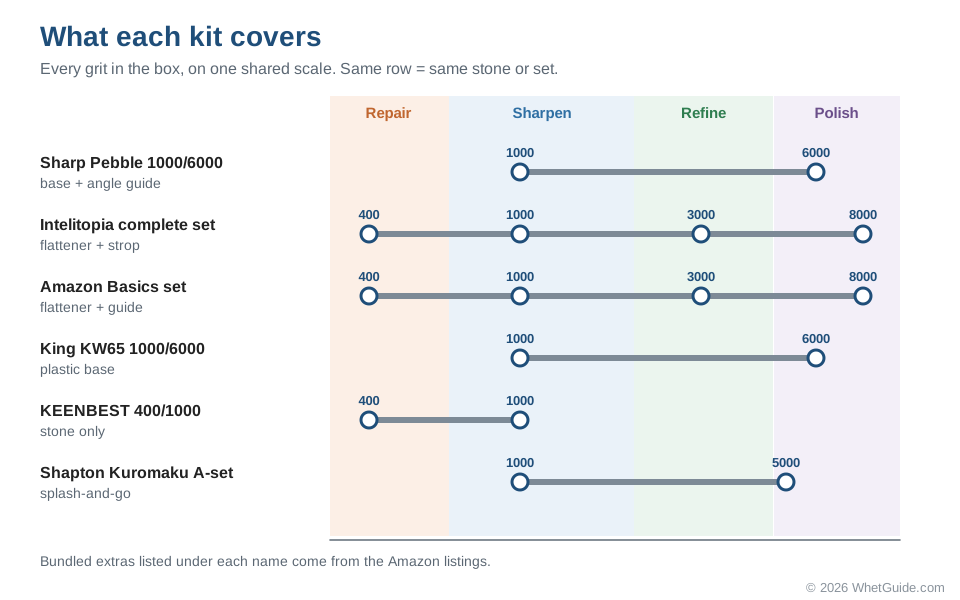
The chart makes one thing plain: every kit has a 1000. That's the stone you'll use most, whichever box you buy. The differences are at the ends. KEENBEST stops at 1000 and has nothing to refine with. The Shapton pair and the 1000/6000 stones start at 1000 and have nothing for chips. Only the Intelitopia and Amazon Basics boxes cover both ends.
Stone sizes from the listings
| Stone | Listed size | What it means at the sink |
|---|---|---|
| King KW65 | 8 x 2.5 x 1 in | The longest and widest here; most room for an 8-inch chef's knife |
| Shapton Kuromaku | 210 x 70 x 15 mm working surface (about 8.3 x 2.75 in) | Long and wide, and thinner at 15 mm |
| Sharp Pebble 1000/6000 | 7.25 x 2.25 x 1 in | Standard size; fine for knives up to about 8 inches |
| KEENBEST 400/1000 | 7 x 2.2 x 1.1 in | Standard size |
A longer stone means more of the edge touches it on each stroke, so you need fewer strokes and fewer sections to cover a long blade. For paring and utility knives, size barely matters.
↑ Back to all sectionsBest combination whetstone or a whole kit?
There's an honest argument for buying less. Knives and Stones, an Australian shop that sells the stones it recommends, tells beginners one medium stone around 1000 is enough to start. Their reasoning: the burr gives you all the feedback you need, and a 3000 or a 400 can come later, once you know you need one. They're right that most people with healthy knives don't need four grits on day one. James Zhang at Knives and Stones draws the line at damage: he says to buy the coarse 400 when you actually have a chip to grind out.
Kits make sense for a different reason: the extras. A flattening stone and a base are things a beginner needs within weeks, and buying them separately often costs more than the kit difference. So ask what you'll need in the first two months, not whether one stone or four is better.
| One 1000 stone | 1000/6000 combination | Four-grit kit | |
|---|---|---|---|
| Learning curve | Simplest: one surface | Simple: flip the block | More steps per session |
| Handles chips | Slowly | Slowly | Yes, on the 400 |
| Finish | Working edge with some bite | Refined, smooth edge | Refined to polished |
| Flattener included | Rarely | Rarely | Usually |
| Best for | One practice knife, tight budget | Most home kitchens | Mixed or neglected drawers |
Our call: the 1000/6000 combination is the middle path for most kitchens, and it's why the Sharp Pebble is the top pick. Buy the four-grit box only when you've looked at your knives and found damage.
↑ Back to all sectionsSoaking stones vs splash-and-go
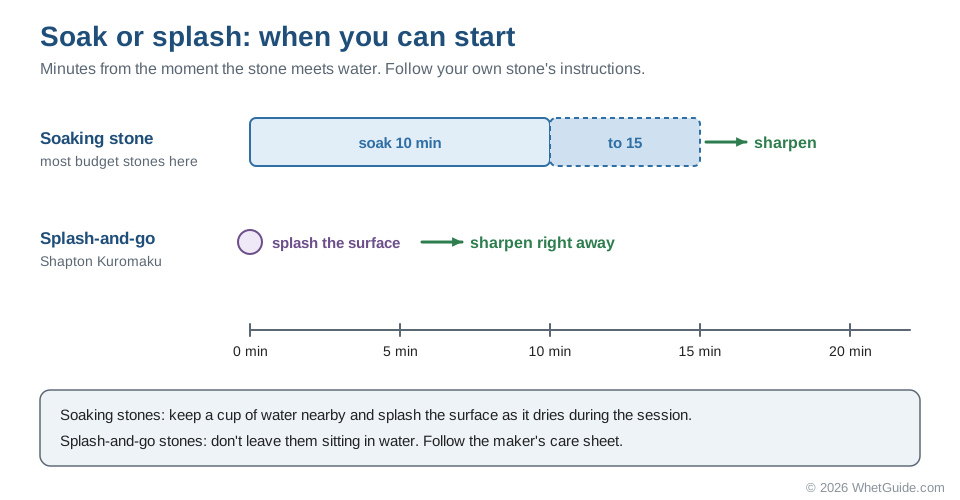
Every water stone needs water on the surface while you work. The difference is how much water it needs inside before it starts. Most budget stones, including every soaking stone on this page, are porous and soak up water; if you skip the soak, the surface dries in seconds and the stone glazes. Splash-and-go stones are denser and only need the surface wet.
| Stone | Type | Before you start |
|---|---|---|
| Sharp Pebble 1000/6000 | Soaking | Soak per the kit's instructions; GearJunkie's review covers the soak |
| Intelitopia and Amazon Basics stones | Soaking | Soak per the listing |
| KEENBEST 400/1000 | Soaking | 10 to 15 minutes per the listing |
| King KW65 | Soaking (check the fine side) | See our King review on soaking the 1000/6000 without cracking the finishing side |
| Shapton Kuromaku A-set | Splash-and-go | Wet the surface and start |
The usual sign that a soaking stone is ready is that bubbles stop rising from it. Then lift it out, set it on the base, and keep a cup of water nearby to splash the surface whenever it starts to look dry. Nick LeFort's GearJunkie review passes along the maker's advice to soak the Sharp Pebble 1000/6000 for 10 to 12 minutes, so build that wait into your first session.
Does the soak matter enough to change which kit you buy? For some people, yes. A session you can start in seconds is one you'll actually do on a Tuesday night, and a weekly touch-up keeps knives sharp with far less work than a monthly rescue. If you know you're impatient, the Shapton pair earns its price on that alone.
Follow the maker. Soak times, and whether a stone can be left in water, differ from stone to stone. Japanese Chef's Knife shows how much this varies inside one shop: its #400/#1200 and #2000 stones want about 10 minutes of soaking, while its #1000/#4000 and #6000 only need the surface wet. Some makers say not to store their stones submerged, and splash-and-go stones generally shouldn't be soaked at all. The sheet in the box wins over anything general, including this page.
Day-one setup, step by step
Ten minutes of setup saves the first session. The aim is a stone that cannot move, a surface that stays wet, and a way to see where you're grinding.
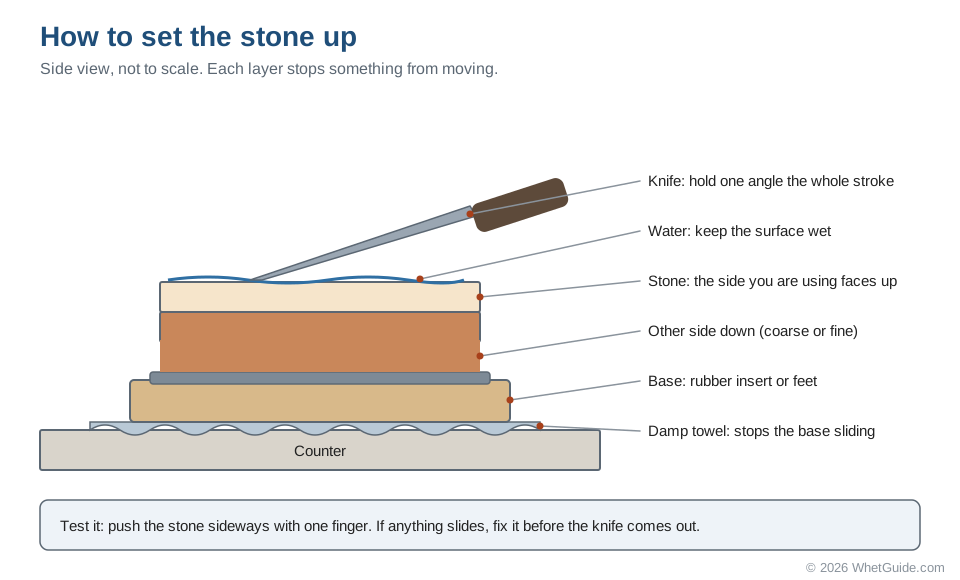
- 01SoakUntil bubbles stop, or splash if it's splash-and-go
- 02AnchorDamp towel, base, stone; push to test
- 03Check flatStraightedge across the face
- 04MarkMarker on the bevel, then sharpen
- Pick the spot. A counter by the sink is ideal: water close by, a surface that can get wet, and good light. Clear everything else off.
- Soak the stone if it's a soaking stone. Start this first, because everything else can happen while it soaks.
- Lay a damp, folded towel on the counter. It stops the base sliding and catches the slurry.
- Seat the stone in its base with the side you'll use first facing up. On a combination stone that's the coarser side. Push the stone sideways with one finger. If anything moves, fix it now.
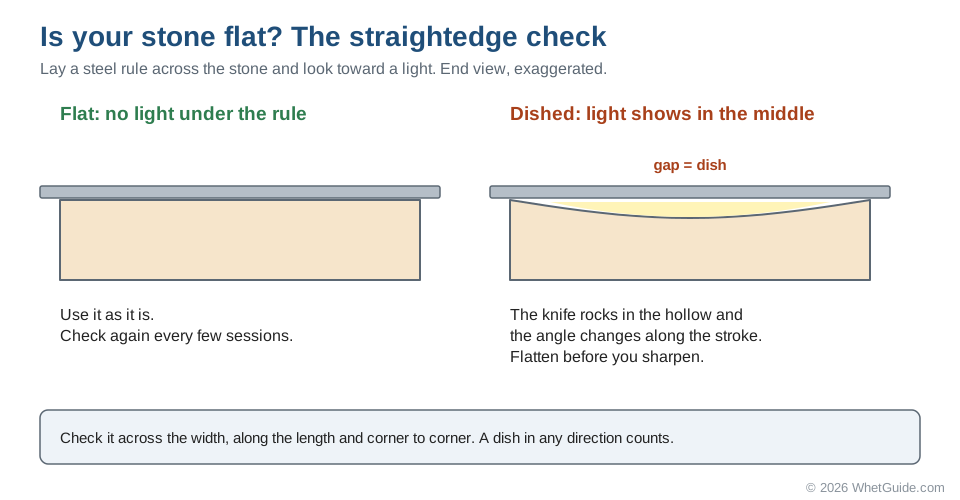
- Check the stone is flat. New stones are usually close, but a straightedge across the face takes a few seconds (how to check).
- Color the bevel with a permanent marker, both sides, along the whole edge. A few strokes later the worn ink shows exactly where the stone is touching. The Sharpie trick guide spells out how to read it.
- Set your angle. Use the guide if your kit has one and you've checked its angle against your knife, or look up your knife's figure in the angle chart.
- Wet the surface and start on the practice knife, not your best one.
Edge leading or edge trailing?
Both work. Edge-leading strokes push the edge into the stone as if slicing a thin layer off it; they raise a burr quickly and feel natural on the coarse stone. Edge-trailing strokes drag the edge behind, the way you'd strop. They're gentler, which is why many people finish with them on the fine stone. Pick one for the first week and get consistent; switching between them while learning only adds a variable. The full stroke technique is in how to use a whetstone.
↑ Back to all sectionsYour angle, and what a kit guide really sets
The angle is measured between the blade face and the stone, on one side. Most kitchen knives sit somewhere between about 15 and 20 degrees per side. Japanese knives are often around 15, German knives around 20, and your knife maker's own figure beats both. Brands are listed on the angle chart, and the angle calculator works out how high to lift the spine for a given blade width.
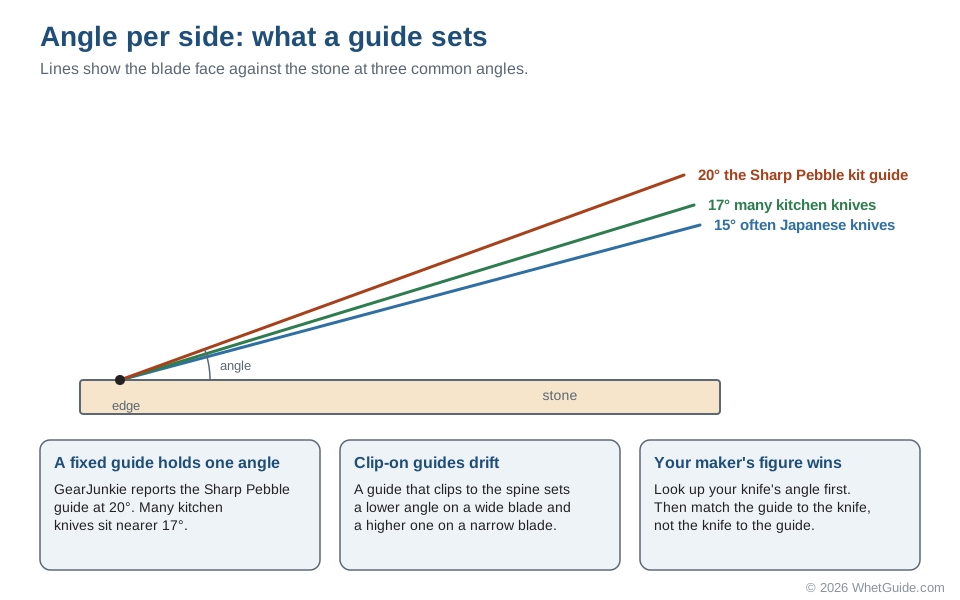
Bundled guides come with a catch. GearJunkie's review of the Sharp Pebble kit reports that its guide is set to 20 degrees, while many kitchen knives are closer to 17. A fixed guide holds one angle, and your knife may want another.
Clip-on guides that ride on the spine have a second quirk: the angle they hold depends on blade width. On a wide chef's knife the spine sits farther from the edge, so the same clip gives a lower angle than it does on a narrow paring knife. The whetstone angle guide picks sort out which guide types hold a true angle.
Find the angle your knife already has
- Color the bevel with a marker.
- Lay the knife on the stone at your best guess and make one light stroke.
- Look at the ink. Worn at the shoulder only? Your angle is too low; raise the spine a little. Worn at the very edge only? Too high; lower it.
- Adjust and repeat until one stroke clears the ink evenly from shoulder to edge. That's the knife's existing angle, and matching it means you remove the least steel.
Use the guide as training wheels for a few sessions, then try a session without it. Most people find their hand has learned the angle sooner than they expected.
↑ Back to all sectionsThe burr: the one signal to watch for
A burr is a thin lip of steel that folds over to the far side of the edge when you've ground all the way to the apex. It's your proof that the two bevels have met. No burr means you haven't sharpened the edge yet, however many strokes you've done. Knives and Stones puts it plainly: learn to feel the burr and you don't need stroke counts.
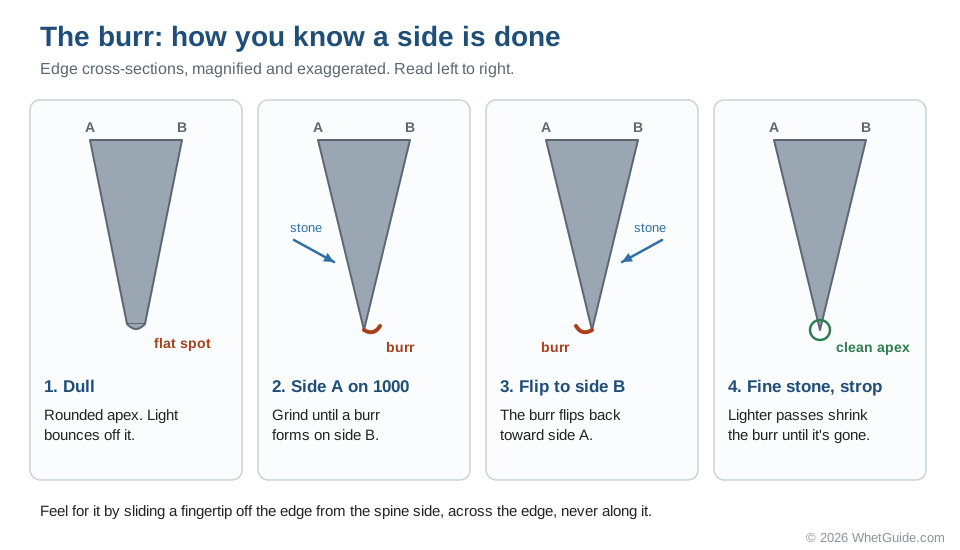
How to feel for it
- Sharpen side A on the 1000 stone.
- Every so often, stop. Slide the pad of your thumb gently off side B, from the spine toward and across the edge. Never along the edge.
- A burr feels like a slight catch or roughness, a tiny lip. A clean, unsharpened edge feels smooth and slippery.
- Check the whole length, especially the heel and the tip. The burr needs to run the whole length. Those two ends are where it usually goes missing.
- When it runs the full edge, flip the knife and sharpen side B until the burr moves back to side A.
- Then reduce pressure, alternate sides with fewer strokes each, and move to the finer stone.
Moving to the finer stone before the burr has formed everywhere is the most common beginner mistake. The fine stone can't fix a part of the edge the coarse stone never reached; it just polishes a dull spot. Stubborn burrs and how to remove them get a full guide: the knife sharpening burr.
↑ Back to all sectionsYour first week with a new stone
Practice on a cheap knife first, one you won't mind scratching. Your best chef's knife can wait a week.
Color the edge with a permanent marker before you start. After a few strokes the worn ink shows exactly where the stone is touching.
The most important rule: stay on the 1000 stone until you raise a burr, a tiny lip of metal along the whole edge. It means you've sharpened all the way to the apex. Move on before then and the finer stone just polishes a dull edge. On the 3000 to 8000 stone, ease off the pressure. Those grits polish, and pressing hard only rounds the edge.
Spread your strokes across the whole stone. Working only the middle wears a dip fast, and a dished stone makes a steady angle harder. When you're done, rinse the stones and let soaking stones air-dry fully before closing them in a box, or they can grow mold or crack.
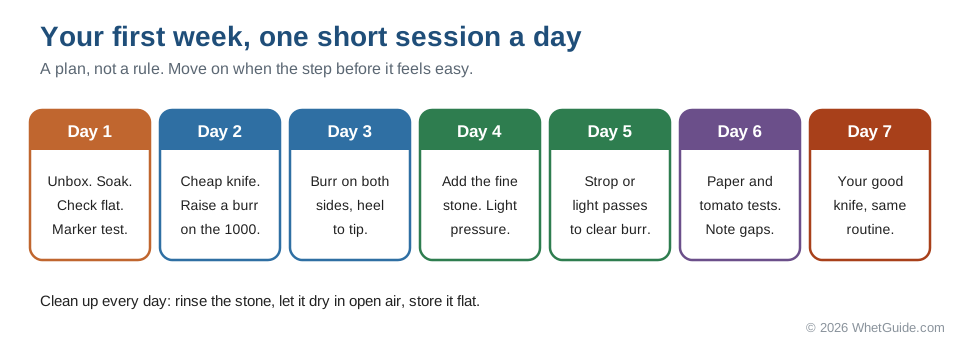
| Day | Do this | You're done when |
|---|---|---|
| 1 | Unbox, read the maker's sheet, soak, set up the stack, check the stone is flat. Do the marker test on the practice knife and adjust your angle until the ink wears evenly. | One stroke clears the ink from shoulder to edge. |
| 2 | Practice knife on the 1000. Sharpen one side until you feel a burr on the other. | You can find a burr somewhere on the edge. |
| 3 | Same again on both sides, chasing the burr into the heel and tip. | The burr runs the whole edge on each side. |
| 4 | Add the finer stone (3000, 5000 or 6000). Light pressure, alternating sides. | The coarse scratches are replaced by a finer, even sheen. |
| 5 | Clear the burr: a few very light edge-trailing passes on the fine stone, or a strop if you have one. | Your thumb finds no catch on either side. |
| 6 | Test the edge on paper and a tomato. Note where it snags. | You know which section of the edge needs work. |
| 7 | Your good knife, same routine, starting on the 1000 only if the edge test says it needs it. | The knife cuts paper cleanly from heel to tip. |
If a day's step isn't working, repeat it tomorrow. Nothing on the list has a deadline, and the burr work on days 2 and 3 is the skill the rest depends on.
The full technique, stroke by stroke, is in how to use a whetstone. Our other stone guides are collected on the whetstones page.
↑ Back to all sectionsUse the whole stone
Where your strokes land decides where the stone wears. Beginners tend to work a short patch in the middle, because that's where the knife sits most naturally. Do that for a few sessions and the middle sinks.
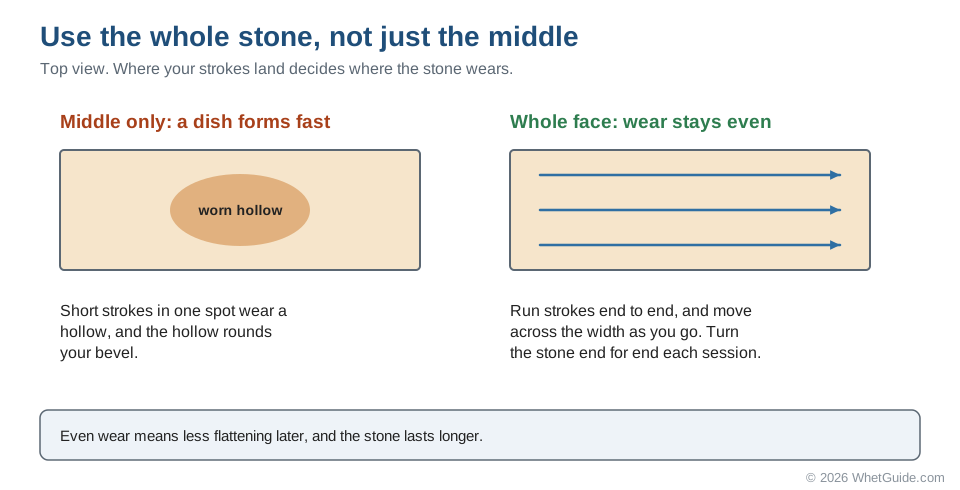
- Run each stroke from one end of the stone to the other, not in short scrubs.
- Drift across the width as you go: near side for a few strokes, middle, far side.
- Turn the stone end for end at the start of each session, so any lean in your stroke wears both ends equally.
- Use the whole length for long knives. A chef's knife needs more stone than a paring knife, and that's another reason longer stones are easier.
Slurry: why the stone turns muddy
A few strokes in, a gray or colored paste builds up on the stone. That's slurry. GearJunkie's Sharp Pebble review separates the two things in it: slurry, the loosened abrasive and water that does the cutting, and swarf, the fine steel removed from the knife.
- Leave the slurry on while you sharpen. It helps a water stone cut.
- Add a splash of water when the surface starts to look dry or the knife begins to stick.
- If the stone stops cutting and looks shiny or dark, it may be clogged with swarf. A rinse and a light rub with the flattener, or a few strokes with a nagura stone if you own one, opens it up.
- Rinse the slurry off before moving to a finer stone, and rinse the knife too. Coarse grit carried onto a fine stone leaves coarse scratches.
- Wipe the slurry off the knife with a damp cloth when you finish. Don't let it dry on the blade.
Don't use oil on a water stone to cut the mess. Oil stops water working on the stone, and getting it back out is hard. Oil belongs on oil stones; the sharpening stone oil guide spells out which stones take which.
↑ Back to all sectionsTest the edge without hurting yourself
Three checks, none of them involving your thumb on the edge.
- Paper. Hold a sheet of printer paper by one corner and slice down into it from the top edge. A sharp edge slices cleanly. Snags and tearing mark the sections that need more work.
- Tomato. Rest the edge on a tomato and draw it back with no downward pressure. A sharp knife bites into the skin at once; a dull one skates.
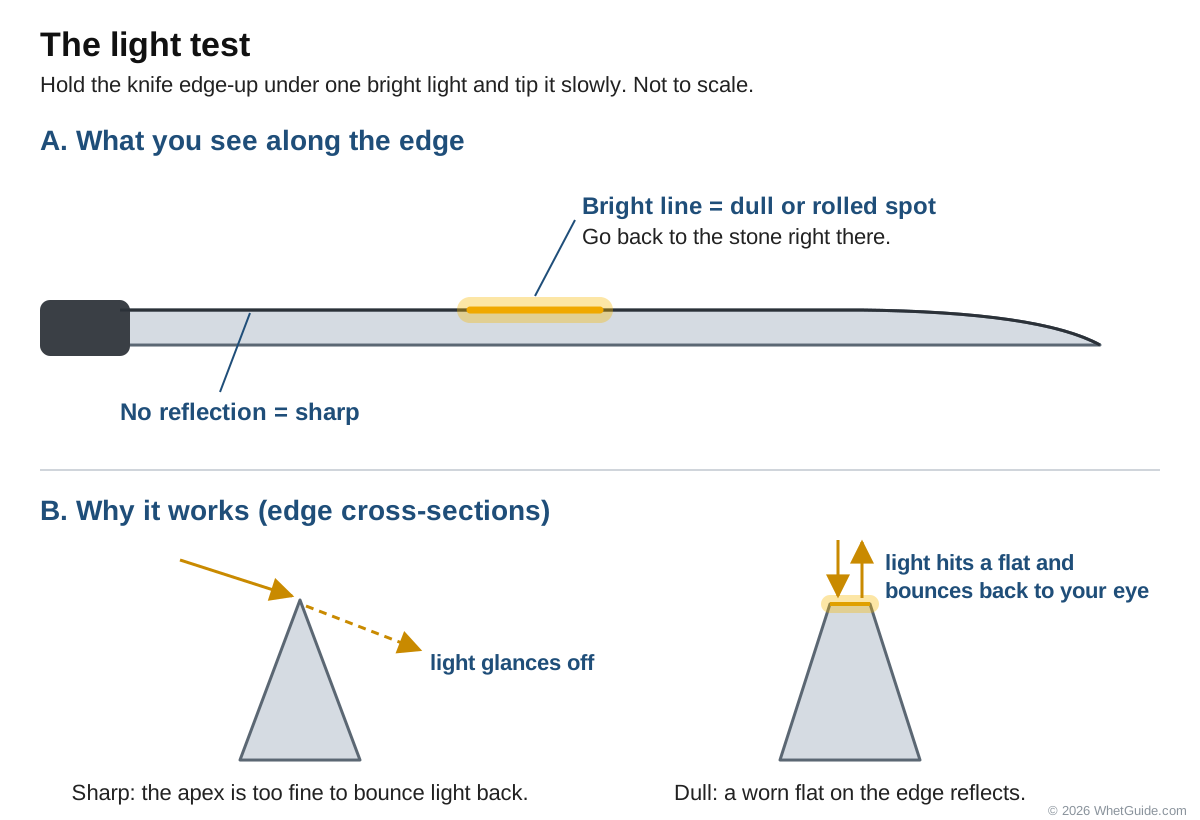
- Light. Hold the knife edge-up under a bright light and tilt it. A sharp apex reflects nothing. Any bright line or dot along the edge is a dull or rolled spot.
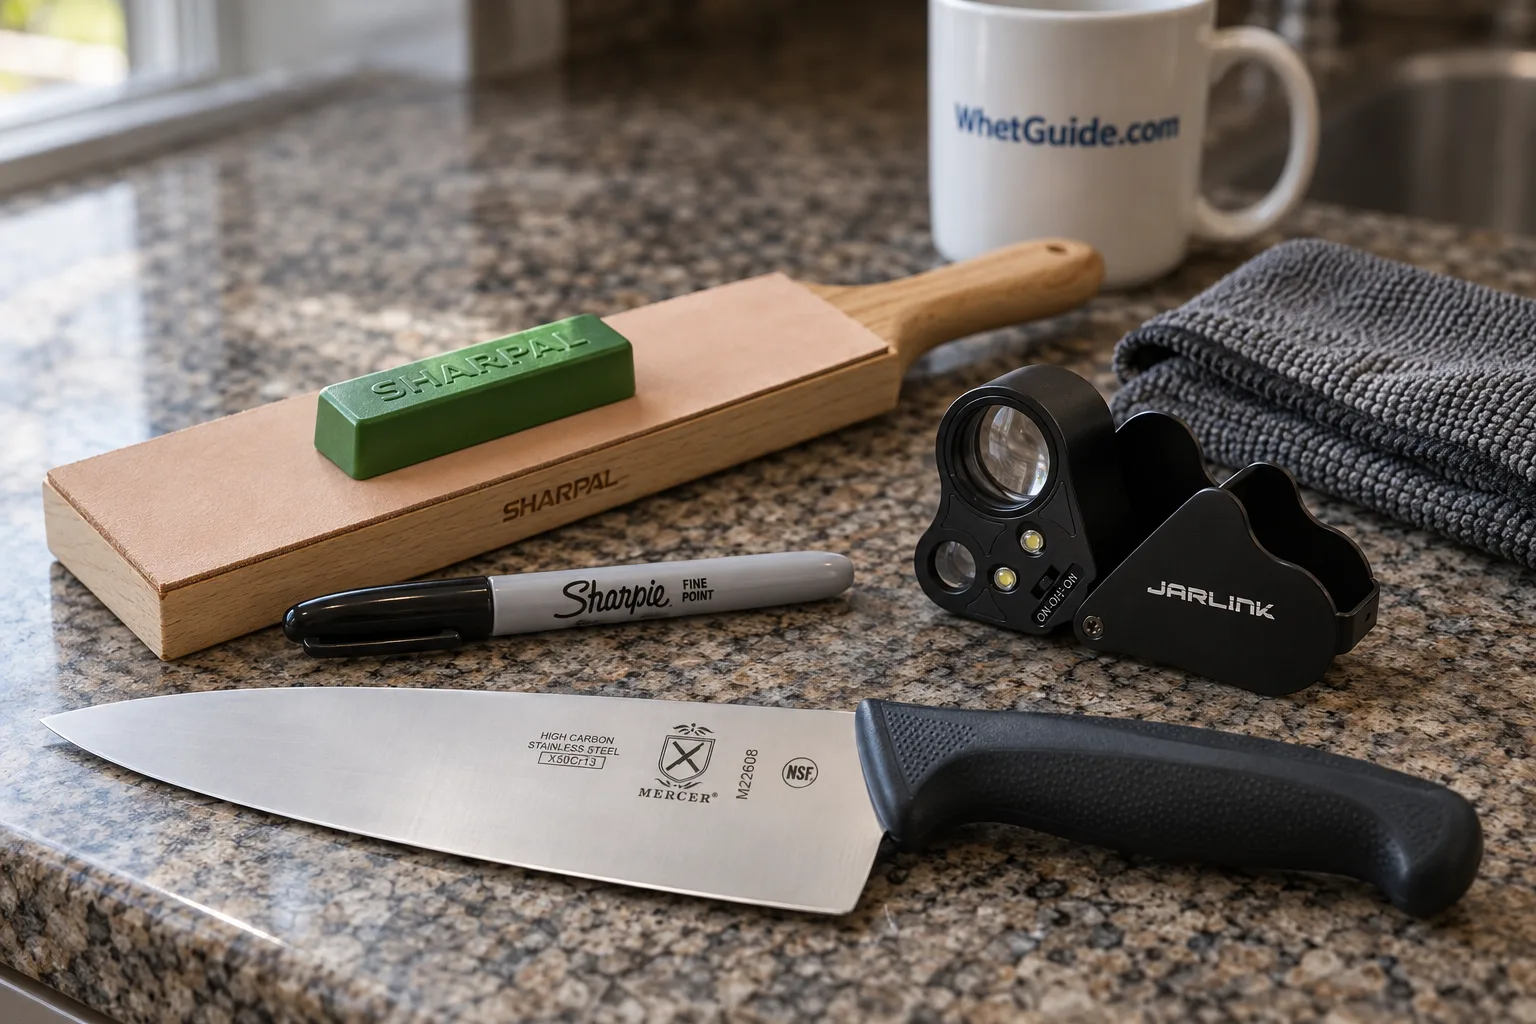
A loupe makes the scratch pattern and the burr easy to see. A cheap 30X jeweler's loupe is enough, and it settles arguments with yourself about whether the 6000 really erased the 1000 scratches.
Common beginner mistakes and fixes
| Mistake | What happens | Fix |
|---|---|---|
| Pressing hard | Rounds the edge, wears the stone faster, and makes the angle wobble | Moderate pressure on the 1000, very light on the finisher |
| Moving to the fine stone before the burr | Polishes a dull edge | Burr along the whole edge first, every time |
| Skipping the soak | The surface dries out and glazes over, so the stone stops cutting | Soak until bubbles stop, or buy splash-and-go |
| A sliding stone | Lost angle, scratched blade, cut fingers | Damp towel under the base; push-test before every session |
| Working only the middle of the stone | A dish that rounds the bevel | Full-length strokes, drift across the width |
| Never flattening | The angle changes along every stroke | Straightedge check every few sessions |
| Starting with the good knife | Scratches and an uneven edge on the knife you care about | A week on a cheap practice knife |
| Trusting the guide blindly | Grinding a new angle onto the knife | Marker test; match the knife, not the guide |
| Rocking the wrist mid-stroke | A rounded, convex bevel that never gets sharp | Lock the wrist; move from the elbow and shoulder |
| Using the 400 on a healthy knife | Deep scratches, wasted steel | Start on 1000 unless you see damage |
| Oil on a water stone | Water stops working on the stone | Water only on water stones |
| Boxing a wet stone | Mold, and cracks in some stones | Air-dry fully before it goes in a box |
Most of these come down to two habits: go slower than you think you need to, and check (the burr, the ink, the straightedge) instead of guessing.
↑ Back to all sectionsKeep the stone flat
Every water stone wears. Softer, coarser stones wear fastest, so the 400 and 1000 sides dish first. Norton's Trish Dawson, writing in New Equipment Digest, says waterstones are softer than other stones and need frequent flattening to keep cutting well. A dished stone rocks the knife and changes the angle along the stroke, and the result is a rounded bevel you can't get sharp.
How to flatten, step by step
- Soak or wet the stone as you would for sharpening.
- Draw a grid of pencil lines over the whole face.
- Rub the stone on the flattening stone, a coarse diamond plate, or wet-dry sandpaper on a sheet of glass. Use even pressure and long strokes or figure eights, and turn the stone now and then.
- Check the pencil. Lines left in the middle mean the middle is still low. Keep going.
- Stop as soon as every line is gone.
- Run the flattener lightly along the stone's edges at an angle to take off the sharp corner, so it doesn't chip or catch the knife.
- Rinse both the stone and the flattener well.
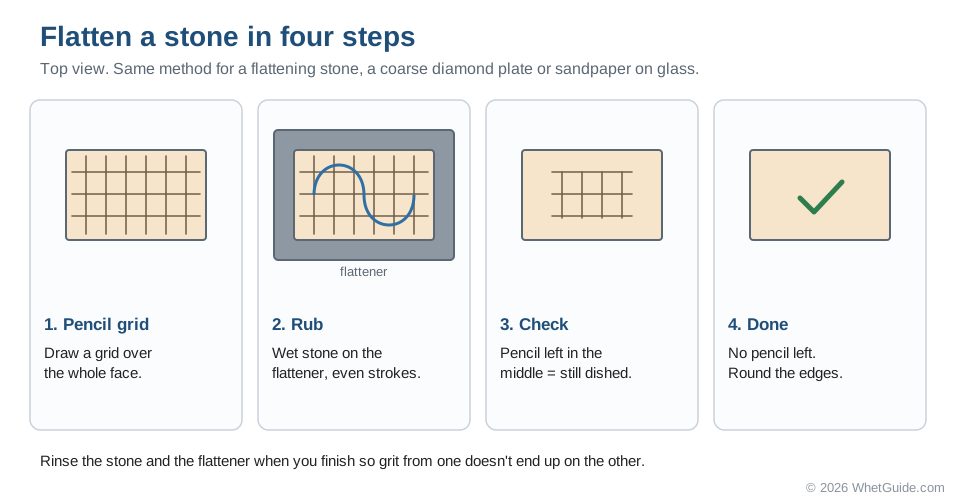
A little and often is easier than a big job later. Many people give the stone a few passes on the flattener at the end of every session, which keeps it close to flat without a dedicated flattening day. The step-by-step on flattening a whetstone goes deeper, and the best flattening stone picks compare flatteners.
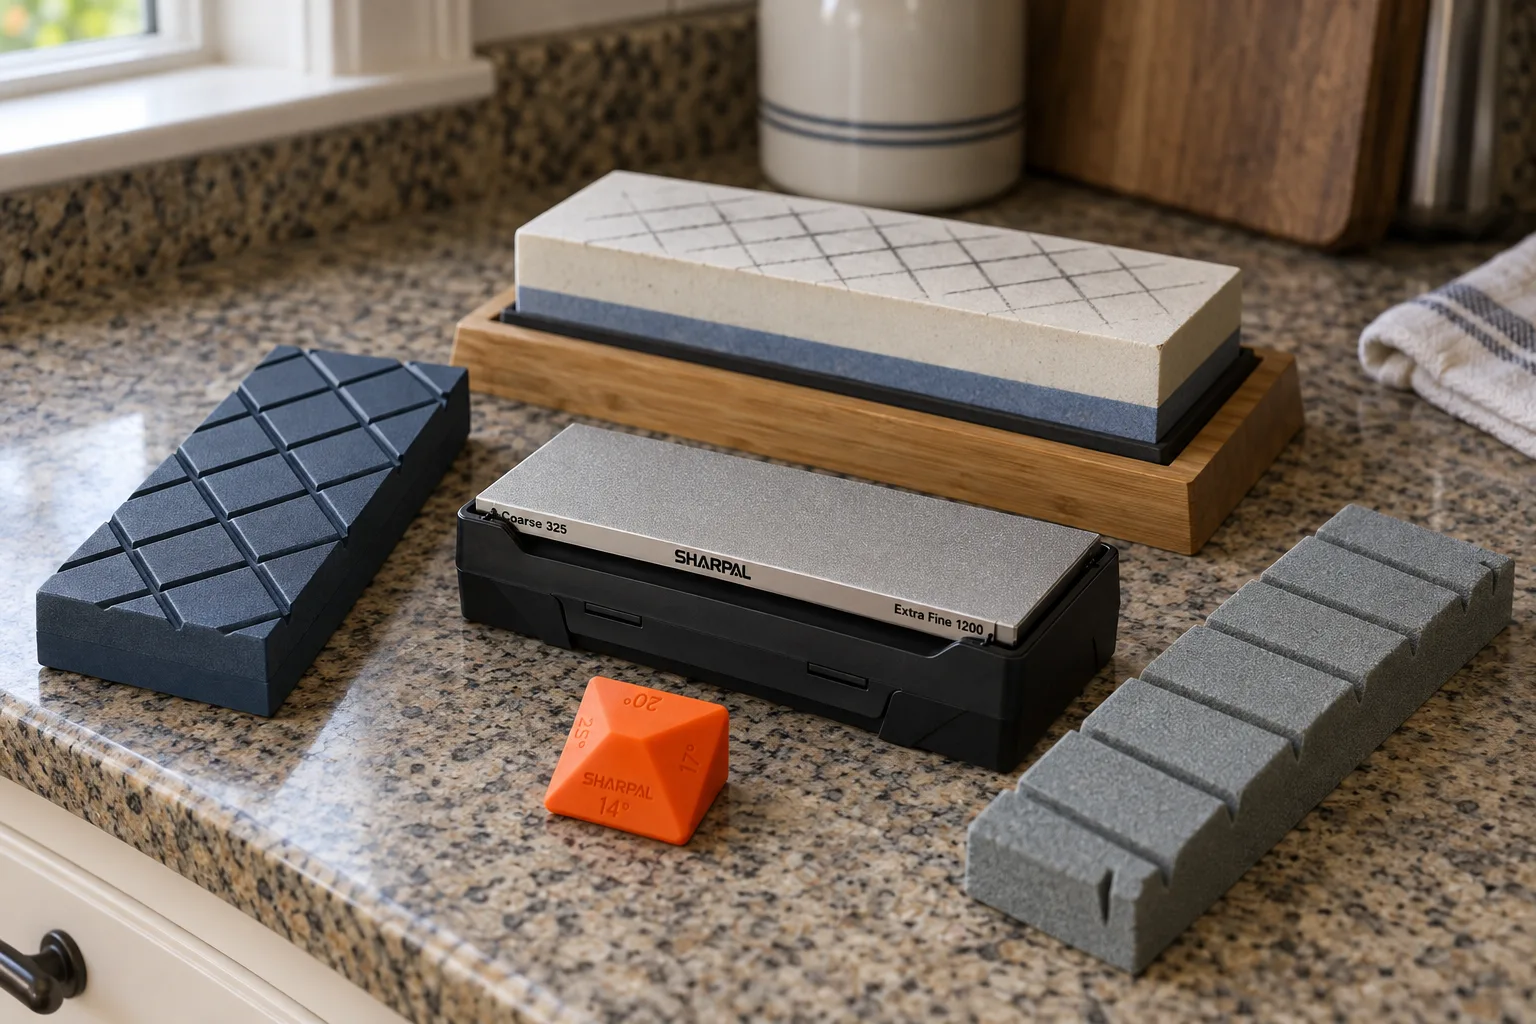
Which flattener? If your kit includes one, use it. If not, a coarse flattening stone is the cheap answer, and a diamond plate is the durable one; a diamond plate also sharpens, so it does double duty. Knife Informer names Norton's flattening stone as an option, and the SHARPAL diamond plate in the accessories section below works too.
↑ Back to all sectionsCare and storage
- Rinse the stone and the knife at the end of every session. Slurry left to dry turns into a crust.
- Let soaking stones air-dry fully, in the open, before they go into a box or a cupboard. A wet stone in a closed box can grow mold, and some stones can crack.
- Store stones flat, where they can't fall. A dropped stone chips or snaps.
- Keep stones out of freezing places while they're wet. Water expanding inside a porous stone can crack it.
- Keep the flattener and the stones apart, or rinse them well, so coarse grit doesn't ride onto a fine surface.
- Store splash-and-go stones dry and follow their maker's care sheet. The Shapton cases are built to hold the stones and let them breathe.
- Dry the knife fully after sharpening and put it away; the knife care guide picks up the rest of its life between sessions.
Some people keep soaking stones in water permanently so they're always ready. Some makers allow it and some don't, so check before you try it.
↑ Back to all sectionsBuying guide: how to choose a kit
Grits first, gadgets second
400 repairs. 1000 sharpens. 3000 to 8000 refines and polishes. Work out which of those your knives need before you compare extras. Each range is explained on our grit chart.
Size
Longer stones (about 7 to 8 inches) make chef's knives easier because more of the edge fits on each stroke. Most stones here are 7 to 8.3 inches long.
Base type
Bamboo frames with a rubber insert, solid silicone holders and plain plastic bases all work if they grip. You want rubber or silicone touching both the stone and the counter. A bamboo frame without rubber feet will slide on a wet counter; a damp towel underneath fixes that.
Soaking vs splash-and-go
Most budget stones need a 10 to 15 minute soak. Splash-and-go stones like Shapton's are ready immediately, and a weekly touch-up you can start in seconds is one you'll actually do.
Angle guides help, but only at first
A clip-on guide teaches your hand the angle. Japanese knives are often around 15° per side and German knives around 20°, though your knife maker's recommendation wins. After a few sessions most people take the guide off for good. Clip guides also change angle with blade width; for which type holds a true angle, the whetstone angle guide picks are the place to look. More angles are on the angle chart.
Stone material
Most budget kits use aluminum oxide (corundum) bonded into a soaking stone, as the Intelitopia listing states. Shapton's Kuromaku stones are a denser ceramic made to be used with surface water only. For a first kit, the grit you pick and a stone that stays flat matter more than what it's made of.
Warranty and support
Only the Amazon Basics set lists a warranty here (one year, limited). The others lean on large owner bases: a stone with tens of thousands of ratings has plenty of owners posting tips and answers when you get stuck.
↑ Back to all sectionsWhich knives to start on, and which to leave
| Knife | On a beginner kit? | Why |
|---|---|---|
| Cheap stainless chef's or utility knife | Start here | Forgiving steel, nothing to lose |
| German or Western kitchen knives | Yes, from week two | Tough steel that forgives small angle errors |
| Japanese kitchen knives (double bevel) | Yes, once the burr is easy | Harder, thinner steel; low angle; light pressure |
| Pocket and hunting knives | Yes | Short blades are easy to cover; see pocket knives |
| Serrated bread knives | No | A flat stone only touches the points; see serrated knives |
| Ceramic knives | No | Harder than most water stones; needs diamond; see ceramic knives |
| Single-bevel Japanese knives (yanagiba, deba) | Later | Different technique on each face |
| Scissors | Later | Possible on a stone with care; see scissors on a whetstone |
Not sure a stone is for you?
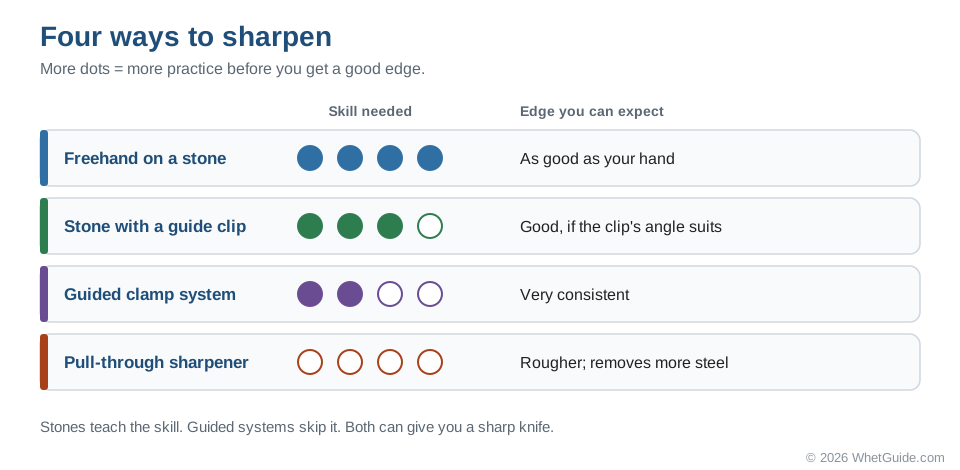
Then skip the freehand part. A guided system clamps the knife and holds the angle for you, and it still sharpens on flat abrasives. Most beginners who pass on stones go this way. Compare options in the best knife sharpeners for beginners and whetstone vs knife sharpener.
| Method | Skill needed | Edge quality | Good for |
|---|---|---|---|
| Freehand on a stone | Most; a few weeks of practice | As good as your hand | People who want the skill and the control |
| Stone with a guide clip | Less; the clip sets the angle | Good, if the clip's angle suits the knife | Learning freehand with a safety net |
| Guided clamp system | Little; the arm holds the angle | Very consistent | Exact angles without practice; see best sharpening system |
| Pull-through sharpener | None | Rougher; removes more steel | Quick fixes on cheap knives; see are pull-throughs bad? |
A honing rod is a separate tool for between sharpenings. It realigns an edge rather than sharpening it, and it keeps a stone-sharpened edge going longer. Honing rod vs whetstone explains how the two fit together.
↑ Back to all sectionsWorth adding later
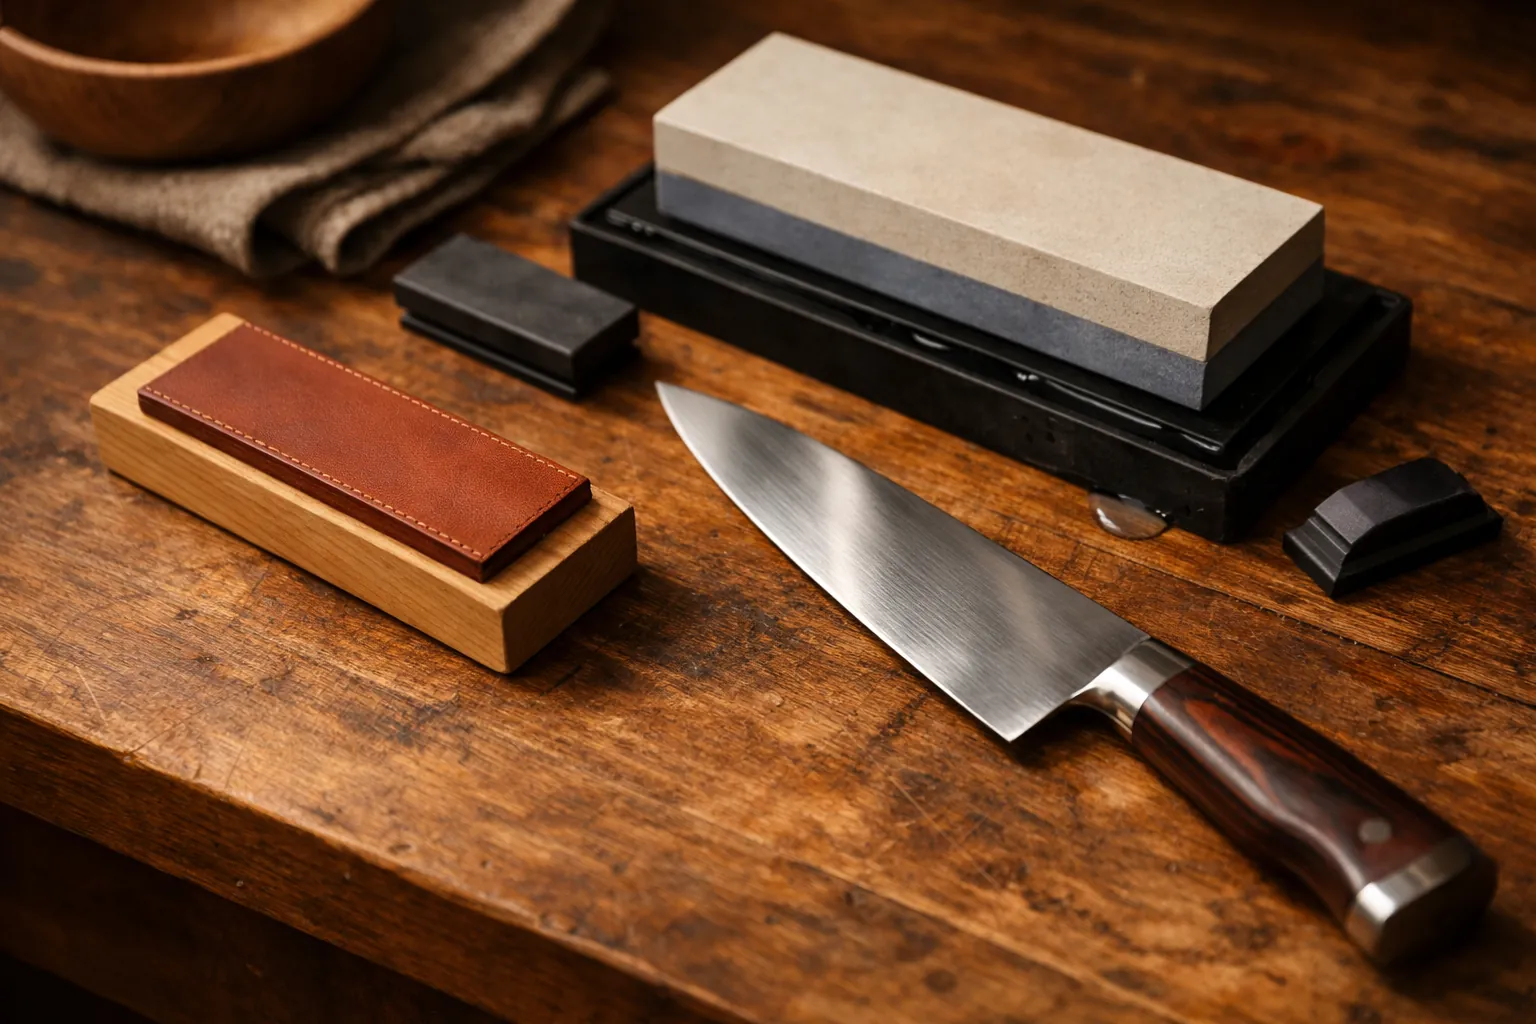
If your kit has no flattening stone, add one first. The Sharp Pebble 400/1000 kit includes one along with a coarse stone. To buy just a flattener, browse the whetstone flattener picks.
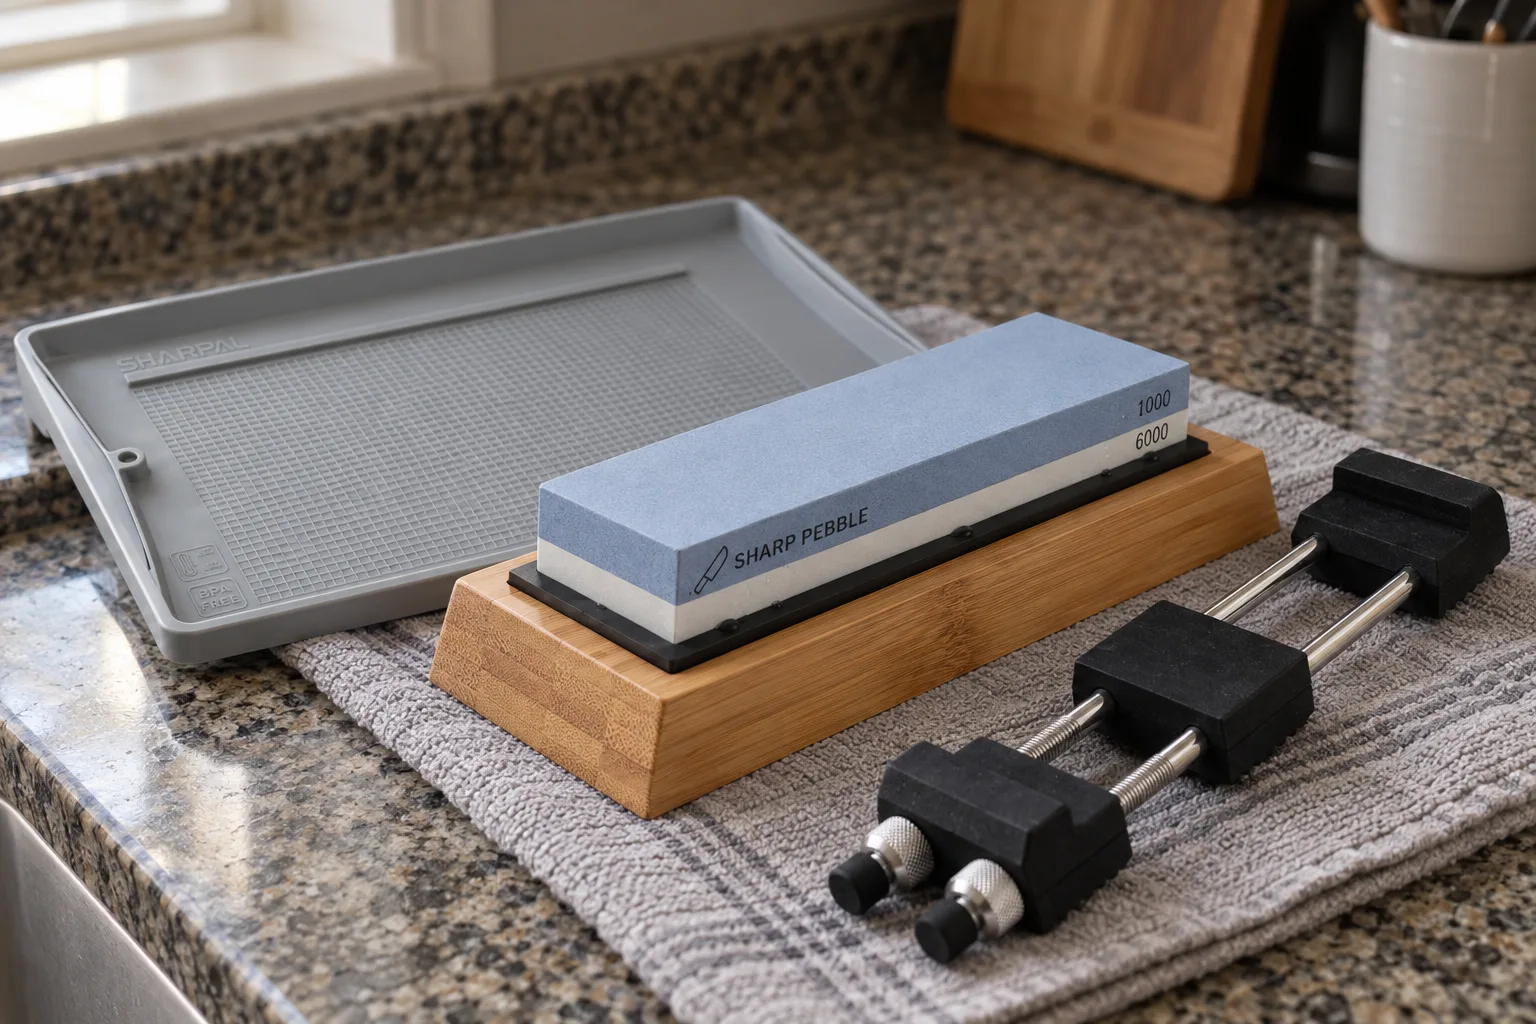
Very hard steels and chipped edges go faster on diamond, such as the SHARPAL 162N (325/1200) plate (whetstone vs diamond stone explains the difference). A leather strop handles the final polish. And if your kit's bamboo base wobbles, a sharpening stone holder with a rubber body is the cheapest fix.
| Add-on | Why | Buy it when |
|---|---|---|
| Flattening stone or diamond plate | Keeps the stone true | Your kit has none; first month |
| Stone holder (rubber or silicone) | Stops sliding better than a bare bamboo base | The base moves when you push the stone |
| Silicone sharpening tray | Catches slurry and grips the stone | The counter cleanup bothers you |
| Leather strop and compound | Clears the last of the burr | The stones feel comfortable |
| Angle wedges or pyramid guides | Set the angle by eye before each stroke | You have no guide, or don't trust the clip |
| Fine-point permanent marker | The angle check | Day one |
| 30X loupe | See the burr and the scratch pattern | You want to know what the stone is doing |
| Cut-resistant glove | Protects the hand pressing on the blade | Day one, if you're nervous |
| Cheap practice knife | Somewhere to make mistakes | Day one |
What to buy next
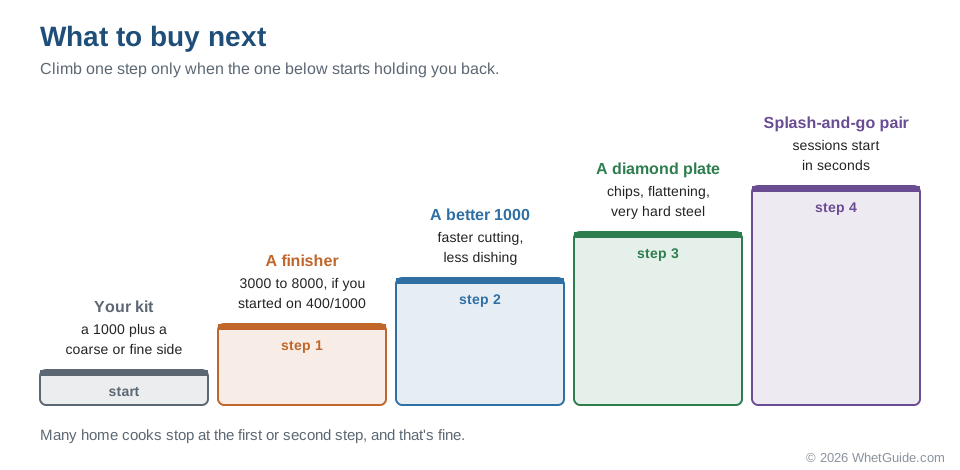
Once the burr is easy and you sharpen without thinking about the steps, the kit's weak spots show. Here's the order most people fill them in.
| Next step | Examples | Price tier | Why |
|---|---|---|---|
| A finisher, if you started on 400/1000 | Sharp Pebble 3000/8000 with flattener; King 6000 | Budget to mid | Refines the 1000 edge |
| A better 1000 | Suehiro Cerax 1000 (splash-and-go); Naniwa 1000 | Mid | Faster cutting, less dishing |
| A diamond plate | SHARPAL 162N; DMT 8-inch bench stone | Budget to mid | Repairs chips, flattens stones, handles very hard steel |
| A splash-and-go pair | Shapton Kuromaku 1000 + 5000 | Mid to high | Sessions start in seconds |
| A brand-matched stone | Wusthof's own 1000/3000 stone | High | For owners who want the maker's stone |
A premium coarse stone, such as a Naniwa Chosera 400, is the last upgrade most home cooks make, and many never need it. For the single-stone options, our best Japanese whetstones and best diamond stones guides go through them one by one.
↑ Back to all sectionsWhat not to buy yet
Knives and Stones warns beginners off three things: long grit ladders, permanent angle guides and pull-through sharpeners. We agree, and we'd add a few more.
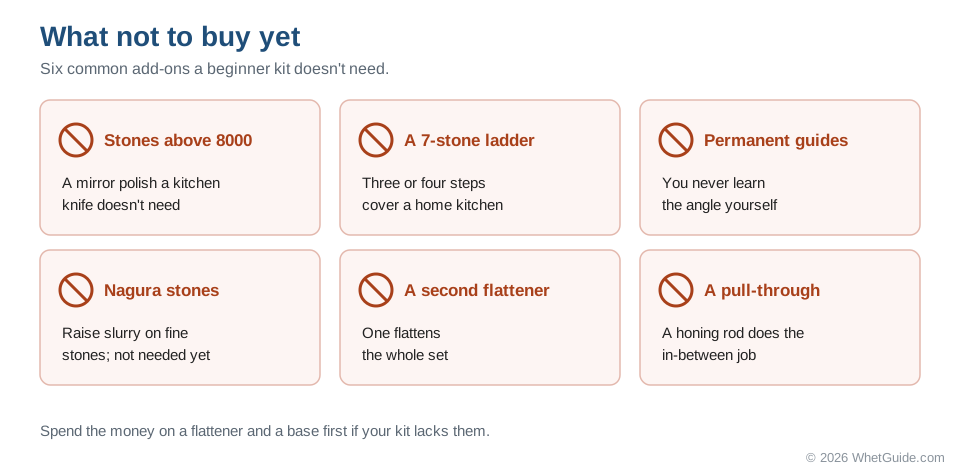
- Stones above 8000. A 10000 or 12000 gives a mirror polish that a kitchen knife doesn't need, and a beginner's edge won't hold the benefit.
- Every grit in the catalog. Three or four steps cover everything a home kitchen does; a ladder of seven stones mostly means more time per session.
- Permanent angle guides you can't take off. They keep you from learning the angle at all.
- Nagura stones for a beginner set. They raise slurry on fine stones, and a beginner on a 6000 doesn't need them.
- A second flattener. One is enough for the whole set.
- A pull-through sharpener "for in between". A honing rod does that job without taking steel off.
Beginner whetstone cheat sheet
The whole routine on one card. Screenshot it for the kitchen, or print it.
| Grits | 400 repairs chips. 1000 sharpens (most sessions). 3000 to 8000 refines and polishes, light pressure. Skip 10000+ for now. |
|---|---|
| Before | Soak 10 to 15 min until bubbles stop (splash-and-go: just wet it). Damp towel, base, stone. Push-test: nothing slides. |
| Angle | Maker's figure first. Often about 15° per side for Japanese, 20° for German. Marker on the bevel; adjust until one stroke clears it evenly. |
| Burr | Side A until a burr runs the full edge on side B. Flip. Then lighter, alternating, finer stone. Feel across the edge, never along it. |
| Strokes | Full length, drift across the width, turn the stone end for end each session. Keep the surface wet; leave the slurry. |
| Test | Paper slice, tomato skin, no light reflecting from the edge. |
| Flat | Straightedge every few sessions. Pencil grid, rub on the flattener, stop when the pencil is gone. Round the edges. |
| After | Rinse stone and knife. Air-dry the stone fully before boxing. Store flat, away from frost. No oil on water stones. |
What to buy first
Look at your worst knife. If it still cuts paper with some effort, the Sharp Pebble 1000/6000 is enough. If it has chips or flattens tomatoes, buy a four-grit box: the Intelitopia set if you want the strop, the Amazon Basics set if you'd rather have the warranty. Save the Shapton Kuromaku A-set for when you know you'll keep at it. Whatever arrives, spend your first session with the step-by-step whetstone guide open beside the sink.
And give it the week. The first two sessions feel clumsy for almost everyone. By day three or four, when the burr shows up where you expect it, the stone stops being a puzzle and starts being a habit.
Specs and sales figures come from Amazon listings checked October 3, 2026, as do the ratings. We do not quote prices we have not checked. Other sources, read November 14, 2026: GearJunkie's review of the Sharp Pebble 1000/6000 (guide angle, slurry, swarf, soaking and storage); Knives and Stones, best whetstone for beginners (one medium stone, the burr as feedback, what to skip); Knife Informer, best whetstone knife sharpeners (choosing by edge condition, grit numbers that differ by maker, flatteners); Japanese Chef's Knife (JCK), whetstones for beginners (arato, nakato and shiageto stage names, plus soaking); Bustle, best whetstones (grit as sandpaper). How we research · Affiliate disclosure