Quick answer: which system to buy
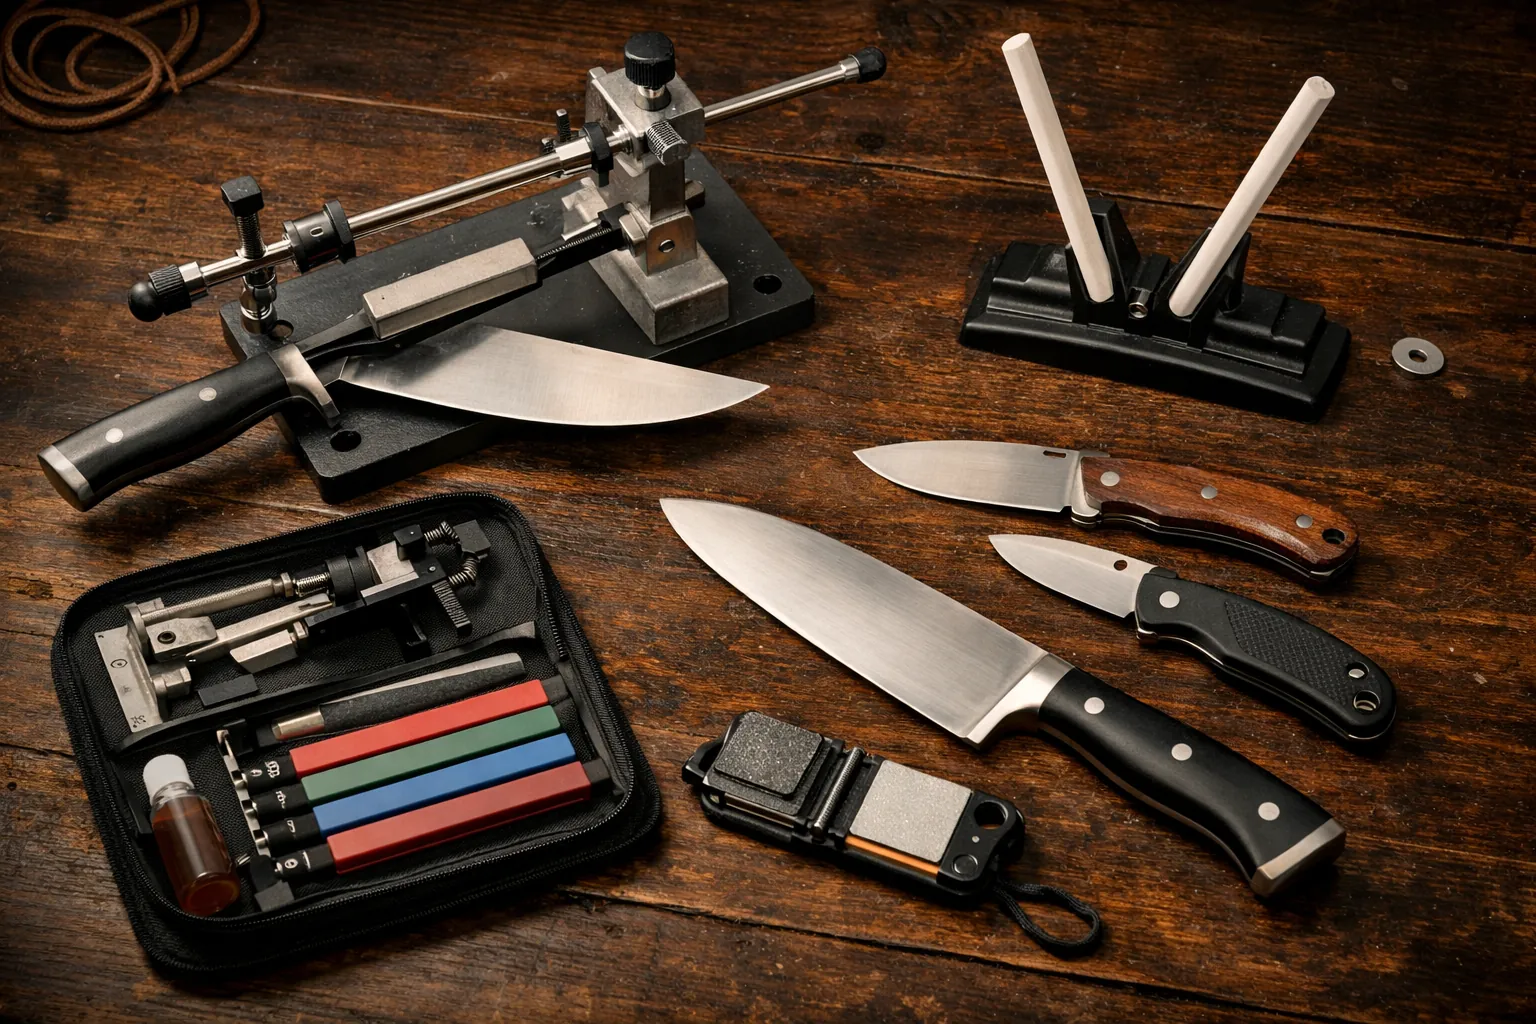
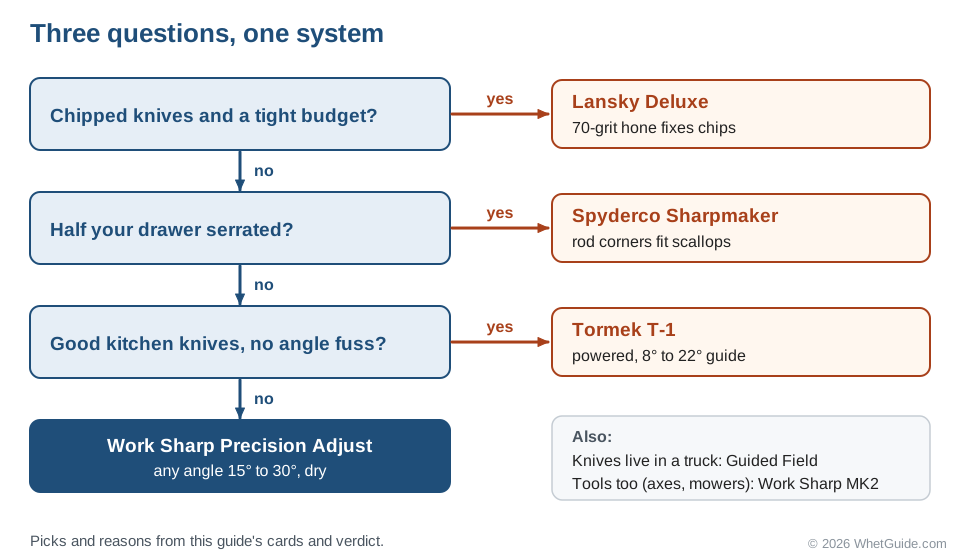
The best knife sharpening system for most people is the Work Sharp Precision Adjust. It clamps the knife and holds any angle from 15° to 30°, with no oil or water involved. On a tight budget, the Lansky Deluxe 5-stone gets you the most grits. The Spyderco Sharpmaker is quicker for routine upkeep and handles serrated knives. And if you'd rather a machine did the work on kitchen knives, the Tormek T-1 is the premium pick.
| Your situation | Buy |
|---|---|
| First system for mixed kitchen and pocket knives | Work Sharp Precision Adjust |
| Chipped or neglected knives, small budget | Lansky Deluxe 5-stone |
| Mostly maintenance, lots of serrated blades | Spyderco Sharpmaker |
| A collection of good kitchen knives, no thinking about angles | Tormek T-1 |
| Knives that live in a truck, pack or tackle box | Work Sharp Guided Field Sharpener (see its card) |
| Knives plus other tools (scissors, axes and mower blades) | Work Sharp MK2 (see its card) |
| You'd rather learn freehand on stones | A 1000/6000 whetstone: see beginner whetstone sets |
Powered machines without a guide arm have their own roundup, the best electric knife sharpener guide. A boxed kit? Try the best knife sharpening kit. Unsure which Precision Adjust? Compare the four models.
The rest of this page is for after you've picked. It shows how each system sets its angle and how to find the angle your knife already has. There's a first session start to finish, plus the places clamp systems struggle. If you only read one extra section, read the marker method: it's the quick habit that separates a good first edge from a scratched-up one.
Quick picks
| Best overall | Work Sharp Precision Adjust | Amazon |
|---|---|---|
| Best value | Lansky Deluxe 5-Stone System | Amazon |
| Best for maintenance and serrated knives | Spyderco Tri-Angle Sharpmaker | Amazon |
| Best premium manual system | Work Sharp Professional Precision Adjust | Amazon |
| Best powered system for kitchen knives | Tormek T-1 Kitchen Knife Sharpener | Amazon |
| Best for knives and tools | Work Sharp MK2 Knife & Tool Sharpener | Amazon |
| Best portable system | Work Sharp Guided Field Sharpener | Amazon |
How we picked these systems
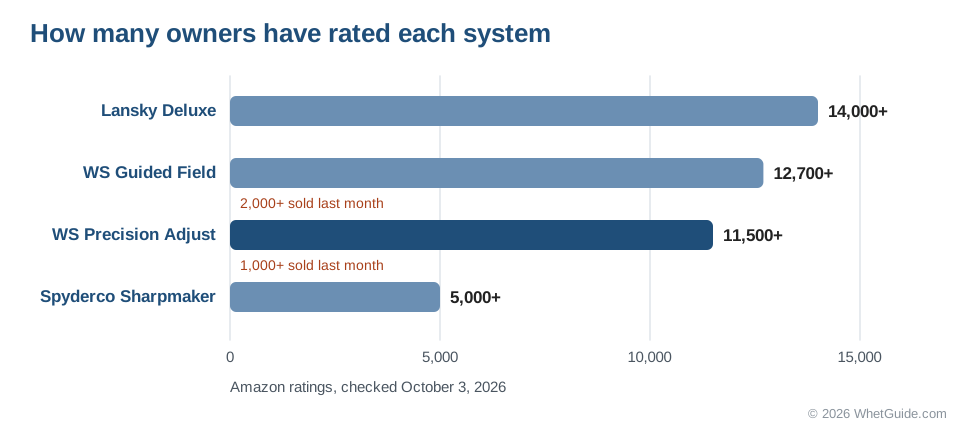
Two Work Sharp models lead this category on Amazon (figures from October 3, 2026). The Guided Field Sharpener sold 2,000+ last month and has 12,700+ ratings; the Precision Adjust sold 1,000+ with 11,500+ ratings. The Lansky Deluxe has 14,000+ ratings and the Spyderco Sharpmaker 5,000+.
Sales got a system onto the list. What ranked it was how it sets and holds the angle, which angles it covers, and whether its abrasives can repair a dull knife or only maintain a sharp one. Specs come from the Amazon listings, and for Tormek from Tormek's own product pages.
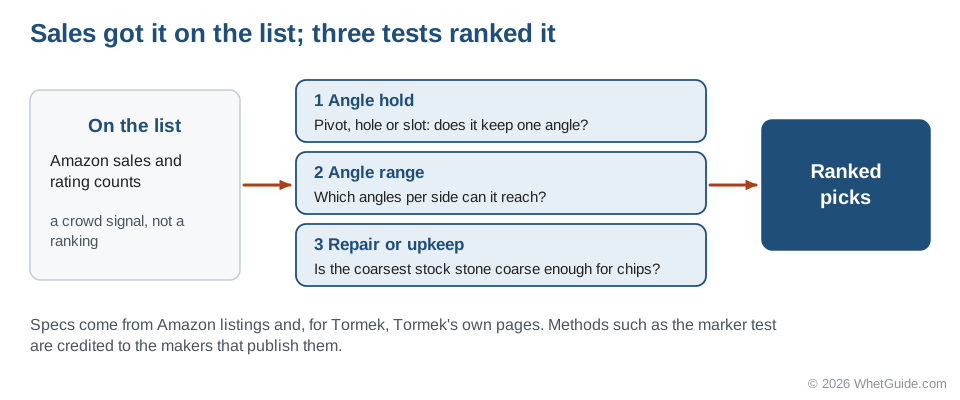
Where a maker publishes its own method, we use it and name it: Wicked Edge's marker method and clamp height, Spyderco's inclusive angles, Tormek's angle range. Where a reviewer or retailer makes a claim we lean on, such as GearJunkie's steel tiers or Sharpening Supplies' notes on clamp jaws, it's credited where it appears. The details are in how we research.
↑ Back to all sectionsWhat a guided system actually does
A sharpening stroke depends on how hard you press and where the stone travels, but mostly on the angle between stone and blade. Freehand, your hands manage all of it at once, and the angle is the part that goes wrong. Tilt a degree high on one stroke and a degree low on the next and the bevel comes out slightly rounded, with the very edge never quite meeting.
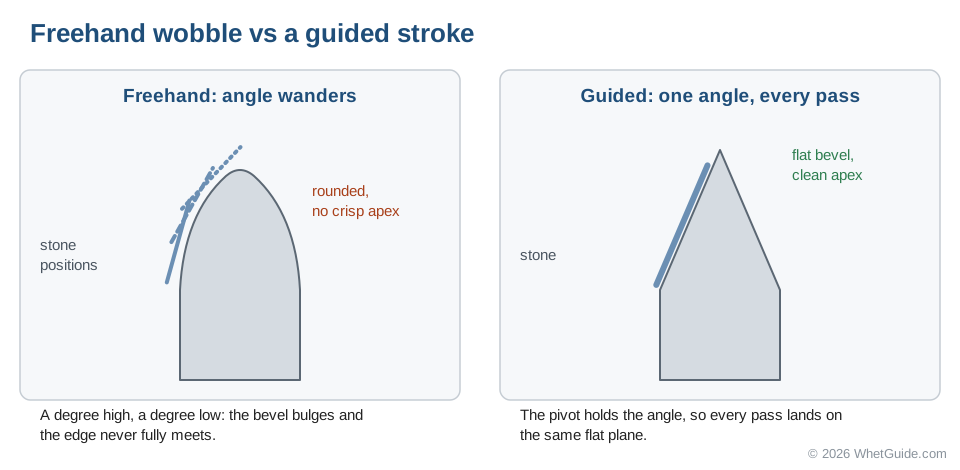
A guided system takes the angle away from your hands. The knife sits in a clamp so it can't move. The stone rides on an arm or a rod that pivots from a fixed point, or sits in a hole drilled at a set angle, so it meets the blade at the same angle on every pass. What's left is the stroke: how hard you press, how long the pass is, and when you stop.
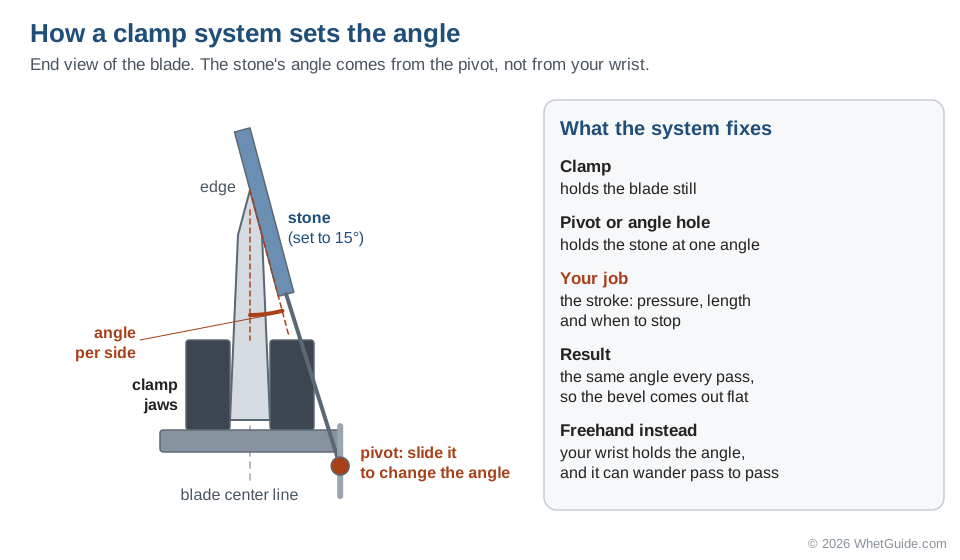
A beginner on a Precision Adjust can get a cleaner bevel on the first evening than most people get after a month on a whetstone. Nobody is more talented on a clamp system. The bevel is just flat because the geometry won't let it be anything else.
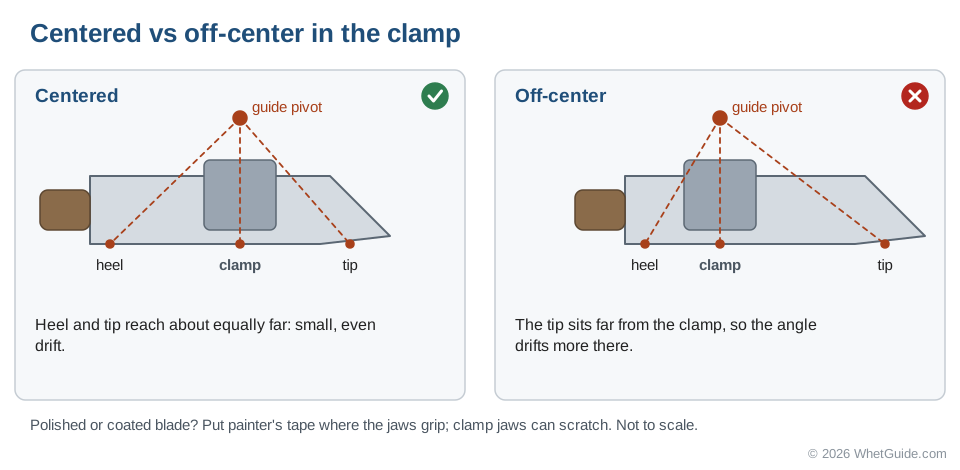
A clamp doesn't fix everything. On clamp-and-rod kits like the Lansky, the angle shifts a little toward the heel and tip, because the hone reaches farther from the clamp there than it does at the middle. Centering the blade in the clamp keeps that drift small, which is why every maker talks about a "sweet spot". The clamp also can't change the knife's own shape: a recurve, a very short blade or a long slicer each causes its own trouble (see where clamp systems struggle).
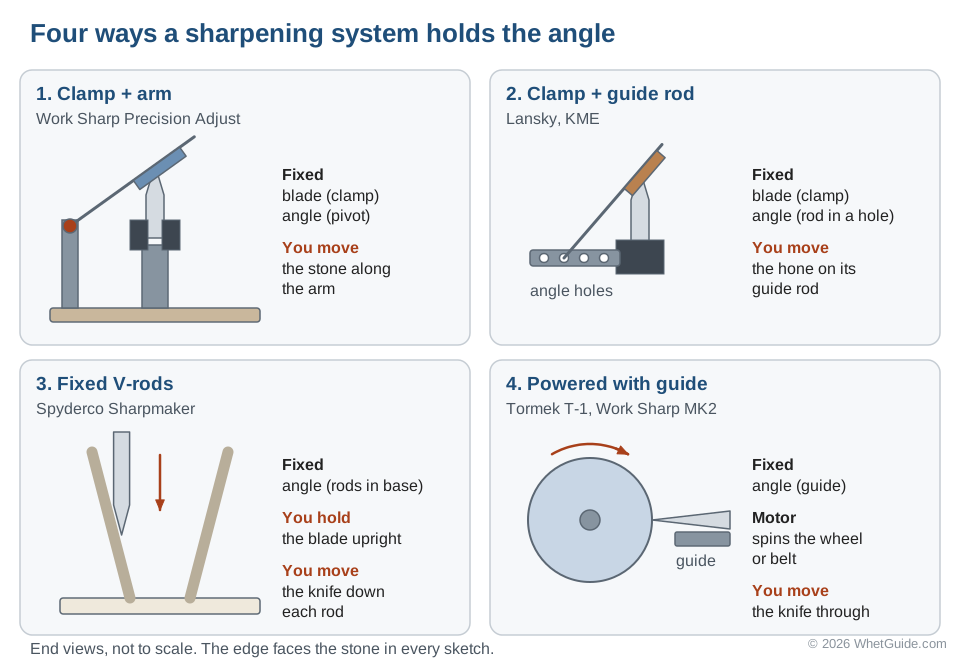
Four ways a system holds the angle
| Type | How it works | Strengths | Examples |
|---|---|---|---|
| Clamp + arm (benchtop) | Knife clamped; abrasive slides on a rod at a set angle | Easiest, adjustable angle | Work Sharp Precision Adjust |
| Clamp + guide rod (hand-held) | Each hone's rod goes in an angle hole on the clamp | Cheap, many grits, portable | Lansky |
| Fixed V-rods | Rods set at a fixed angle; you hold the knife vertical | Fast maintenance, serrations | Spyderco Sharpmaker |
| Powered with guide | Wheel or belt with an angle guide | Speed, volume | Tormek T-1, Work Sharp MK2 |
If you'd rather hold the knife and move the stone, the Edge Pro sharpener works the other way round from a clamp system: the blade lies on a table and the stone rides a guided arm.
Two more designs sit at the enthusiast end and are covered further down. The Edge Pro is table-style: the knife lies loose on a platform and you move the stone, which suits long and thin blades. Wicked Edge is dual-arm: the knife is clamped upright in a vise with one arm on each side, so you work both bevels without flipping the knife.
Which mechanism suits you comes down to how you sharpen. If you sharpen a few knives a few times a year, the clamp-and-arm design is the least fiddly. If you sharpen often and only want to restore an edge that's already close, the V-rods are faster than any clamp. If you sharpen for a household of knife abusers, a powered machine earns its noise.
Best fixed angle knife sharpener
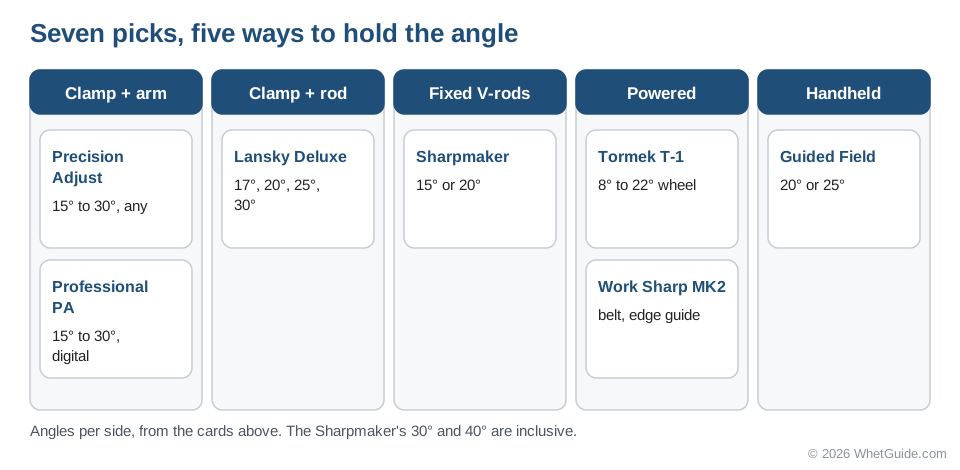
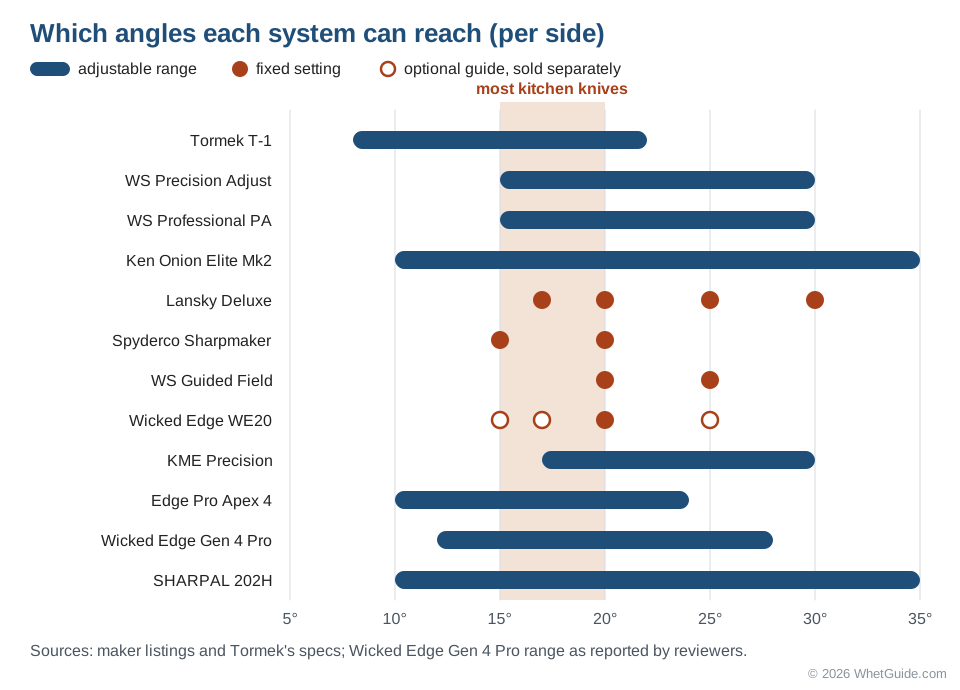
A fixed angle sharpener gives you a few set choices instead of a dial, so there's little to get wrong. Among the guided systems on this page, the Lansky offers four preset angle holes, from 17 to 30 degrees. The Spyderco Sharpmaker holds 15 or 20 degrees per side with its V-rods, and the Work Sharp Guided Field Sharpener has 20 and 25 degree guides.
The catch is the match. A fixed angle only helps when one of the presets is close to what your knife was ground at. Many German kitchen knives sit near 20 degrees, so any of these can work. Many Japanese knives sit nearer 15, which leaves the Sharpmaker as the closest fit. If your knives fall between the presets, a guided sharpening system with a dial, like the Work Sharp Precision Adjust, is the better buy.
↑ Back to all sectionsThe 7 best knife sharpening systems
Work Sharp Precision Adjust
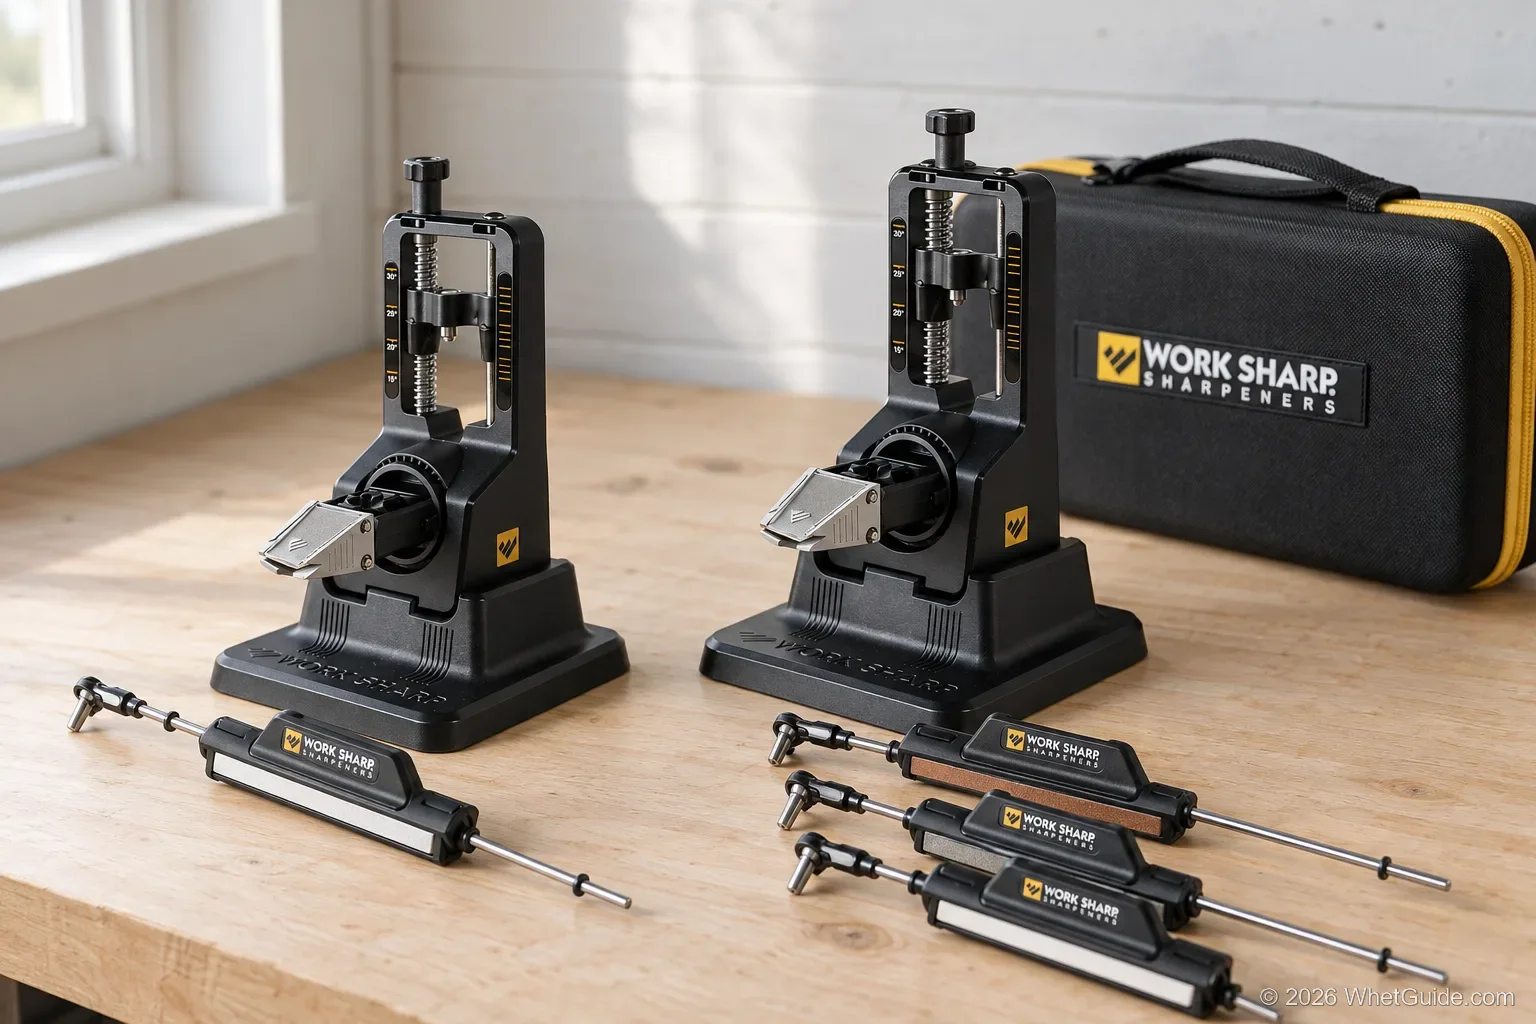
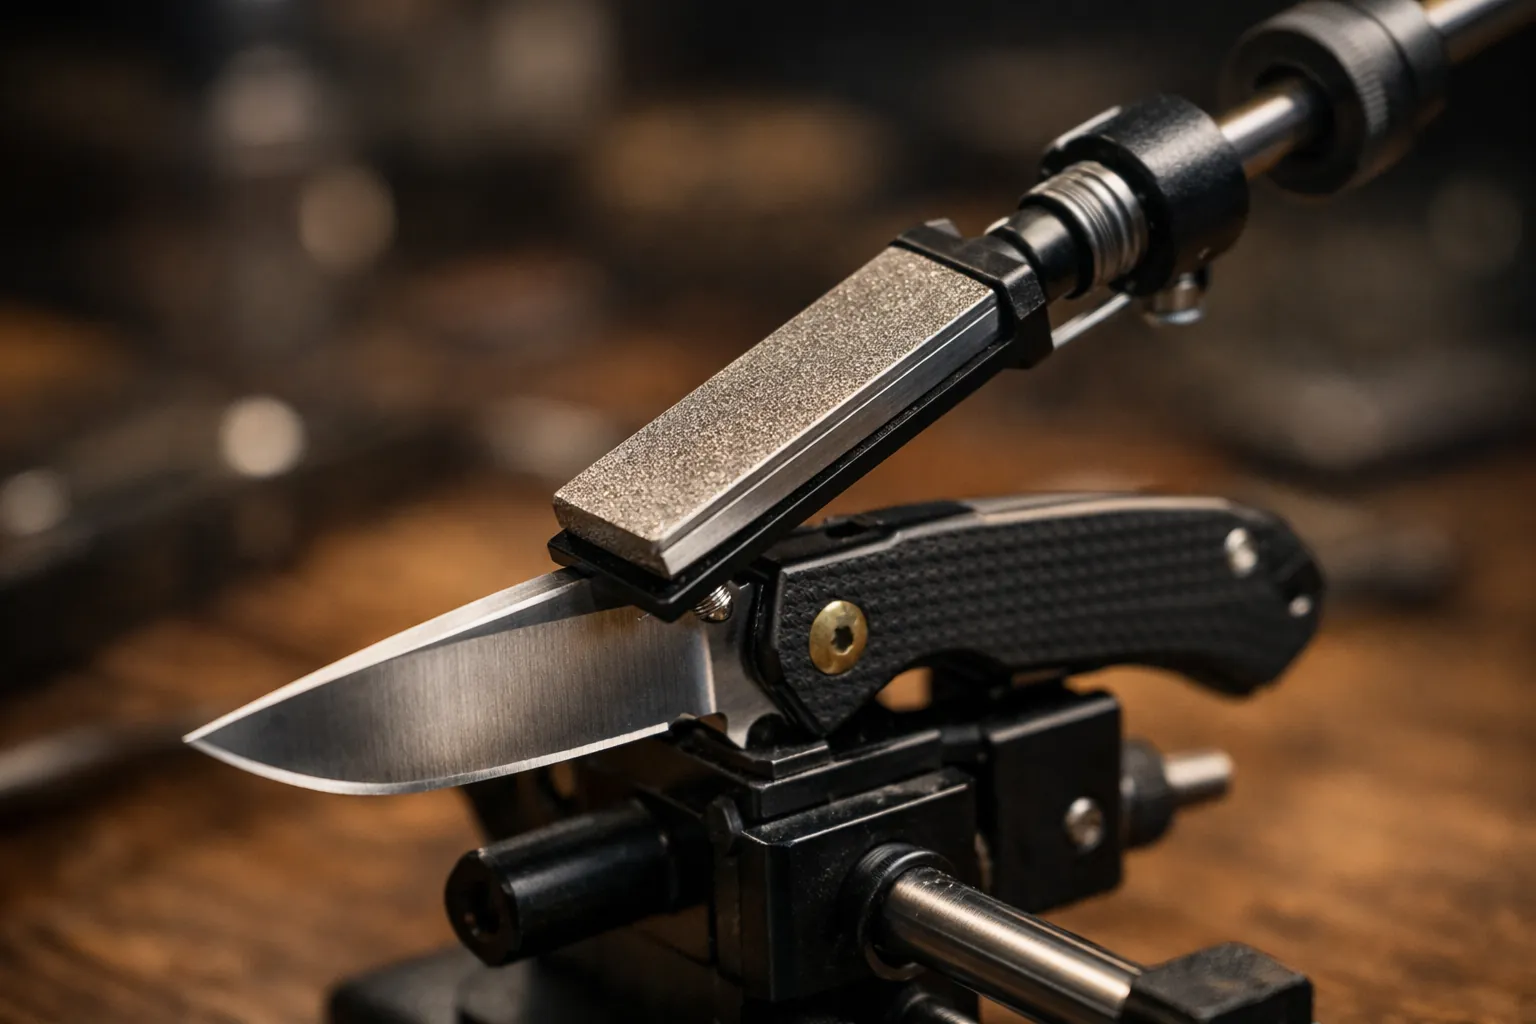
The knife sits in a clamp on a stable base. You dial the angle anywhere from 15° to 30°, then slide a three-sided abrasive along a rod across the edge. That range covers Japanese and Western kitchen knives as well as pocket and hunting knives. It runs dry and quiet, and it lives in a drawer.
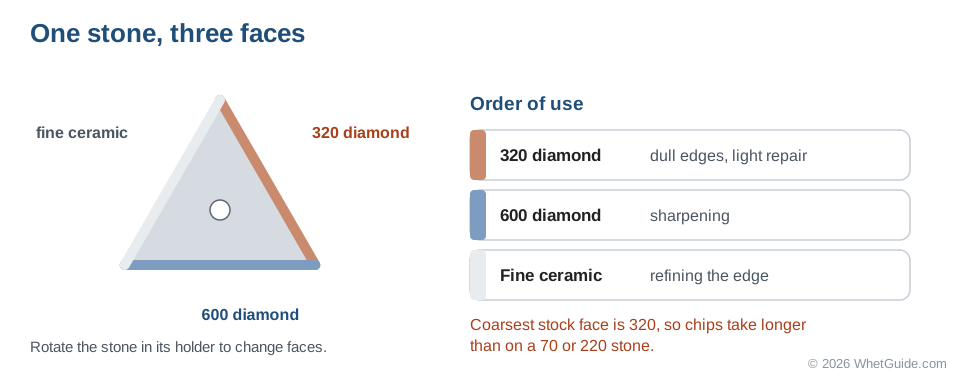
Its weak spot is grit range. Going from 320 diamond to fine ceramic handles maintenance and moderate dullness fine, but heavy reprofiling takes longer than on a system with a very coarse stone.
- Typeclamp + arm, benchtop
- Angle15° to 30°
- AbrasivesTri-Brasive 320/600 diamond + fine ceramic
- Lubricantnone
- Warranty3 years
Why it stands out
- Easiest system to set up and use
- Any angle from 15° to 30°
- No oil, no water, no power
Think twice if
- You regularly reprofile or repair chips
- You want a mirror polish without upgrades
Lansky Deluxe 5-Stone System
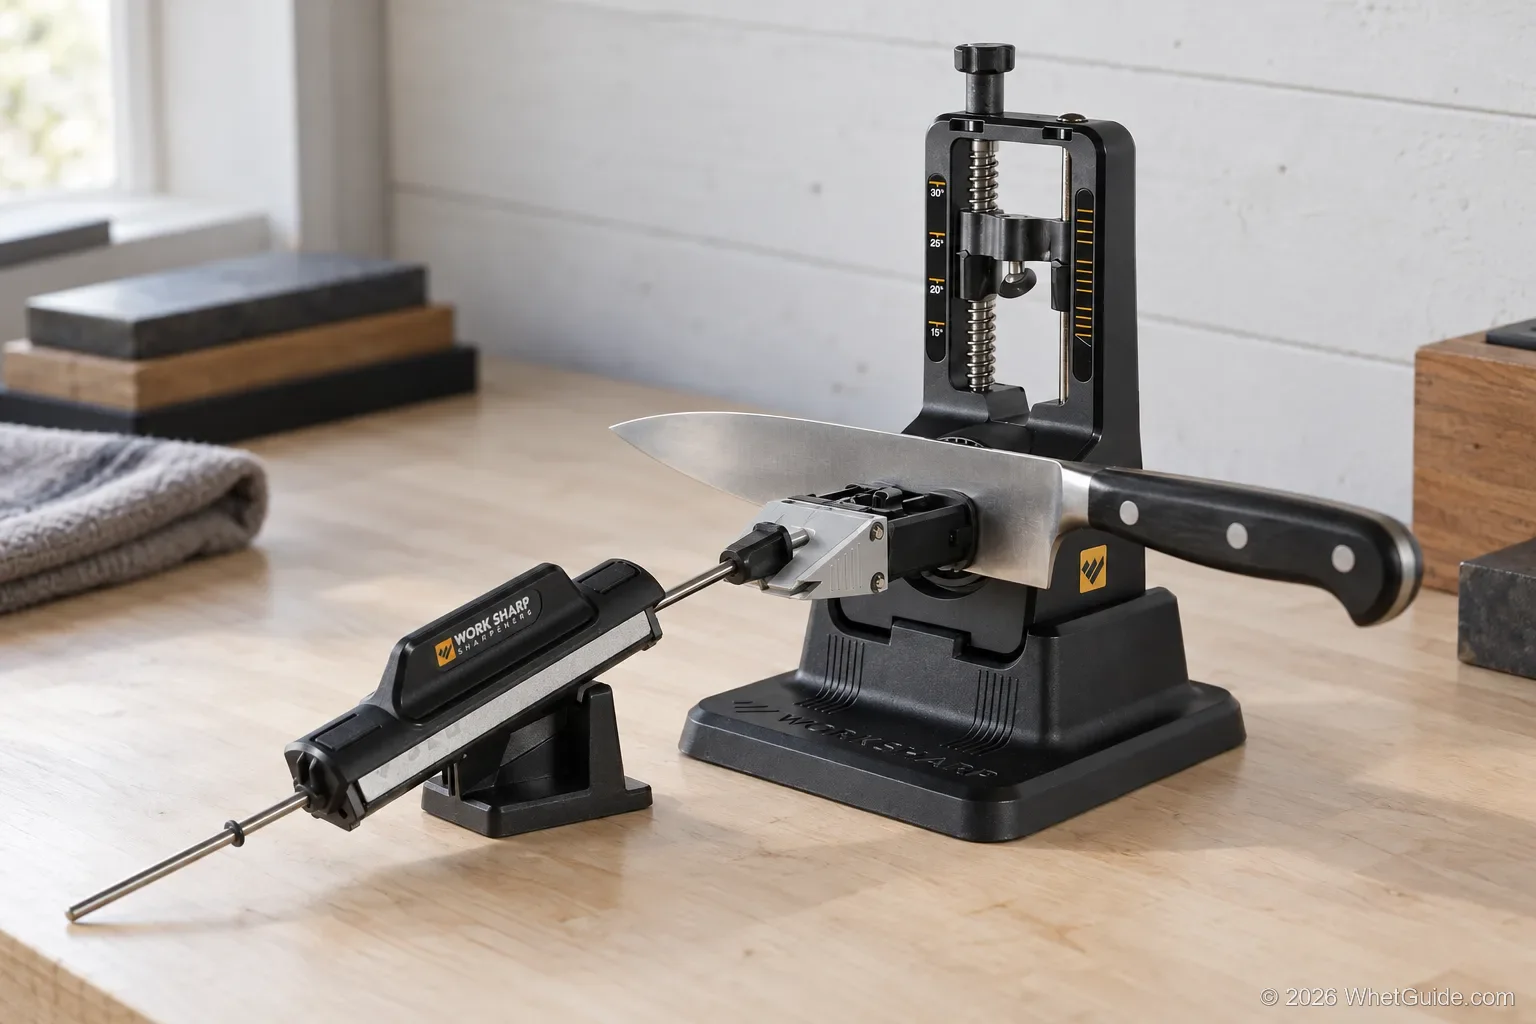
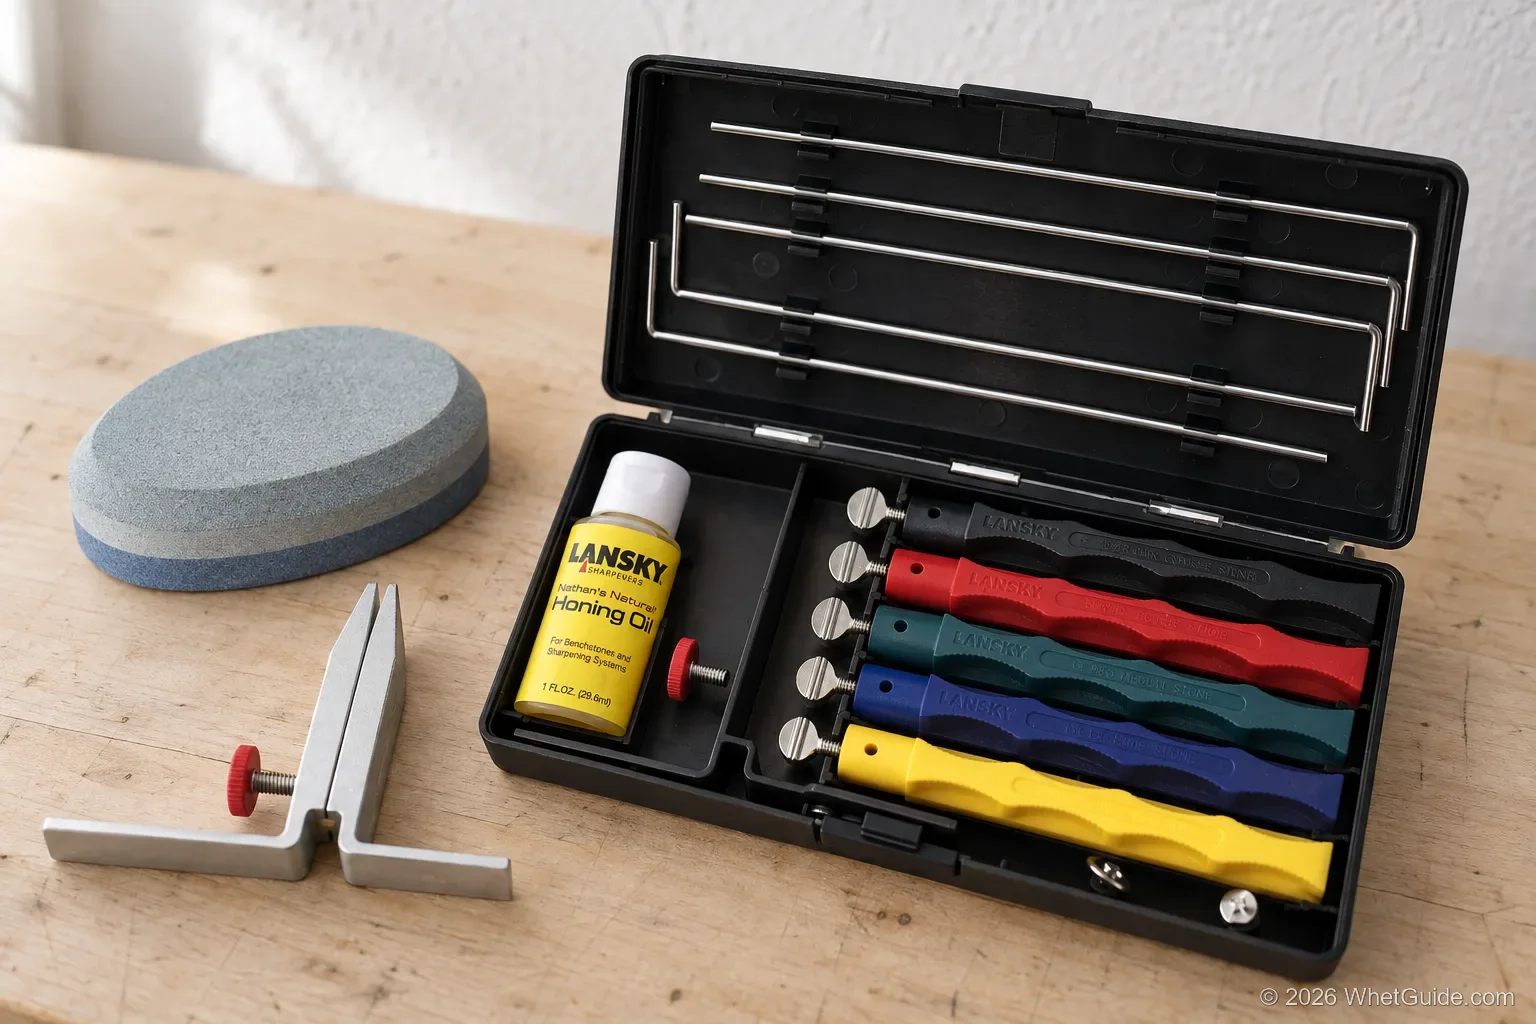
Five hones for less than most guided systems cost: a 70-grit extra coarse for fixing chips up to a 1000-grit ultra fine for finishing. A clamp and guide rods come with it, and everything packs into a carry case, honing oil included. You hold the clamp in one hand, so it takes more coordination than the Work Sharp, and the angles are fixed presets. Nothing else here gives you this much grit range per dollar.
- Typeclamp + guide rod, hand-held
- Angles17°, 20°, 25°, 30° preset
- Hones70, 120, 280, 600, 1000 (Lansky scale)
- Includedclamp, rods, honing oil, case
Why it stands out
- Widest grit range for the money
- Compact case for trips
- 14,000+ ratings
Think twice if
- You need 15° per side (lowest preset is 17°)
- You dislike oil
Spyderco Tri-Angle Sharpmaker
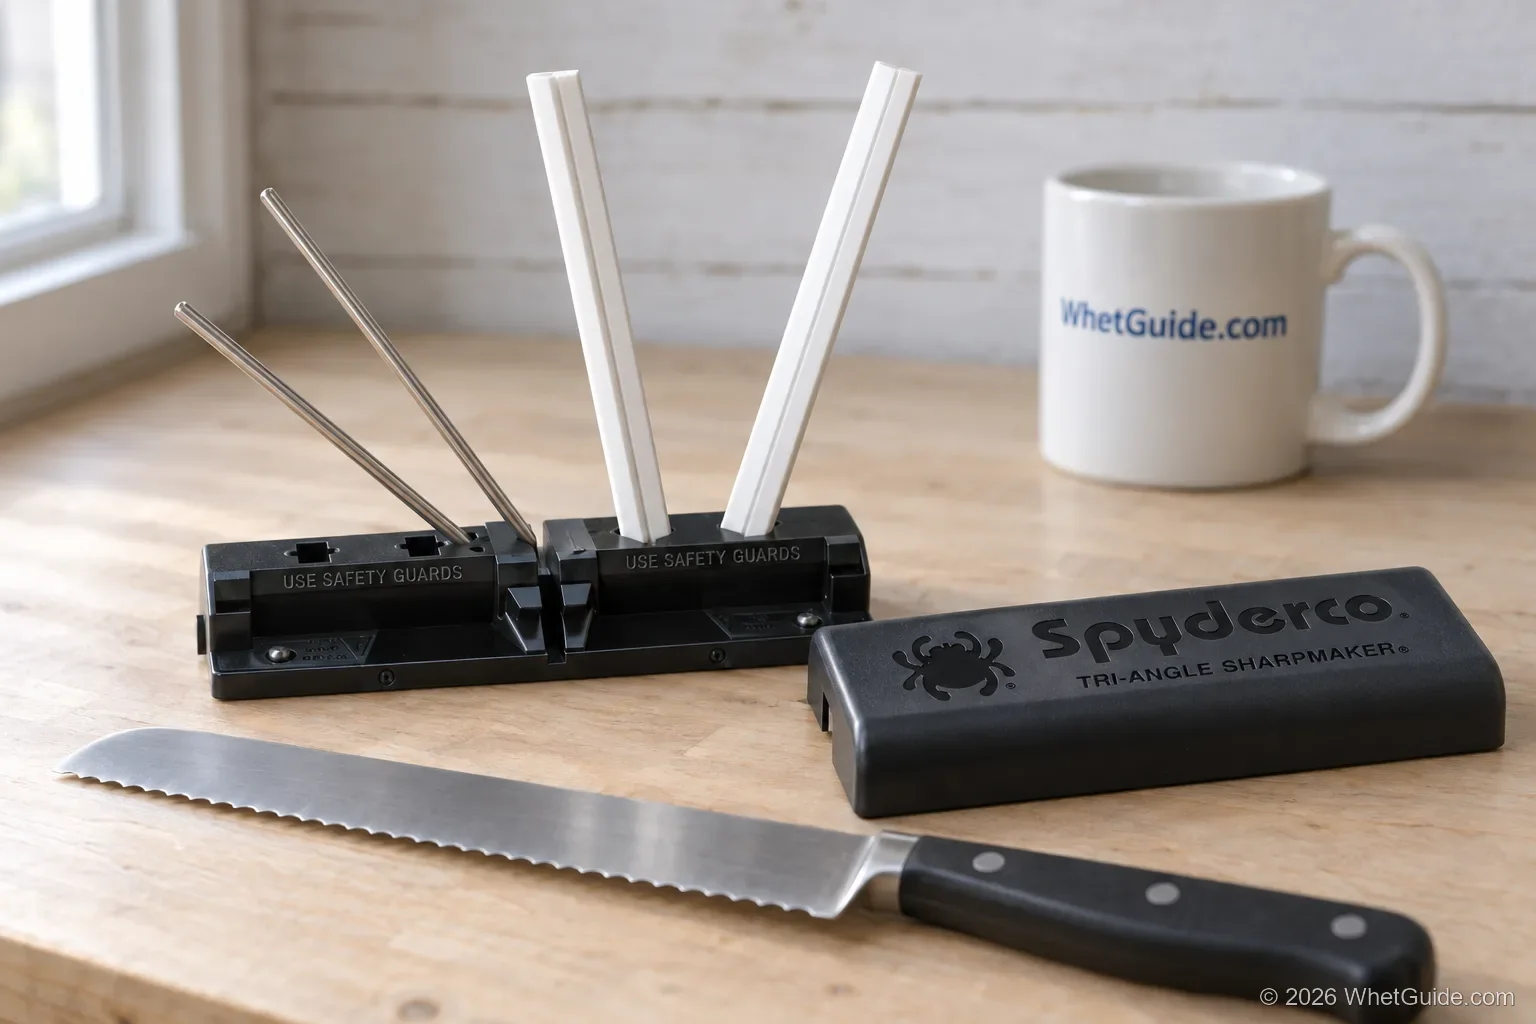
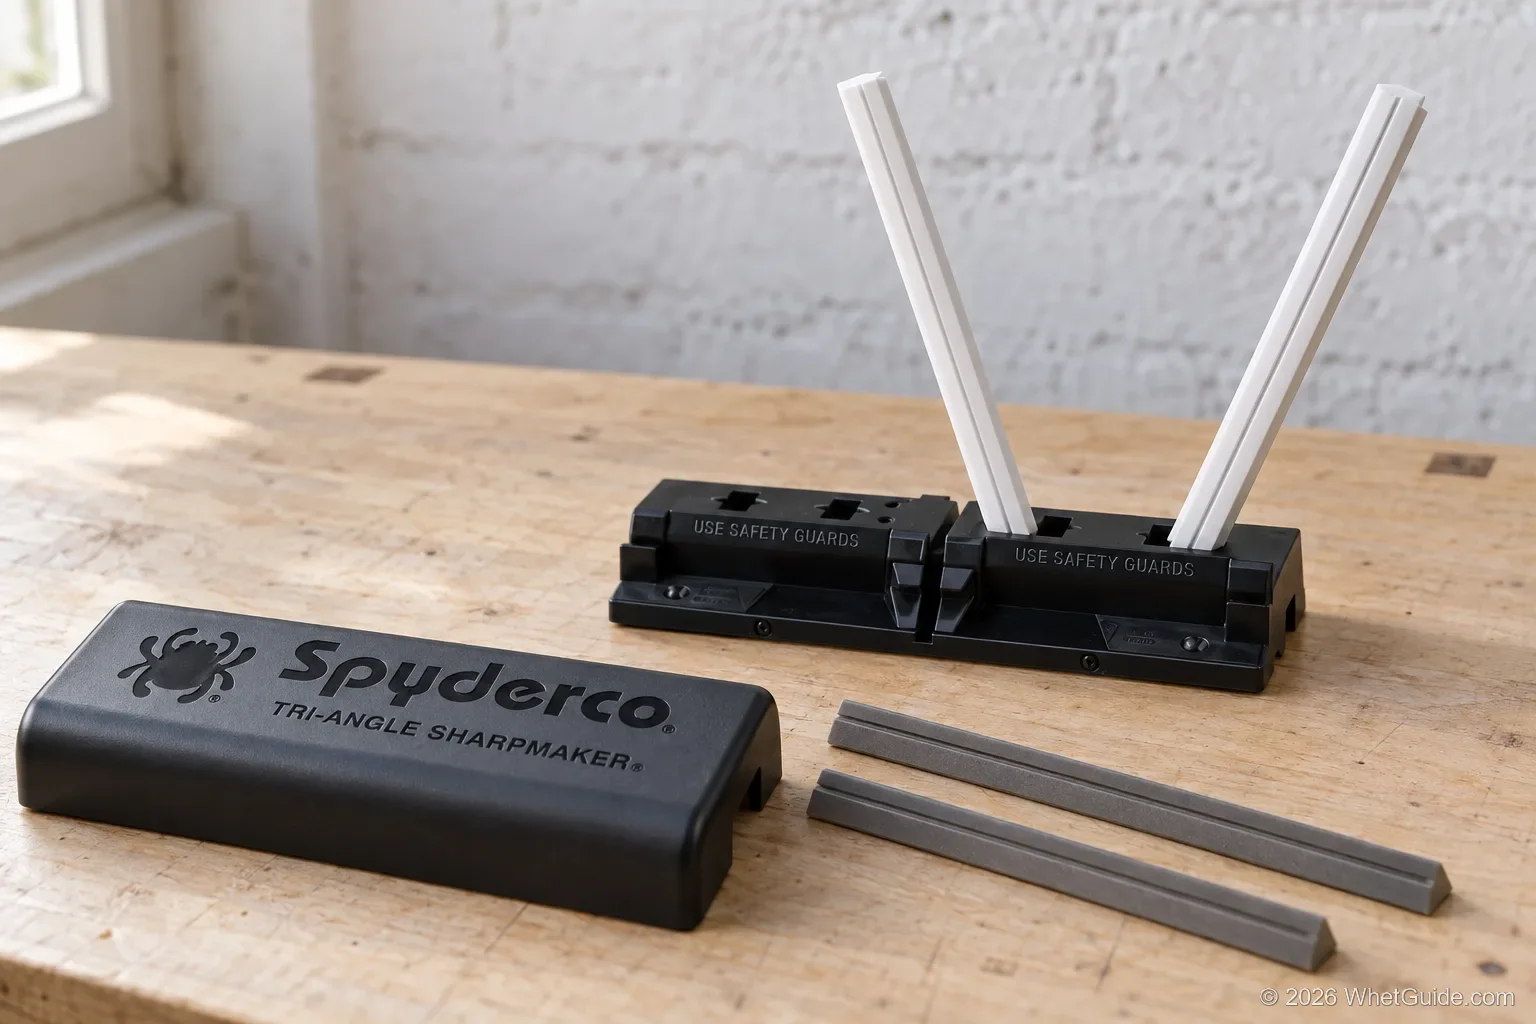
Drop the rods into the base, hold the blade vertical, stroke down. That's the whole technique, and it's why this is the fastest way to keep a knife sharp. The rounded corners of the triangular stones fit into serrations, so a serrated edge takes no more effort than a plain one. Out of the box it maintains edges. To fix dull knives quickly, add Spyderco's diamond stones. The Sharpmaker gets a longer write-up in the full Sharpmaker review.
- Typefixed V-rods
- Angles30° and 40° inclusive (15°/20° per side)
- Stonesmedium and fine alumina ceramic
- Edgesplain and serrated
- Warranty2 years
Why it stands out
- Minimal learning curve
- Excellent on serrated edges
- No clamping, no oil
Think twice if
- You need angles other than 15° or 20° per side
- Your knives are very dull and you won't buy the diamond stones
Work Sharp Professional Precision Adjust
Same clamp-and-arm idea as the base model, rebuilt in metal with a digital angle indicator. It also carries seven abrasives, starting at 220 diamond for heavy work and ending on a leather strop. Buy it if you sharpen often and want one manual system that covers repair through polish. If you're eyeing a dual-arm system above this, read is Wicked Edge worth it first.
- Typeclamp + arm, metal construction
- Angle15° to 30°, digital angle indicator
- Abrasives220, 320, 400, 600, 800 diamond, fine ceramic, leather strop
Why it stands out
- Seven abrasives, coarse to strop
- Digital angle indicator
- Metal build
Think twice if
- You sharpen a few times a year: the base model is enough
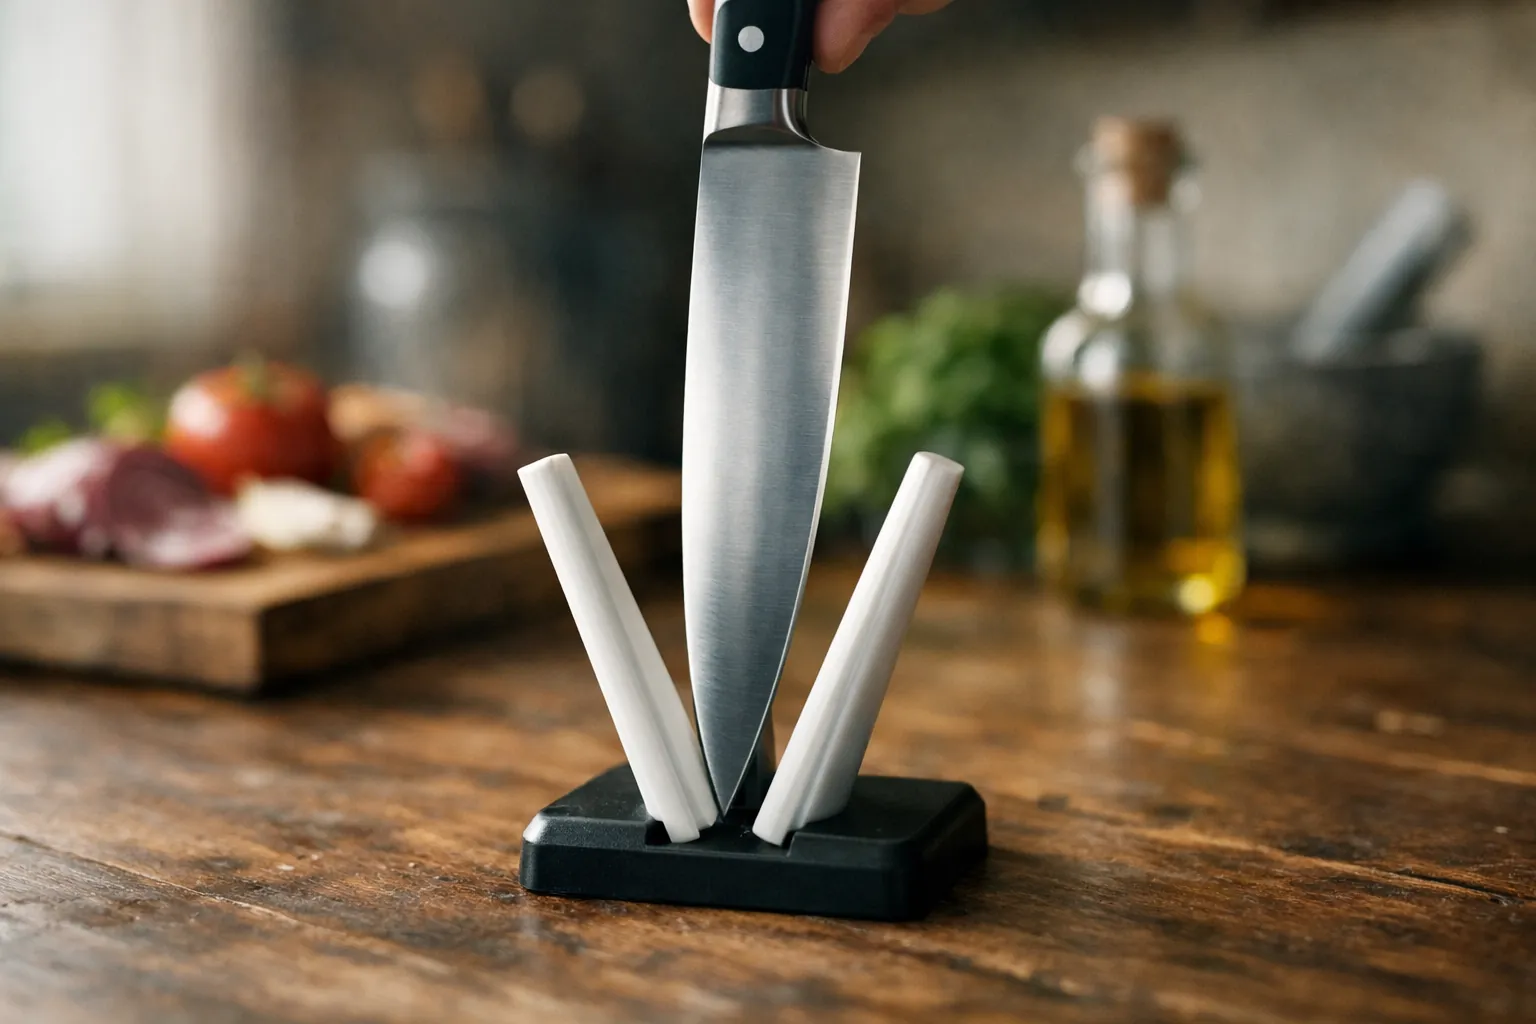
Tormek T-1 Kitchen Knife Sharpener
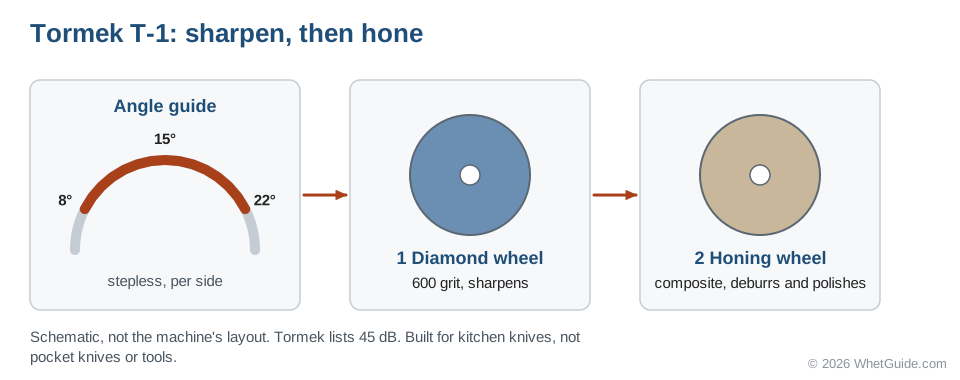
Restaurant-level edges on kitchen knives, no skill required, at a premium price. A patented guide sets any angle from 8° to 22° per side. A fine diamond wheel sharpens, then a composite honing wheel deburrs and polishes. The housing is cast zinc and the machine is quiet. Given the cost, it makes sense only if you own a collection of good kitchen knives. Compare it with the rest of the line in Tormek T-1 vs T-2 vs T-4 vs T-8.
- Typepowered diamond wheel + composite honing wheel
- Angle8° to 22° per side, stepless
- Wheel600 grit diamond
- Noise45 dB
- Warranty8 years with registration (per Tormek)
Why it stands out
- Fast, repeatable, removes little steel
- Wide angle range for Japanese and Western knives
Think twice if
- You also want to sharpen pocket or outdoor tools
- You're on a budget
Work Sharp MK2 Knife & Tool Sharpener
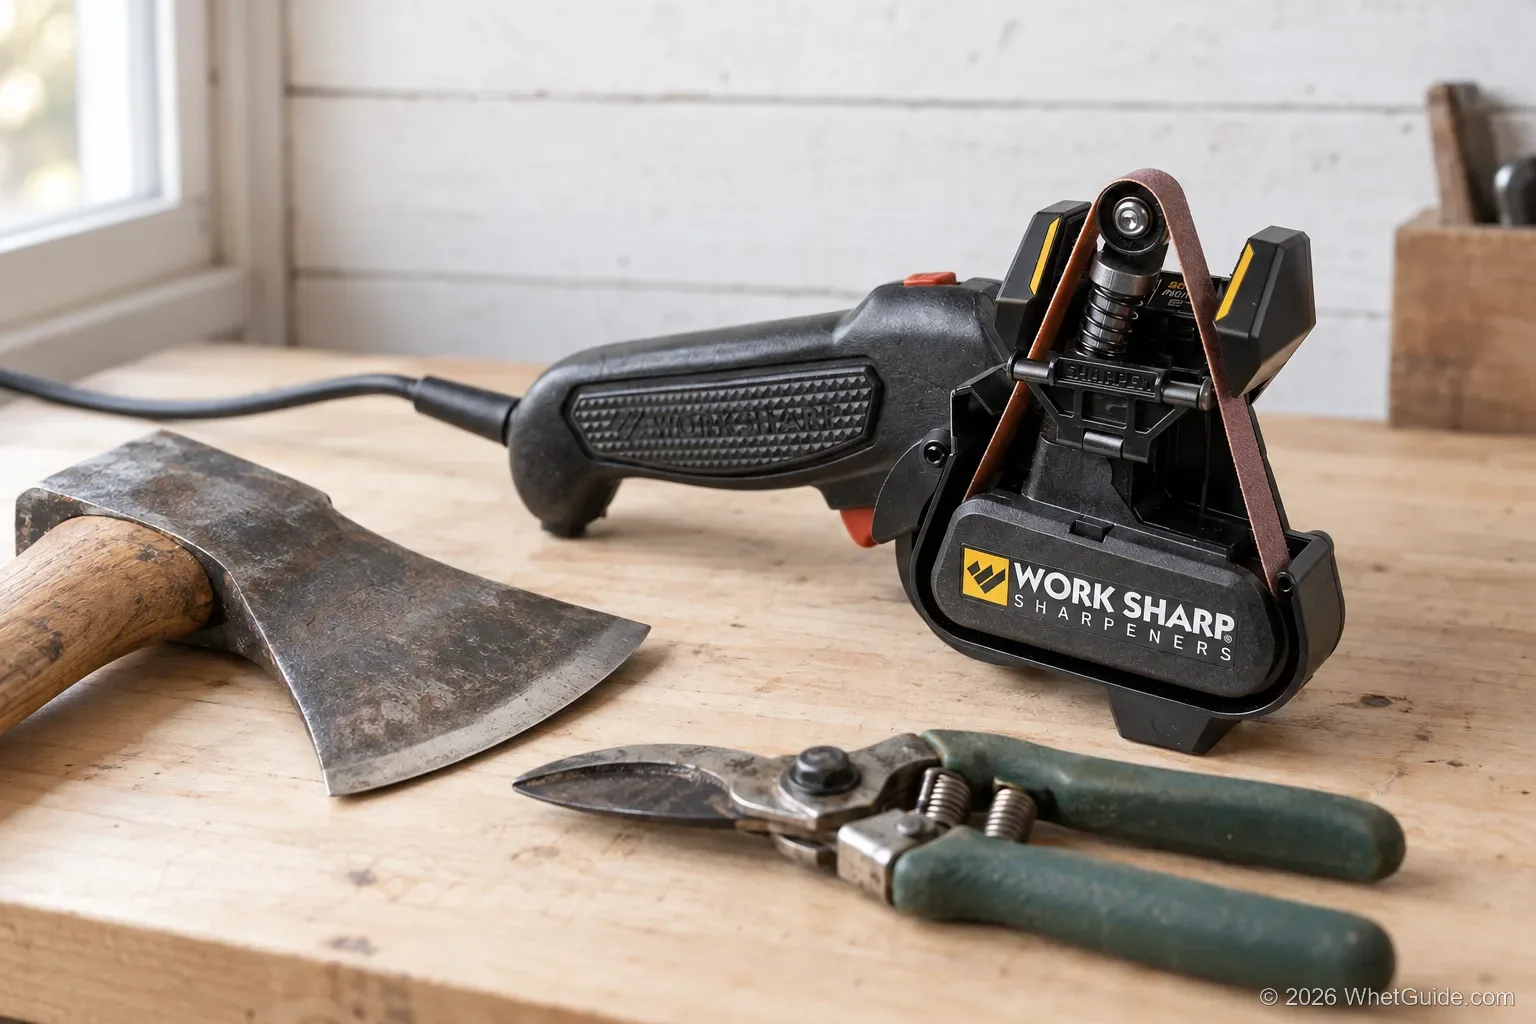
Flexible belts sharpen almost anything with an edge, and fast. Kitchen knives and mower blades both go on them. The two-speed motor lets you slow down for knives. Use a light touch: belts remove metal quickly and will round a tip if you pull it off the belt. For how to use it safely, is Work Sharp a good knife sharpener? has the rundown.
- Typepowered belt with edge guide
- Motortwo-speed
- Beltsflexible
- Usesknives, serrated knives, scissors, mower blades, axes
- Warranty3 years
Why it stands out
- Handles almost any edge
- Very fast
Think twice if
- You own thin, expensive Japanese knives
Work Sharp Guided Field Sharpener
The most-bought sharpener in this guide fits five abrasives and angle guides into a flat body that slips into a pocket. Keep it in the truck or tackle box for outdoor knives.
- Typehandheld field sharpener
- Guides20° and 25°
- Abrasivescoarse and fine diamond plates, ceramic rod, leather strop
- Weight135 g
Why it stands out
- Pocketable, complete
- 12,700+ ratings
Think twice if
- You need low angles for Japanese kitchen knives
Side-by-side comparison
| System | Angles (per side) | Abrasives | Serrated | Power | Pick it if |
|---|---|---|---|---|---|
| Work Sharp Precision Adjust | 15°–30° | Diamond + ceramic | Listed | No | You want the easiest adjustable system |
| Lansky Deluxe | 17/20/25/30° | 5 hones, 70–1000 | Pro kit | No | You need to repair chips cheaply |
| Spyderco Sharpmaker | 15° / 20° | Medium + fine ceramic | Yes | No | You maintain edges and own serrated knives |
| WS Professional PA | 15°–30° | 5 diamond, ceramic, strop | Check listing | No | You sharpen weekly and want repair to polish |
| Tormek T-1 | 8°–22° | Diamond + honing wheel | No | Yes | You own thin Japanese kitchen knives |
| Work Sharp MK2 | Guide (check listing) | Belts | Yes | Yes | You also sharpen tools and garden blades |
| WS Guided Field | 20° / 25° | Diamond, ceramic, strop | Ceramic rod | No | You carry a knife outdoors |
"Check listing" means the detail isn't confirmed in the product listing we checked.
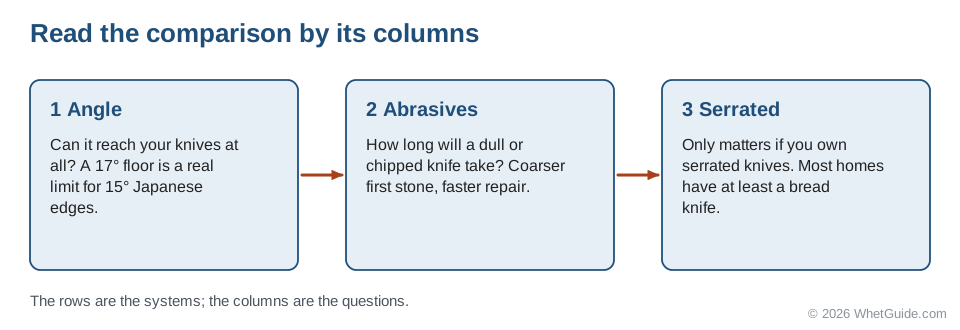
Read the table by its columns, not its rows. The angle column decides whether a system can do your knives at all; a 17° floor is a real limit if your drawer is mostly Japanese. The abrasives column decides how long a dull or chipped knife takes. The serrated column matters only if you own serrated knives you care about, and most households own at least a bread knife.
How the Precision Adjust compares with the Lansky and Sharpmaker
These three are the systems people actually cross-shop, and they fail in different places. The Precision Adjust is easiest to use but starts at 320 grit, so a chipped edge takes patience. The Lansky has the widest grit range for the money, but the clamp and oil make it slower to set up. The Sharpmaker has almost no learning curve but only two angles and stock ceramic that cuts slowly, so very dull knives need its diamond stones.
| Precision Adjust | Lansky Deluxe | Sharpmaker | |
|---|---|---|---|
| Angle | Any, 15° to 30° | 17°, 20°, 25°, 30° | 15° or 20° |
| Coarsest stock abrasive | 320 diamond | 70 (Lansky scale) | Medium ceramic |
| Wet or dry | Dry | Honing oil (included) | Dry |
| Where it sits | On the bench | In your hand | On the bench |
| Biggest weakness | Slow on chips | Fiddly setup | Two angles only |
If you want one answer, buy the Precision Adjust. If most of your knives are folders with serrations, the Sharpmaker beats it. The clamp-versus-clamp comparison is Work Sharp vs Lansky, and the angle question gets answered in the Sharpmaker review and Precision Adjust review. If you're weighing a Tormek instead, Tormek T-1 vs T-2 vs T-4 vs T-8 sorts the line by what you sharpen. Wondering whether a dual-arm system is worth the jump? See is Wicked Edge worth it. Lansky owners can pick a kit with which Lansky system and learn the clamp in how to use a Lansky sharpener.
Per-side vs inclusive angles: the number that trips people up
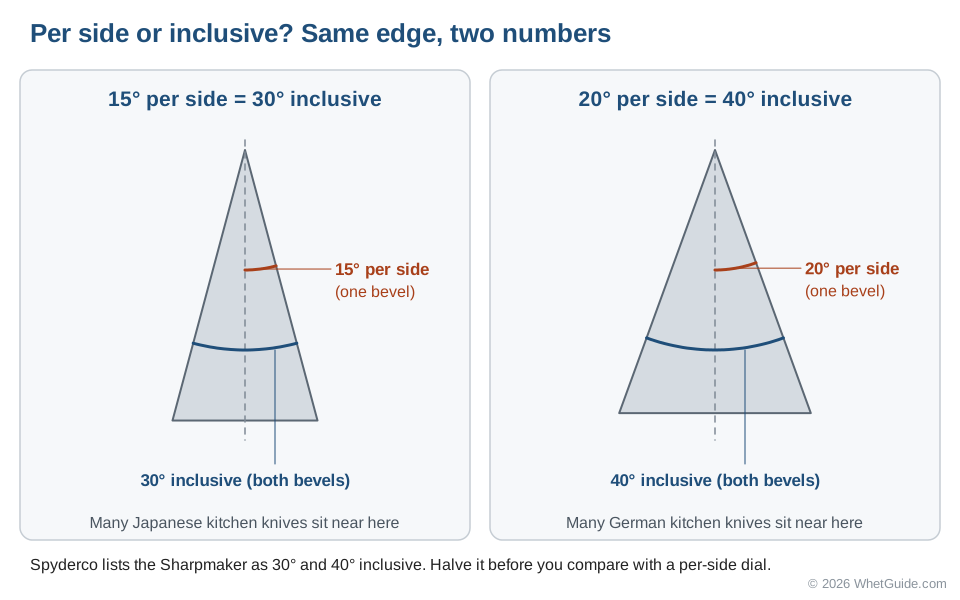
An edge has two bevels that meet at the apex. The angle of one bevel against the blade's center line is the per-side angle. Add both sides together and you get the inclusive angle. A 15° per-side edge is a 30° inclusive edge; they're the same edge described two ways.
Most systems in this guide use per-side numbers. The Precision Adjust dial reads 15° to 30° per side, the Tormek T-1 guide 8° to 22° per side, and the Lansky holes 17°, 20°, 25° and 30° per side. Spyderco goes the other way. It lists the Sharpmaker as 30° and 40°, which are inclusive numbers, so the settings are really 15° and 20° per side. Read a Sharpmaker spec as per-side and you'd think it can only sharpen axes.
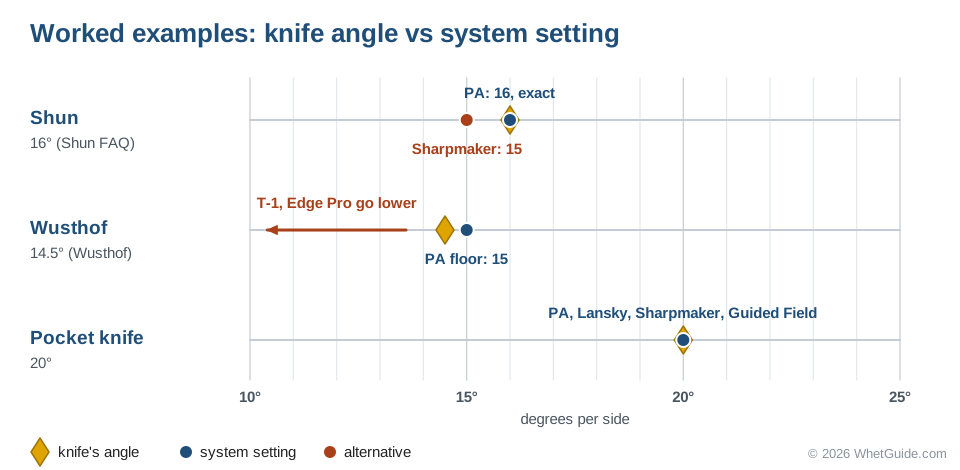
Three worked examples, using makers' own numbers where we have them:
- A Shun is ground at 16° per side, per Shun's own FAQ. Set the Precision Adjust to 16 and you match it exactly. On a Sharpmaker the nearest setting is 15° per side (its 30° inclusive), which is close enough that most cooks never notice (Shun sharpening angle).
- Wusthof's articles give 14.5° per side for its standard blades. The Precision Adjust's floor is 15°, half a degree steeper, which you won't feel on the board. The Tormek T-1 and Edge Pro go lower if you want an exact match, and Wusthof sharpening angle has the figures.
- A pocket knife at 20° per side is the easy case. Every system here reaches 20°, including the Lansky's 20° hole, the Sharpmaker's 40° inclusive setting and the Guided Field's 20° guide.
If your knife's maker doesn't publish a number, measure what's there with the marker method, or start from the brand rows in our angle chart. The angle calculator converts between per-side and inclusive and works out the block height for freehand stones.
↑ Back to all sectionsThe grit ladder: what each system's stones can do
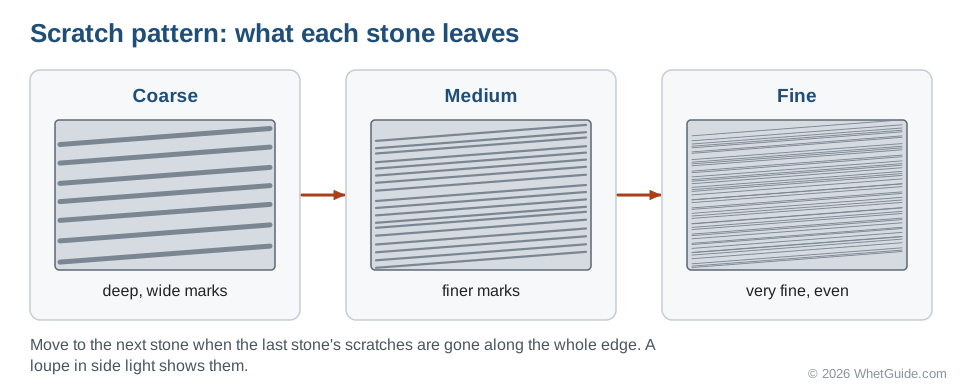
Grit decides speed and finish. Coarse abrasives remove steel quickly and leave deep scratches, which is what you want for chips and for moving an edge to a new angle. Medium abrasives turn a dull edge sharp. Fine abrasives and ceramics refine the scratch pattern, and a strop takes off the last of the burr.
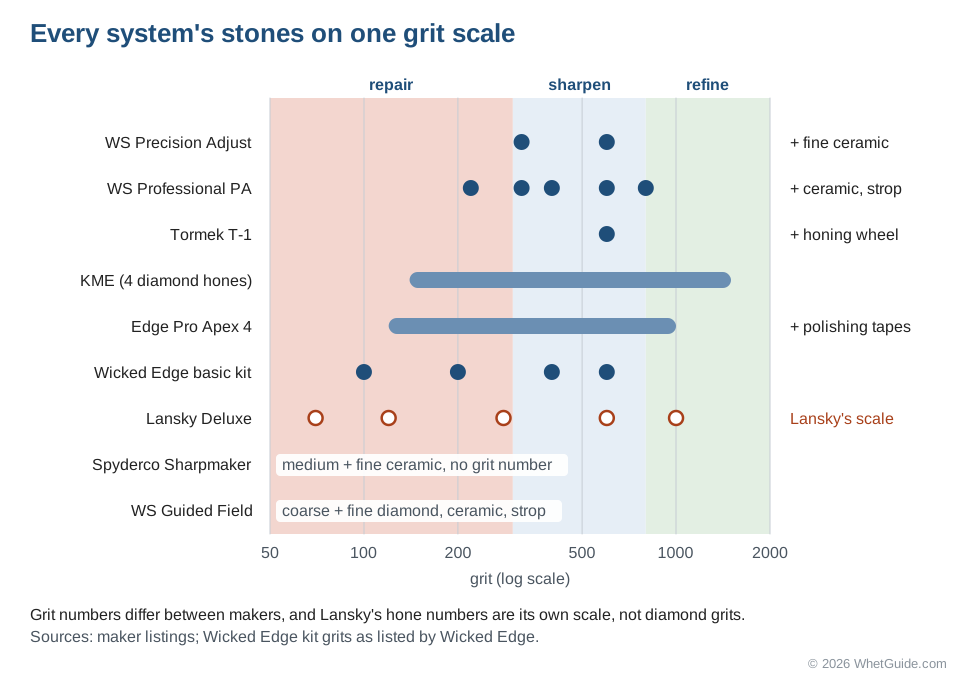
| System | Coarsest | Finest stone | Finisher | What it means |
|---|---|---|---|---|
| Precision Adjust | 320 diamond | 600 diamond | Fine ceramic | Good for dull, slow for chips |
| Professional PA | 220 diamond | 800 diamond | Ceramic, leather strop | Repair to polish in one kit |
| Lansky Deluxe | 70 (Lansky) | 1000 (Lansky) | None stock | Most range for the money |
| Sharpmaker | Medium ceramic | Fine ceramic | None stock | Upkeep; add diamond rods for dull |
| KME | 140 diamond | 1500 diamond | Check the kit | Four hones cover it all |
| Edge Pro Apex 4 | 120 stone | 1000 stone | Polishing tapes | Wet stones, wide range |
| Tormek T-1 | 600 diamond wheel | 600 diamond wheel | Composite honing wheel | One wheel, kitchen knives only |
| Guided Field | Coarse diamond | Fine diamond | Ceramic rod, strop | Touch-ups away from home |
Don't compare grit numbers across brands too literally. Makers grade abrasives on different scales, a diamond 600 and a ceramic "fine" don't line up neatly, and Lansky labels its hones on a scale of its own. What does carry across brands is the order: coarse first, then each finer stone until the scratches from the last one are gone. The sharpening stone grit chart maps the numbers between stones in more depth.
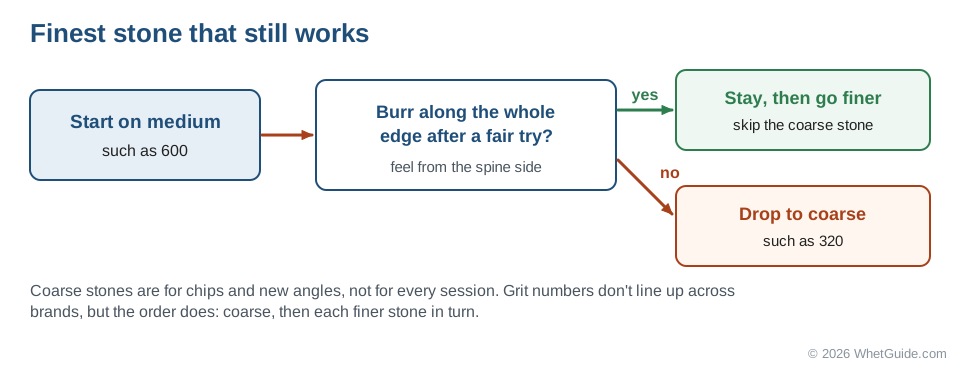
A simple rule: start on the finest abrasive that still makes progress. If the 600 raises a burr along the whole edge, there's no reason to touch the 320. Coarse stones are for chips and new angles, not for every session.
Find your knife's angle with a marker
Before you sharpen a knife for the first time on any guided system, find out what angle it already has. The cheapest tool for the job is a permanent marker, and Wicked Edge publishes the clearest version of the method.
- Color both bevels with a permanent marker, edge to shoulder.
- Clamp the blade where your system's maker says to. Wicked Edge calibrates its angles with the edge 5/8 inch above the vise; other systems mark their own sweet spot in the manual.
- Set your best guess: the maker's published angle, or 20° if you have nothing to go on.
- Make a few light passes with a fine stone on one side.
- Look at where the ink came off, and adjust.
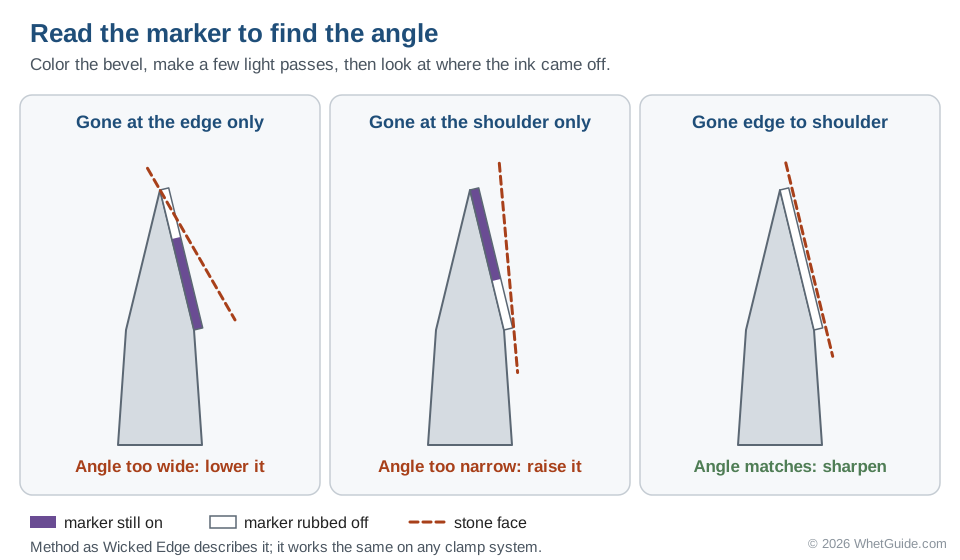
If the ink comes off only at the very edge, the stone is sitting steeper than the bevel; lower the angle a degree and try again. If it comes off only at the shoulder, the stone is too flat; raise it. When the stone wipes the ink from edge to shoulder in one pass, you've found the angle the knife was ground at. Work Sharp's angle guide is relaxed about precision, saying an angle within a few degrees of the manufacturer's is close enough for practical use.
Do the other side too. Wicked Edge points out that factory angles often differ from one side to the other, and it suggests keeping the factory angles when the two sides differ by more than 5°, instead of grinding both to match. Evening them out costs a lot of steel and changes how the knife cuts. The same method works for freehand stones, and the Sharpie trick guide is where it's written up.
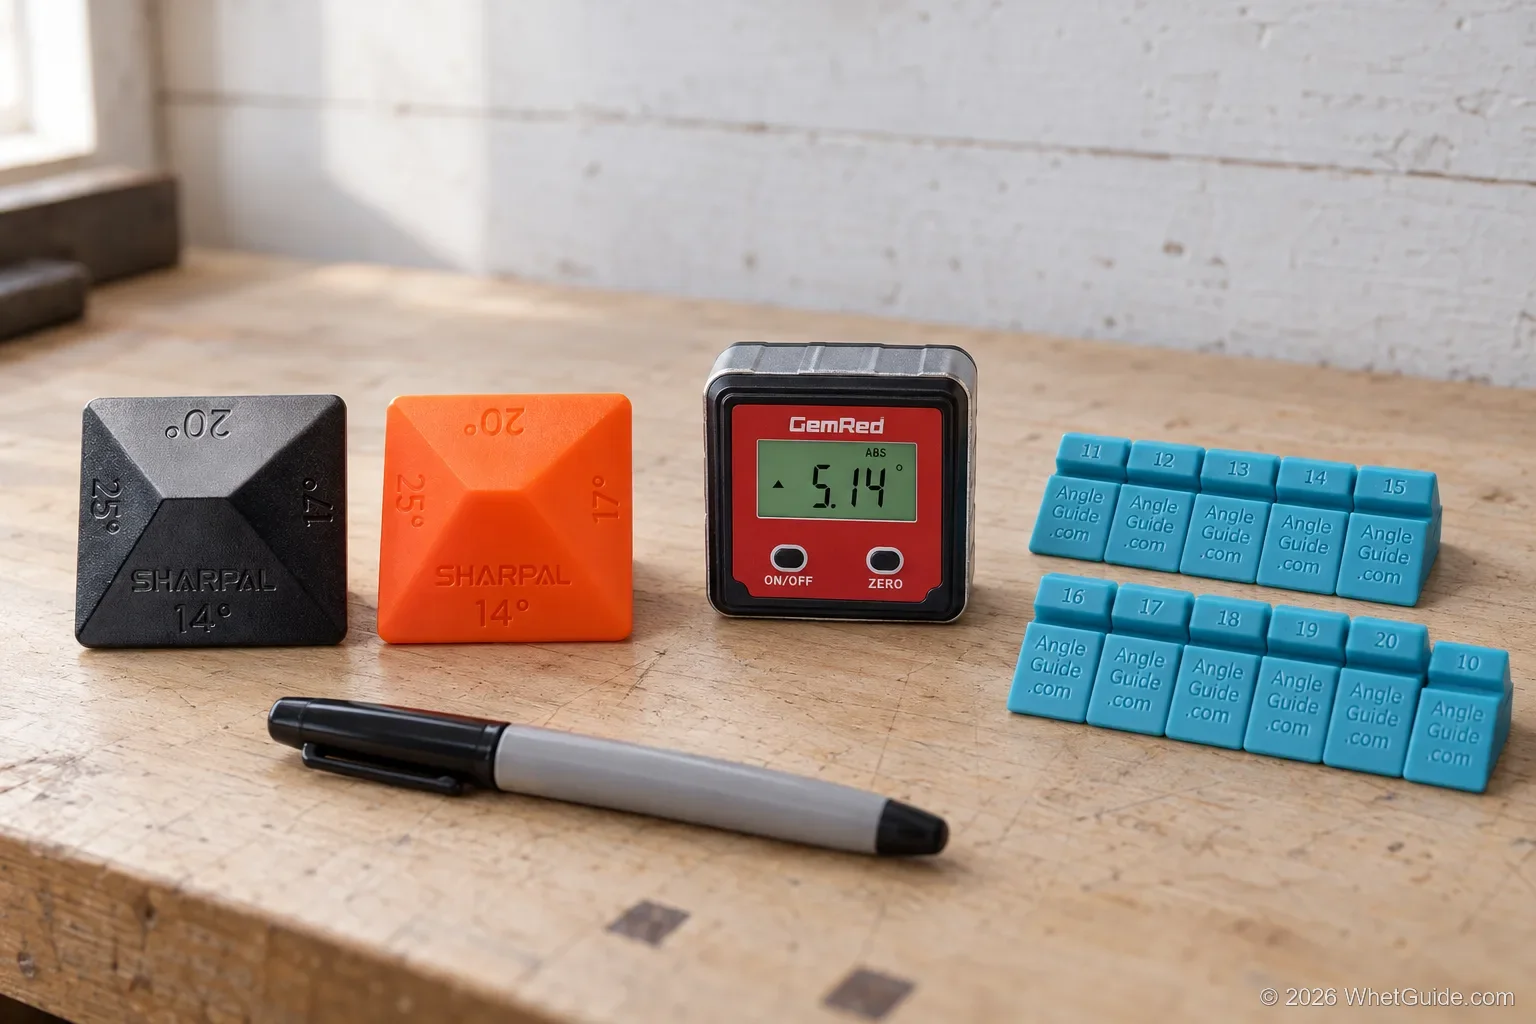
Want to check the system itself? A small digital angle gauge laid on the arm, or an angle pyramid held against the stone, tells you whether the dial reads true. It's worth doing once on a new system and again if the clamp has taken a knock. If you sharpen freehand, a clip-on guide does part of this job; try the whetstone angle guide.
↑ Back to all sectionsYour first session on a clamp system, step by step
This is the sequence for a clamp-and-arm or clamp-and-rod system. V-rods and powered machines skip some of it, and their manuals cover the differences. No stroke counts and no minutes here, because the right number depends entirely on how dull the knife is; the burr tells you when each step is done.
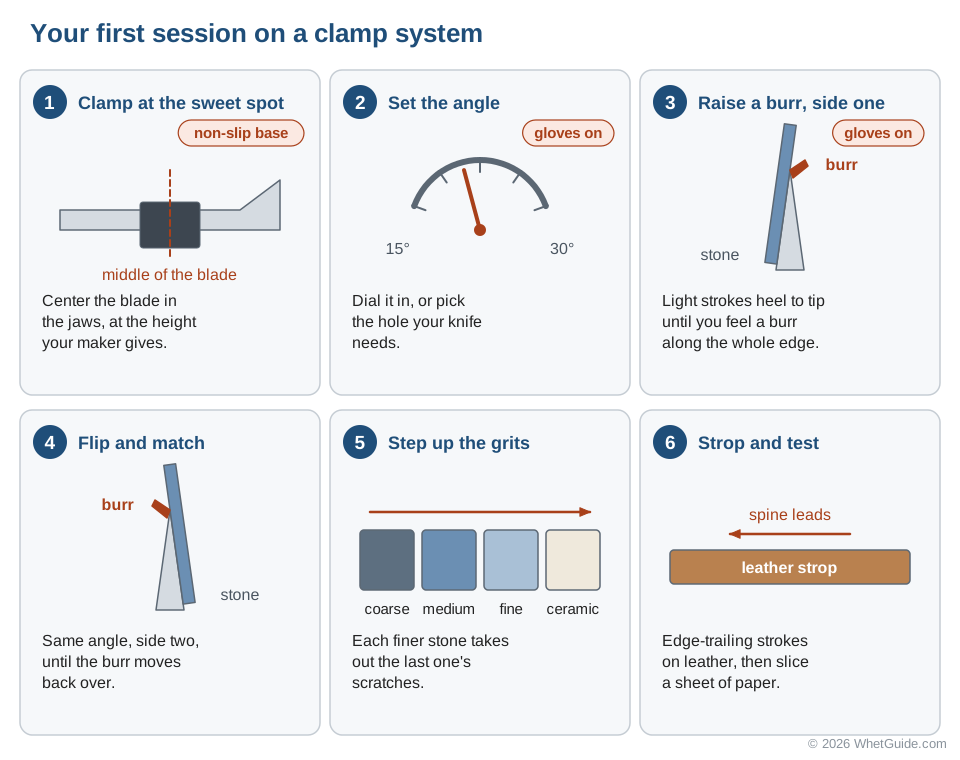
- 01Set upFlat bench, side light, gloves.
- 02AngleMarker check, then set it.
- 03BurrSide one, then side two.
- 04RefineFiner stones, strop, test.
1. Set up the bench
Put the system on a flat, solid surface on a non-slip mat. Work with light coming from the side so you can see the scratch pattern and the reflection on the edge. Wear cut-resistant gloves, at least on the hand nearest the blade. Have a paper towel ready to wipe the blade between grits, and a marker.
2. Clamp at the sweet spot
Center the blade in the jaws, front to back, so the stone covers heel and tip with similar reach. On a small blade, clamp nearer the spine so the stone has room. If the blade has a polished or coated finish, put a strip of painter's tape on it where the jaws grip; Sharpening Supplies notes that clamp jaws can scratch a blade.
3. Find and set the angle
Run the marker test, settle on the angle, and lock it. If you're deliberately moving to a new angle, set the new one and accept that the first stone will be coarse and the session long.
4. Raise a burr on side one
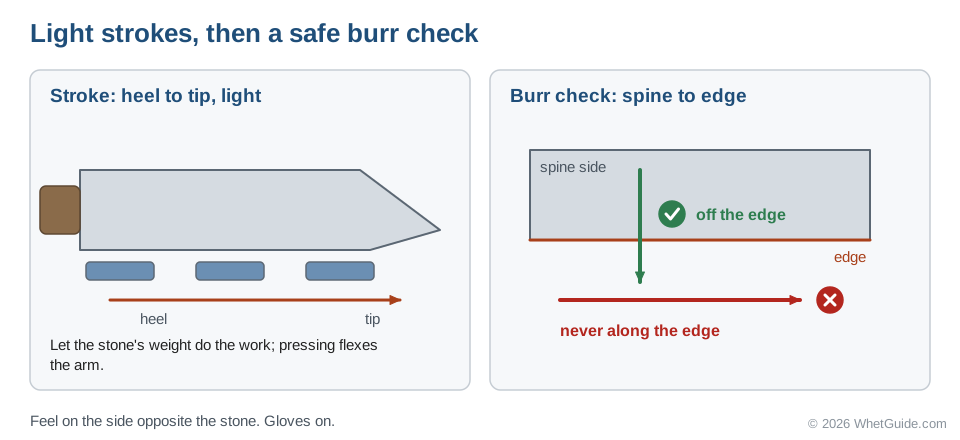
Start on the finest stone that makes real progress; for a merely dull knife that's often the medium. Use light, even strokes from heel to tip. Task & Purpose's advice is to let the stone's own weight do most of the work, and it's good advice: pressing hard flexes the arm and scratches deeper. Keep going until a burr runs the whole length of the edge, which you can feel by drawing a fingertip off the edge on the opposite side, from spine toward edge, never along it.
5. Flip and match side two
Turn the knife or swing the arm to the other side. Same angle, same stone, until the burr moves back over to side one along the whole edge.
6. Step up the grits
Wipe the blade, change to the next finer stone, and repeat both sides with lighter strokes. Each stone's only job is to replace the previous stone's scratches with finer ones. Alternate sides more often as you go finer, which keeps the burr small.
7. Strop and test
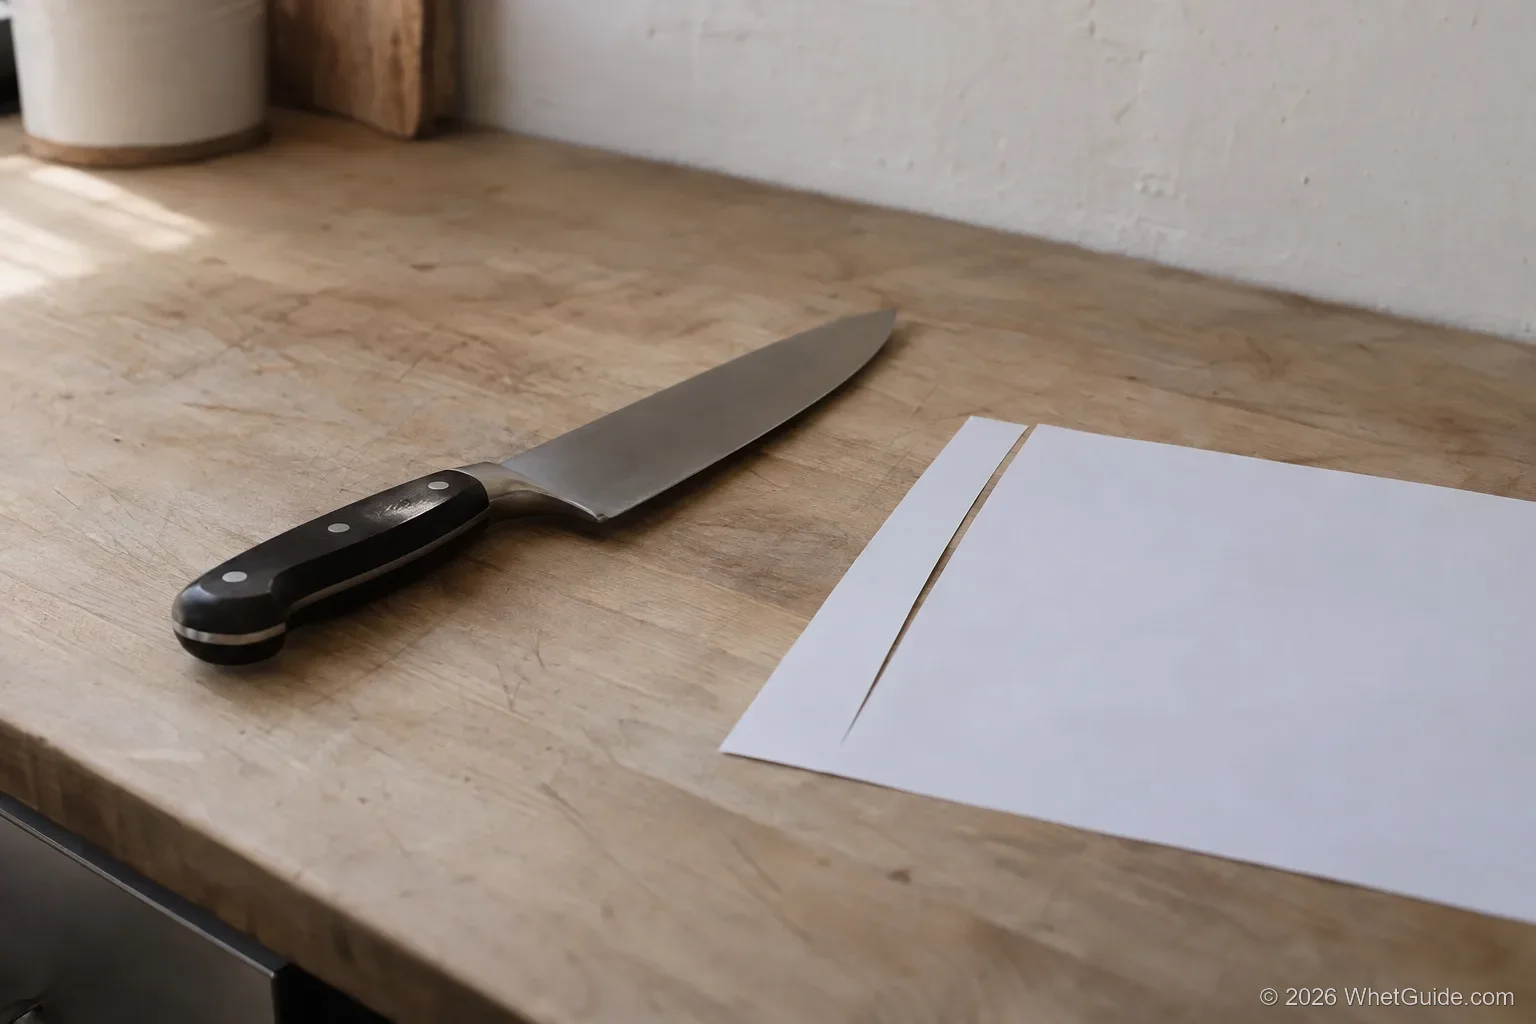
Finish with edge-trailing strokes on a leather strop, spine leading, so the edge never digs in. Then slice a sheet of printer paper. A clean, quiet cut along the whole edge means you're done; a snag in one spot means that stretch needs another pass on the fine stone. The stropping guide covers compound and stroke direction.
One last tip from Task & Purpose: limit how far the stone runs past the tip at the end of each stroke. A stone that drops off the tip on every pass rounds it, and a rounded tip is the one mistake a clamp system makes easy (see limits).
The burr: your signal to flip and to stop
A burr is a thin lip of steel that folds over to the far side of the edge when the stone has ground all the way to the apex. It's the only reliable sign that one side is finished. No burr means the two bevels haven't met yet, however long you've been stroking.
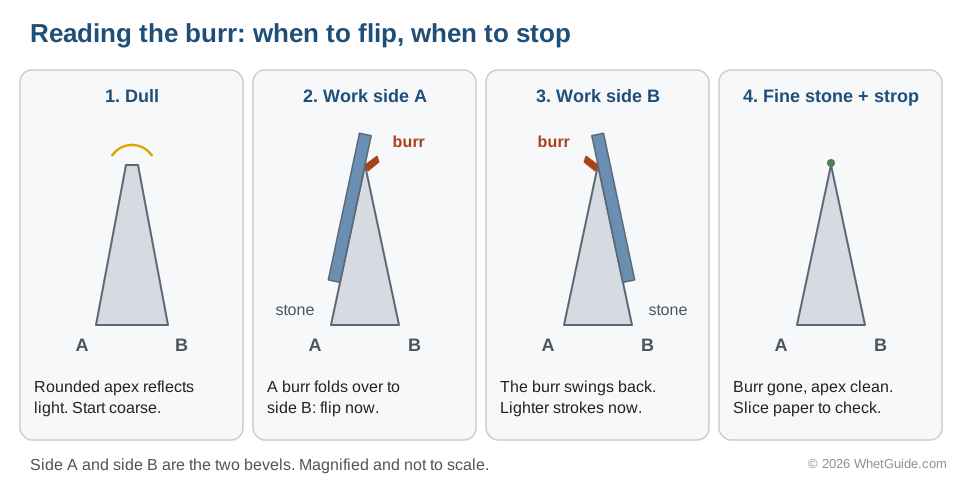
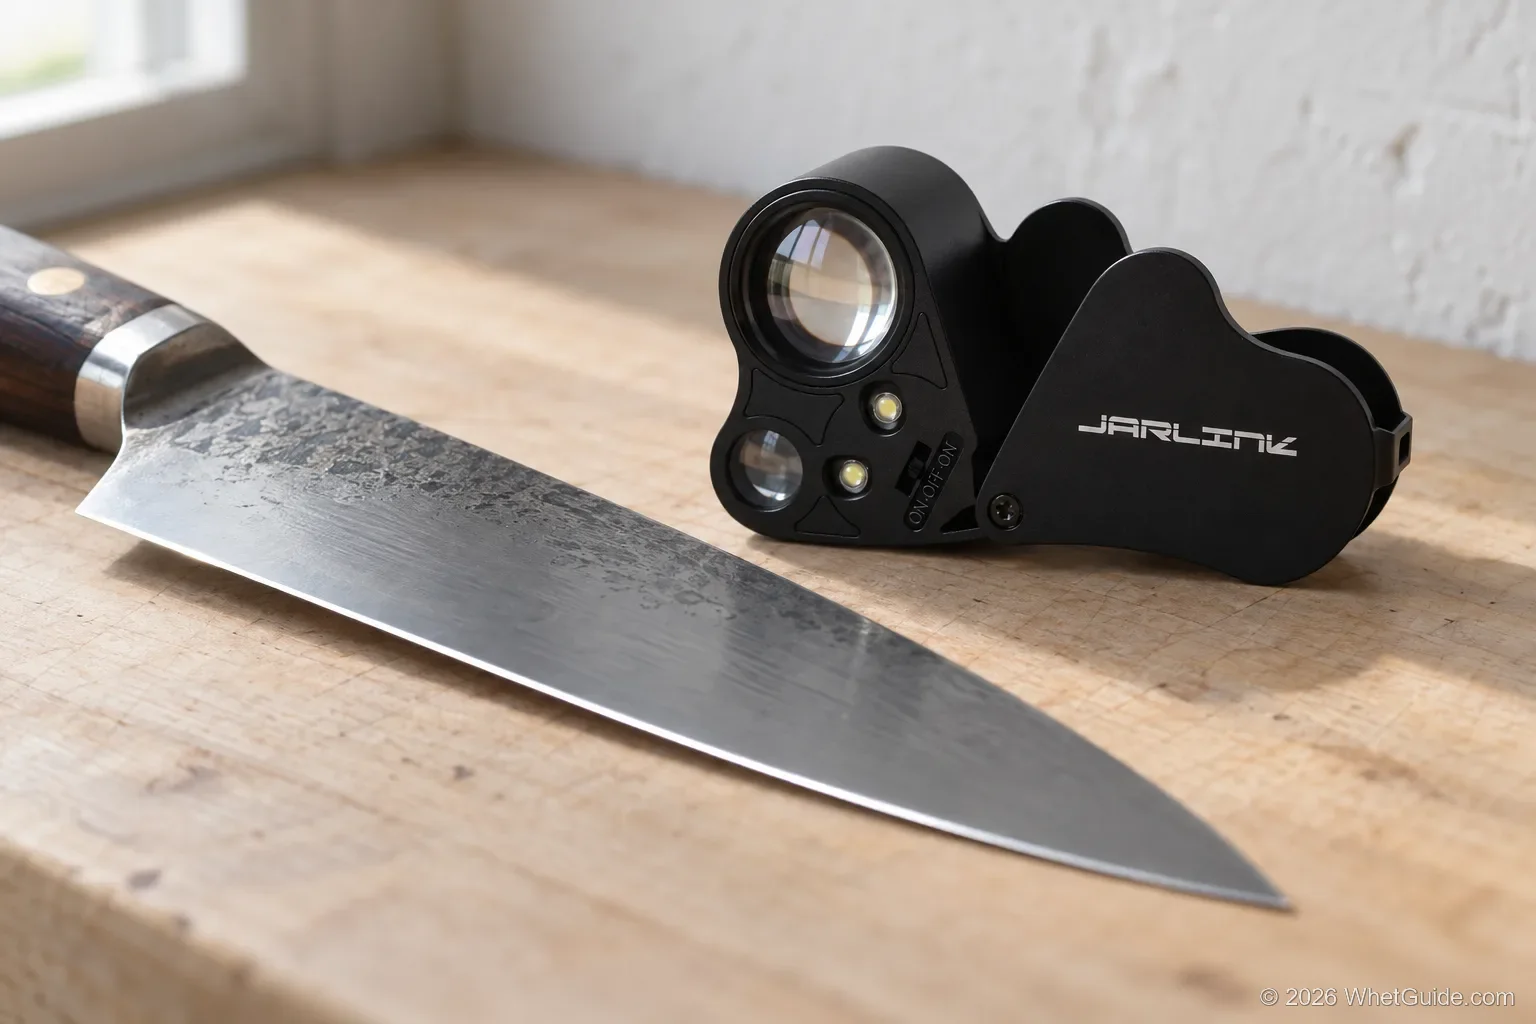
Feel for it with a fingertip drawn across the edge from the spine side, or look for it under a loupe in side light: it shows as a bright, ragged line. On a clamp system you can also watch the scratch pattern. When the scratches from the current stone reach the edge along the whole length, the burr is close.
Getting rid of it is the second half of the job. Lighter strokes and finer stones shrink the burr, and so does switching sides every pass or two, until it breaks off cleanly. A strop removes what's left. A burr that's left on feels sharp for a day and then folds over in the first onion, which is the most common reason a freshly sharpened knife "goes dull" overnight. More on feeling and removing it: knife sharpening burr guide.
↑ Back to all sectionsReprofile or touch up: know which job you're doing
Most sessions are maintenance: the knife has its angle, the edge has rolled or worn, and a medium and fine stone bring it back. Reprofiling is different. It means grinding a new bevel at a new angle, and it removes far more steel. Mixing the two up is how people spend an evening on a knife that needed ten minutes, or spend ten minutes on a knife that needed an evening.
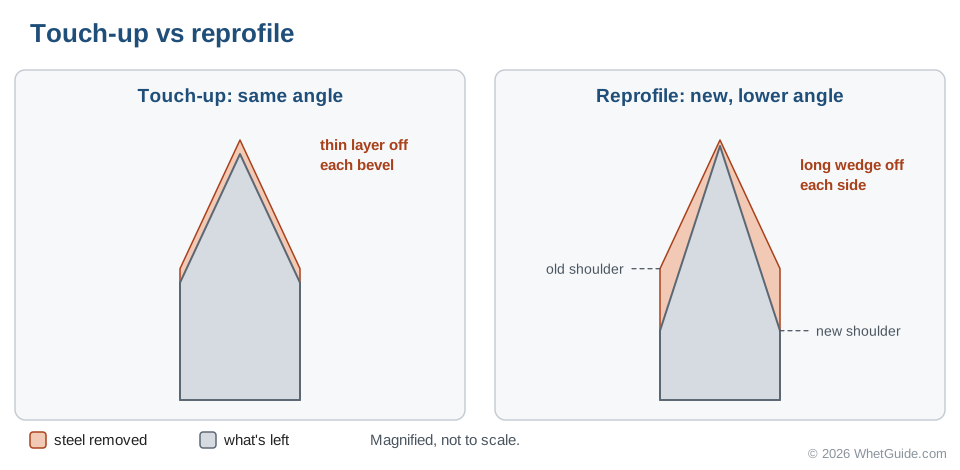
| What you see | The job | Start on | Systems that do it well |
|---|---|---|---|
| Slips on tomato skin, no visible damage | Touch up at the existing angle | Fine or ceramic | Sharpmaker, any system's fine stone |
| Dull along the whole edge, reflects light | Sharpen at the existing angle | Medium | Precision Adjust, Lansky, KME |
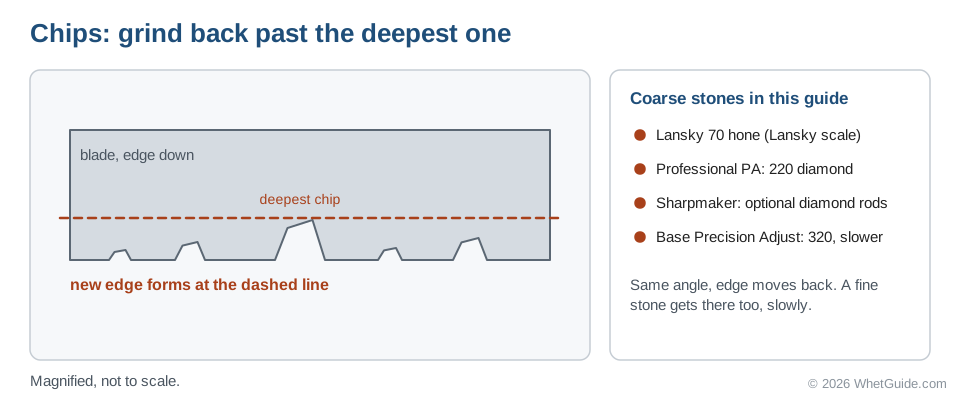
| Small chips or a nicked edge | Grind past the chips, same angle | Coarse | Lansky (70 hone), Professional PA (220), Sharpmaker with diamond rods |
| Factory angle is wrong for how you use it | Reprofile to a new angle | Coarsest you own | Professional PA, KME, Edge Pro, Wicked Edge |
| Two sides differ by more than 5° | Keep the factory angles (Wicked Edge's advice) | Medium | Any adjustable system |
| Thin Japanese edge | Hold the maker's angle; don't go lower | Medium or fine | Tormek T-1, Edge Pro, Precision Adjust at 15° |
The case for reprofiling is usually weaker than it looks. A cheap knife from the factory may have an uneven or overly steep bevel, and moving it to a cleaner 20° can make it cut much better. But a good knife at its maker's angle is already where it should be. Lowering a German knife to 15° makes it slice more easily and dull faster on bone and squash; raising a Japanese knife to 20° makes it tougher and less pleasant to use. Change the angle when you know why you're doing it.
↑ Back to all sectionsWhere clamp systems struggle, and the fix
Guided systems are easy, but not on every knife. Reviewers at Task & Purpose note that fixed-angle systems can round the tip and struggle with thin blades and extreme recurves. Sharpening Supplies adds that guided systems suit a few standard knives better than a drawer of odd shapes, and that clamp jaws can scratch. Owner reports add short-blade wobble to the list. None of these is a reason to skip a system, but each needs a workaround. Wicked Edge's own guide for long, flexible blades says to clamp the knife as high in the vise as possible and to start with minimal pressure.

Three more limits come from the systems themselves. Preset angles miss odd factory angles: the Lansky's holes are 17°, 20°, 25° and 30°, and the Sharpmaker has two settings, so a knife ground at 18° or 22° gets either a slightly different micro-bevel or a reprofile. Stones also wear. Owners report the angle drifting as a hone dishes in the middle and stops sitting flat on the bevel; replace worn hones instead of compensating. And some owners find a guided edge feels toothier than a whetstone edge, which usually comes down to stopping at a medium stone. A finer stone and a strop close the gap.
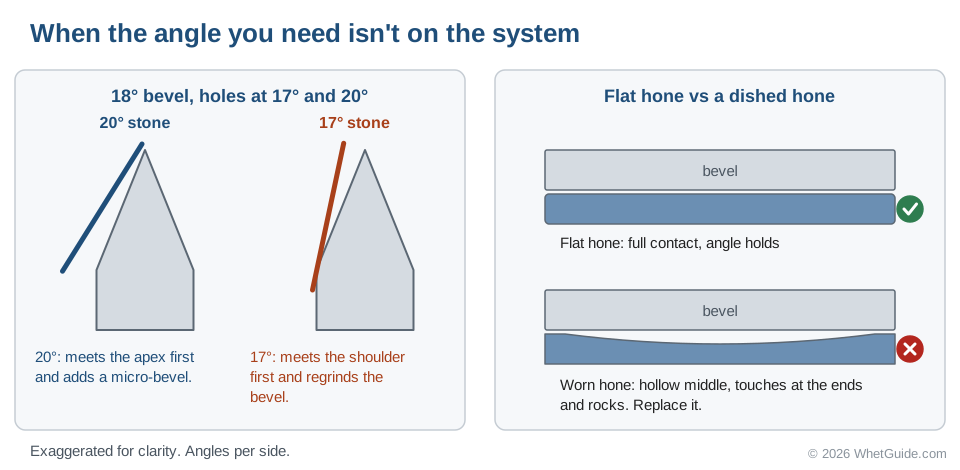
Powered machines have their own boundaries. The Tormek T-1 is built for kitchen knives, not pocket knives or tools, and belt machines like the MK2 remove steel fast enough to round a tip if you pull the knife off the end of the belt.
↑ Back to all sectionsThe right system for each kind of knife
One system rarely suits every blade in a house. This table pairs the knives most people own with the system that handles each best, using the angles on our angle chart as the target.
| Knife | Typical target | Best system | Runner-up |
|---|---|---|---|
| Japanese gyuto or santoku | About 15° per side | Tormek T-1 | Precision Adjust at 15°; Edge Pro |
| German or Western chef's knife | About 20° per side | Precision Adjust | Sharpmaker at 40° inclusive |
| Serrated bread knife | Follow the scallops | Sharpmaker | Work Sharp MK2 |
| Pocket folder | 20° to 25° per side | Precision Adjust (clamp near the spine) | Sharpmaker |
| Hunting fixed blade | 20° to 25° per side | Lansky or Precision Adjust | Guided Field in the pack |
| Fillet knife | Thin, flexible | Edge Pro (blade lies flat) | Precision Adjust, light pressure |
| Scissors | Their own bevel | Work Sharp MK2 (listing names scissors) | A dedicated scissor sharpener |
| Axe, mower blade | Steep and tough | Work Sharp MK2 (listing names both) | A hand-held puck |
| Chisels and plane irons | Square, flat bevel | Water-cooled Tormek with jigs | Diamond plate and honing guide |
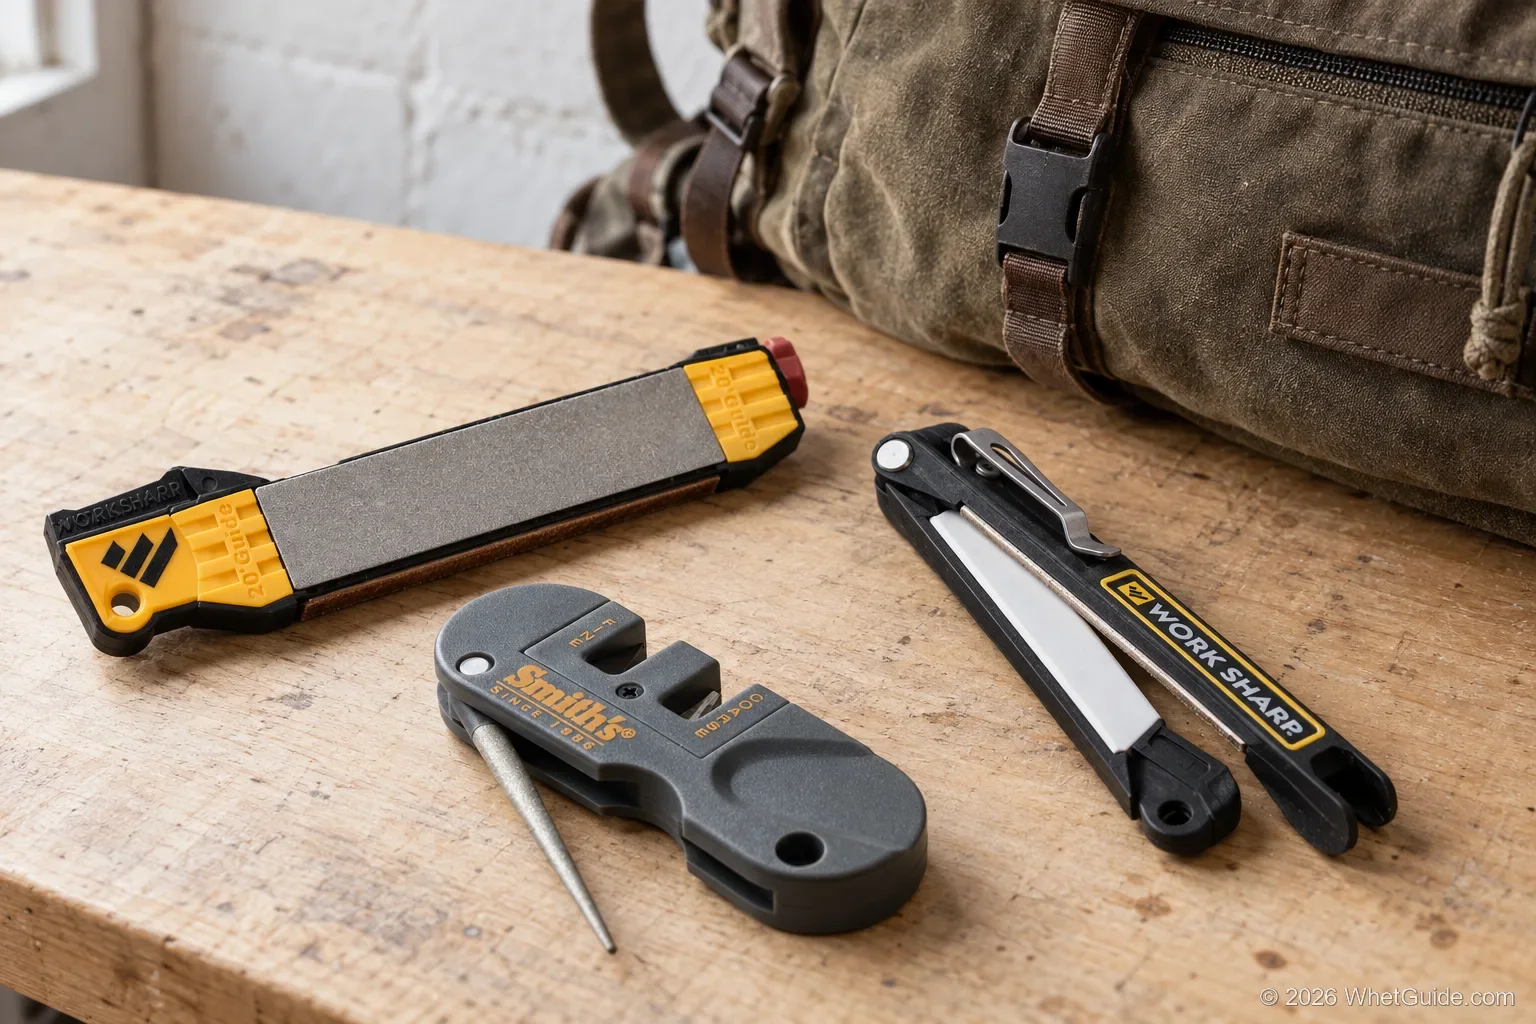
For deeper picks by blade, see sharpeners for Japanese knives, sharpeners for pocket knives and sharpeners for hunting knives. Shop tools have their own guide in how to sharpen woodworking tools, and the field kit is reviewed in full in our Guided Field Sharpener review.
↑ Back to all sectionsSerrated knives: which systems actually handle them
A serrated edge is a row of small scallops, each with its own bevel, usually on one side only. A flat stone on a clamp arm can only touch the points between the scallops. To sharpen the scallops themselves you need something round or narrow enough to ride inside each one.
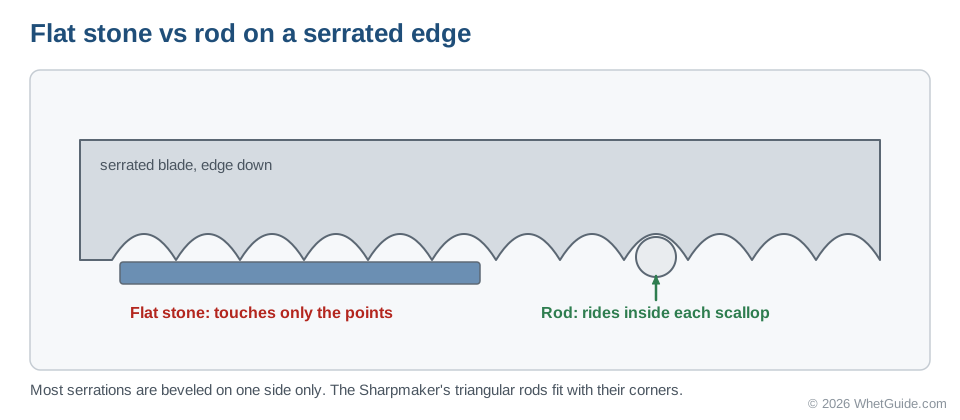
| System | Serrated? | How |
|---|---|---|
| Spyderco Sharpmaker | Yes | The rounded corners of the triangular rods ride into each scallop |
| Work Sharp MK2 | Yes | The flexible belt bends into the serrations |
| WS Guided Field | Yes | Ceramic rod, one scallop at a time |
| Lansky | With an extra hone | Lansky sells a serrated hone; the Professional kit includes one |
| Precision Adjust | Listed | Check the listing for which abrasive does it |
| Tormek T-1 | No | Plain edges only |
For a house with one bread knife, any of the "yes" rows works. For a drawer full of serrated folders, the Sharpmaker is the obvious buy. Our full walkthrough is how to sharpen a serrated knife, and the gear roundup is best sharpener for serrated knives.
↑ Back to all sectionsMatch the abrasive to the steel
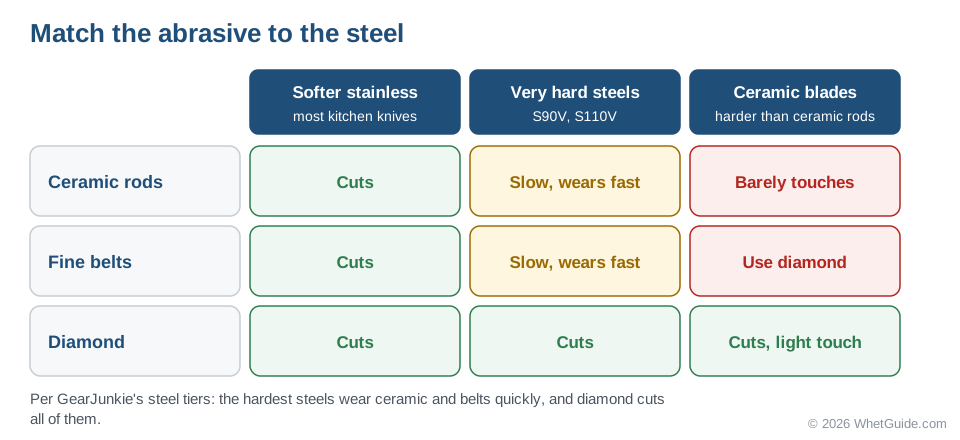
Hard, high-carbide steels hold an edge longer and are slower to sharpen. GearJunkie groups knife steels from softer stainless up to very hard powder steels such as S90V and S110V, and calls S90V exceptionally difficult to sharpen. The hardest steels also wear ceramic and belts quickly, and diamond cuts all of them. That's the main reason the better clamp systems ship with diamond plates.
| Steel | Common in | Abrasive that works | Note |
|---|---|---|---|
| Softer stainless | Budget and many German kitchen knives | Anything: ceramic, diamond, belt | Sharpens fast; watch for a big burr |
| Carbon steel | Many Japanese and vintage knives | Stones, diamond, ceramic | Sharpens easily; dry it after water-based stones |
| Mid-carbide stainless | Many pocket and premium kitchen knives | Diamond or good ceramic | Slower on ceramic alone |
| Very hard powder steel | High-end folders (S90V, S110V) | Diamond | Wears ceramic and belts quickly |
| Ceramic blade | Ceramic kitchen knives | Diamond only | Chips easily; light pressure |
Ceramic knives and very hard steels
A ceramic blade is harder than the ceramic rods on a Sharpmaker, so those rods barely touch it. You need diamond and a light touch, because ceramic chips rather than bending. Very hard steels aren't quite that extreme, but stock ceramic rods and fine belts go slowly on them. If your favorite folder is S90V, budget for diamond plates or rods from day one. The method is in the ceramic knife guide, and whetstone vs diamond stone explains why diamond cuts what other abrasives can't. Which steels to buy in the first place is the subject of best steel for kitchen knives.
↑ Back to all sectionsProgrammable sharpening machines and motorized systems
People search for a "programmable sharpening machine" expecting something that stores a routine and runs it. In the listings we read, none of the powered systems here does that. What exists is motorized sharpening with a manual angle setting. The Tormek T-1 has a stepless guide for 8° to 22°, and the Work Sharp Ken Onion Elite Mk2 lists variable speed and a 10° to 35° range, per its listing. The Work Sharp MK2 above is the cheaper belt option, and Work Sharp MK2 vs Ken Onion shows how it differs from the Ken Onion. You still choose the angle each time. Read best electric knife sharpener for the fixed-angle machines.
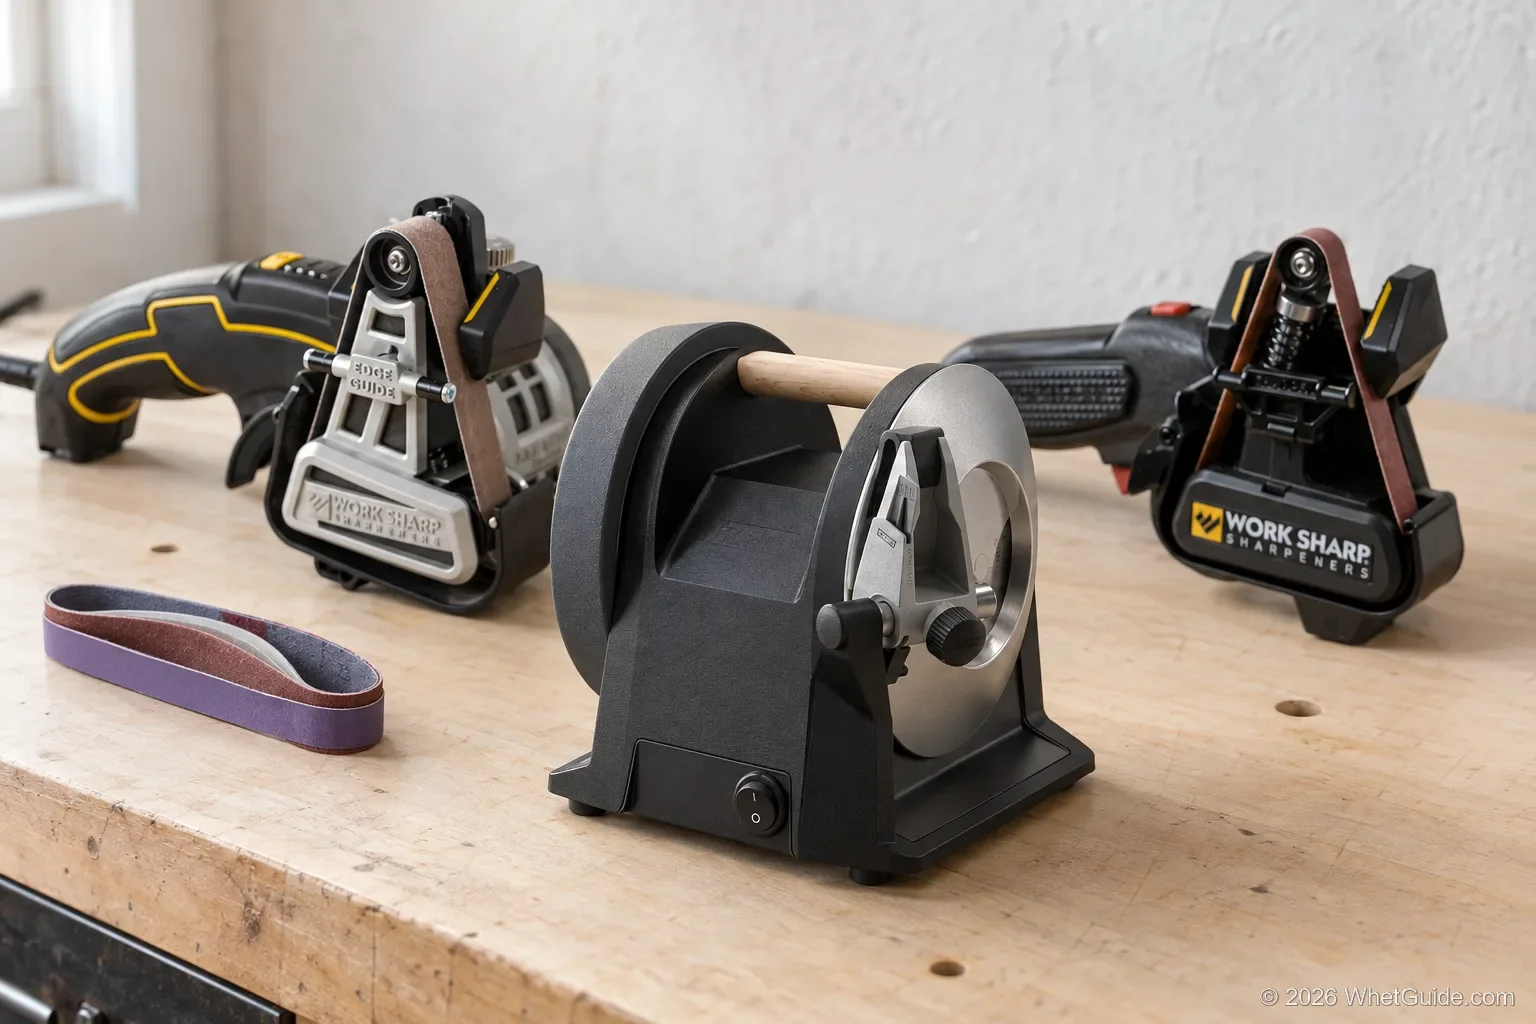
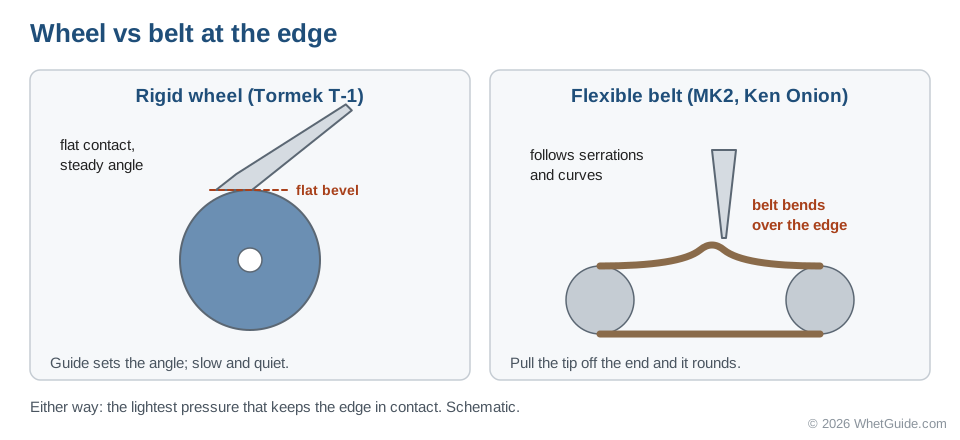
Wheels and belts behave differently at the edge. The Tormek T-1 grinds on a flat diamond wheel at a slow, quiet pace (Tormek lists 45 dB), then deburrs on a composite honing wheel. A belt machine flexes the belt over the edge, which is what lets it follow serrations and odd shapes, and the speed control on the Ken Onion lets you slow it down for thin knives. Powered machines are quick on a block of kitchen knives. They're also quick to overdo it, so use the lightest pressure that keeps the edge in contact.
For woodworkers, the water-cooled Tormek T-4 and T-8 are a separate category: slow wet wheels with jigs that hold chisels and plane irons, and turning tools. The Tormek comparison sorts them, and belt-sander owners can read how to sharpen a knife on a belt sander.
Wicked Edge and KME, or an Edge Pro: the step up from a beginner system
Three names come up whenever people ask about a professional knife sharpening system. All three are guided, and all three cost more than the Work Sharp or Lansky above. They differ in how they hold the knife.
| System | How it holds the angle | Angle range (per side) | Abrasives |
|---|---|---|---|
| Wicked Edge | Knife clamped in a vise; one arm on each side, so both bevels are worked without flipping | Set on the guide rods | Diamond stones; basic kits start at 100, 200, 400 and 600 grit |
| KME Precision Knife Sharpener | Clamp and guide rod with a bearing so the stone does not wobble | 17° to 30° in 1° steps | Four diamond hones, 140 to 1500 |
| Edge Pro Apex 4 | Knife lies loose on a table; the stone rides a guided arm | 10° to 24° | Water stones from 120 to 1000, plus polishing tapes |
The stationary Wicked Edge models, including the entry-level Go, are sold through the maker and knife retailers rather than Amazon. A search of Amazon for the Go found only the handheld Wicked Edge Venture WE20 (20° guide, optional 15°, 17° and 25° guides), so we don't list the Go as a pick. The model ladder and the break-even against a sharpening service are in the Wicked Edge review, and the Edge Pro review sorts its kits. If you own thin Japanese knives, note that the KME bottoms out at 17°, while the Edge Pro goes down to 10°.
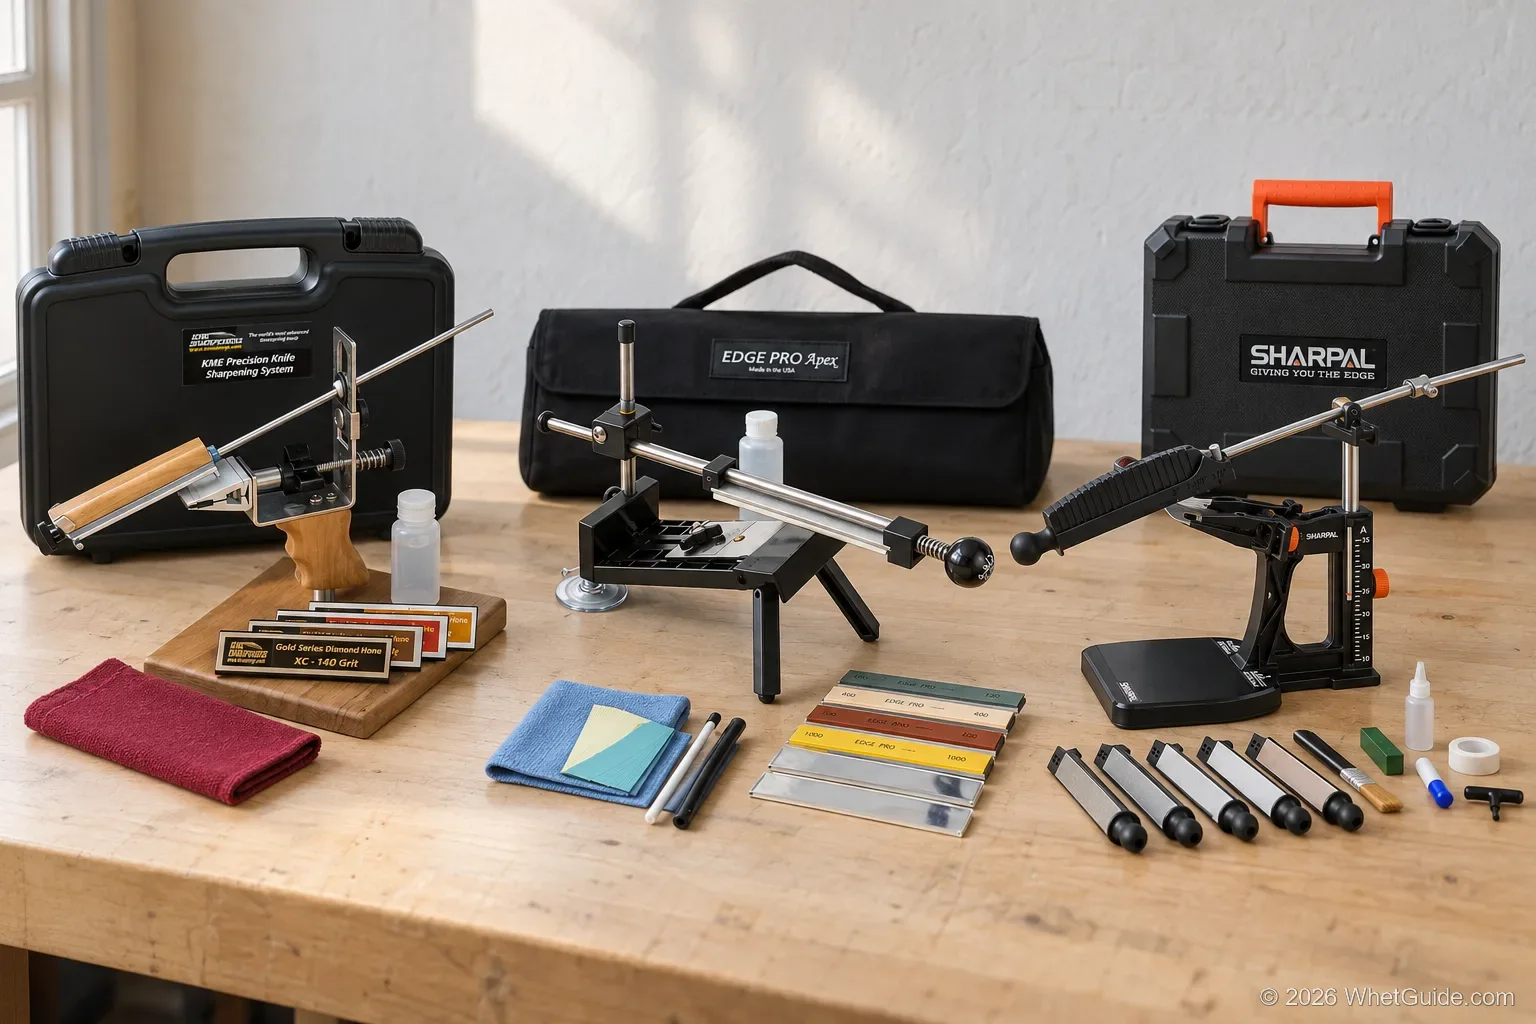
What do you actually gain for the money? Mostly repeatability and range. The KME's bearing stops the stone from rocking. Wicked Edge's twin arms keep both sides at exactly the same setting because you never unclamp. The Edge Pro's table holds long and flexible blades that a clamp can't. If you sharpen a few kitchen knives twice a year, none of that is worth paying for. If you sharpen for friends, collect folders or chase mirror edges, it is.
↑ Back to all sectionsUpgrade paths: where to go after your first system
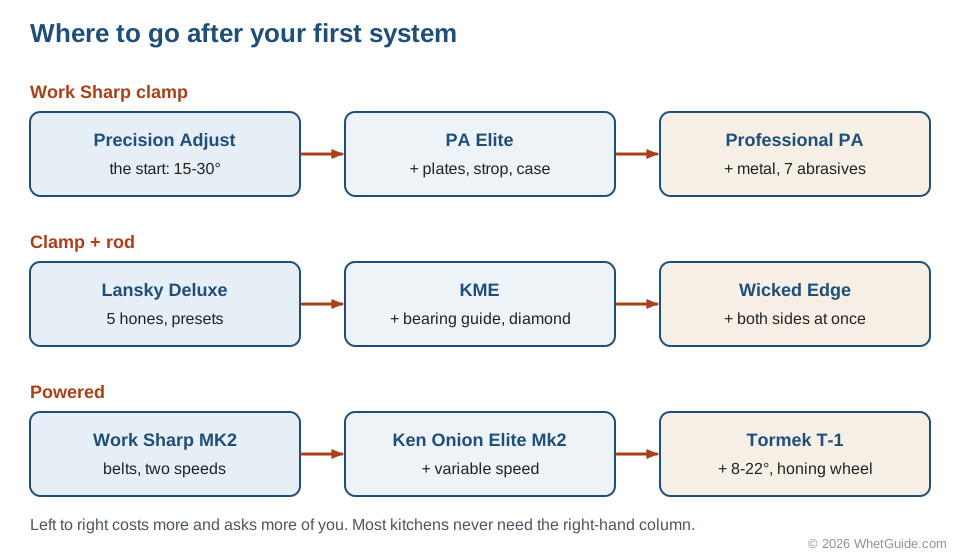
Most people never need a second system. The ones who do usually follow one of three tracks, and the right next step depends on what annoyed you about the first one.
| If this bothered you | Move to | What you gain |
|---|---|---|
| Precision Adjust is slow on chips | Precision Adjust Elite, or the Professional PA | More abrasives; the Professional starts at 220 diamond and adds a strop and digital angle readout |
| Lansky clamp wobbles, presets are limiting | KME | Bearing-guided rod, 1° steps from 17° to 30°, diamond hones |
| Flipping the knife breaks your rhythm | Wicked Edge | Two arms, both sides without unclamping |
| Clamp won't hold long or thin blades | Edge Pro Apex 4 | Table support, down to 10° |
| MK2 belt feels too aggressive | Ken Onion Elite Mk2 | Variable speed and a 10° to 35° range, per its listing |
| Kitchen knives only, and you want it done | Tormek T-1 | Stepless 8° to 22° guide; diamond and honing wheels |
A side route worth knowing: if the guided system taught you what a consistent angle feels like, a pair of whetstones costs less than any upgrade on this list and takes you the rest of the way. Our whetstone guide picks up exactly where a clamp system leaves off.
↑ Back to all sectionsWhat a sharpening system really costs
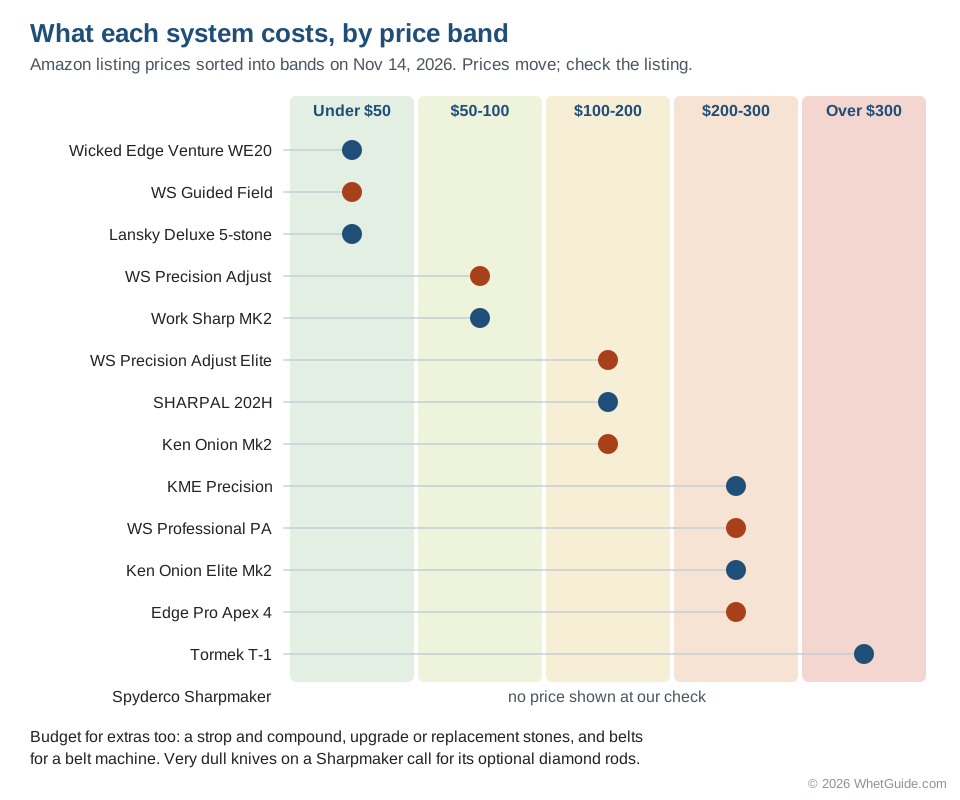
The price of the box is only part of the cost. Stones wear and belts glaze. Most people end up adding a strop, too. Here's where each system sat when we checked Amazon listings on November 14, 2026, sorted into broad bands because exact prices move week to week.
| Band (Nov 14, 2026) | Systems | Likely extras |
|---|---|---|
| Under $50 | Lansky Deluxe, Guided Field, Wicked Edge WE20 | Replacement hones over time; a strop |
| $50 to $100 | Precision Adjust, Work Sharp MK2 | A strop for the PA; replacement belts for the MK2 |
| $100 to $200 | Precision Adjust Elite, SHARPAL 202H, Ken Onion Mk2 | Belts for the Ken Onion |
| $200 to $300 | KME, Professional PA, Ken Onion Elite Mk2, Edge Pro Apex 4 | Finer stones or tapes if you chase a polish |
| Over $300 | Tormek T-1 | Little; it ships with both wheels |
| Not shown at our check | Spyderco Sharpmaker | Diamond rods for very dull knives |
Should you just pay a service instead? For one or two knives sharpened once a year, a service is usually cheaper. For a full block sharpened a few times a year, a mid-band system pays for itself before long, and you keep the skill. Run your own numbers with our knife sharpening service cost page, or see how the mail-in services compare. The Wicked Edge verdict works the same break-even at the top of the market.
↑ Back to all sectionsGuided system, whetstone, electric, pull-through or service?
A guided system is the right answer for a lot of people, but not all of them. Here's how it stacks up against the other ways to get a sharp knife.

| Method | Skill needed | Angle control | Steel removed | Serrated | Thin Japanese |
|---|---|---|---|---|---|
| Guided system | Low | Set by the clamp or guide | Low (you pick the grit) | Some models | If it reaches the angle |
| Whetstones | High | Your hands | Low to moderate | Needs a rod | Yes |
| Electric (fixed angle) | None | Set by the slots | Moderate | Some models | Only at its angle |
| Rolling sharpener | Low | Set by a magnetic angle block | Low to moderate | Rarely | If the block has a low setting |
| Pull-through | None | Set by the slots | High | Rarely | Knifewear and Seisuke say no |
| Sharpening service | None | The sharpener's | Depends on the shop | Usually | Ask first |
Sharpening Supplies, a retailer that sells all of these, says guided systems remove less steel. Our reading is that a fixed angle and a free choice of grit are why. Rolling sharpeners sit in between. The knife sticks to a magnetic block at a fixed angle and you roll a disc along the edge, so they're easy, but you only get the angles the block offers. Pull-throughs sit at the far end: they're quick, but they set their own angle and chew more steel. You'll find when one is still fine in the page on whether pull-through sharpeners are bad. If you want the electric route, the Chef'sChoice Trizor XV review and how to use a knife sharpener are the places to start.
↑ Back to all sectionsWhetstone or guided system: the honest trade-off
Whetstones win on flexibility. One stone handles any angle, any blade length and any shape, it costs less than most systems, and a skilled hand gets an edge as good as anything on this page. They lose on the learning curve. Holding one angle by hand is a skill that takes weeks of practice, and until you have it, a whetstone edge is less consistent than a clamp edge.
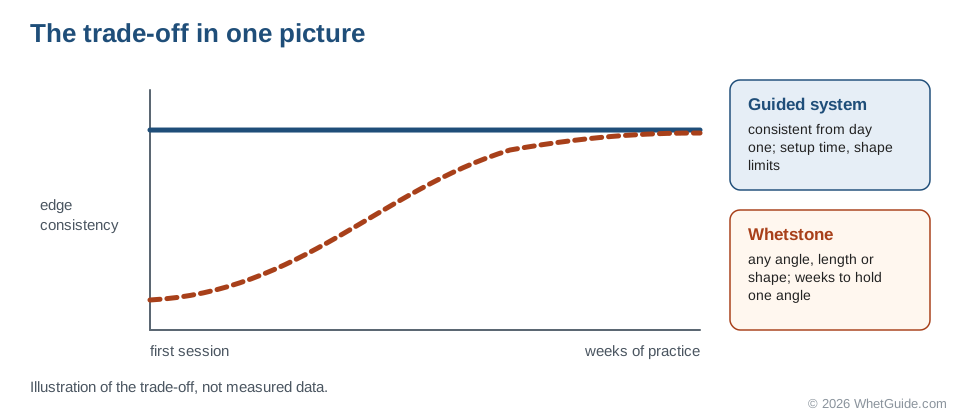
Guided systems win on consistency from day one. The cost is setup time, blade-shape limits, and the reports covered in limits: stones that wear and shift the angle, and edges some owners find toothier unless they finish fine. Neither is "better". They suit different people:
- Pick a system if you want sharp knives with the least practice, own a mixed drawer of standard shapes, or sharpen only a few times a year.
- Pick stones if you enjoy the craft, own Japanese knives with odd profiles, or want one tool that does everything for the rest of your life.
Plenty of people own both: a system for the household knives and a 1000/6000 whetstone for the good ones (the one we suggest is in alternatives). The whetstone vs knife sharpener comparison goes deeper; the best whetstone sets lists starter kits.
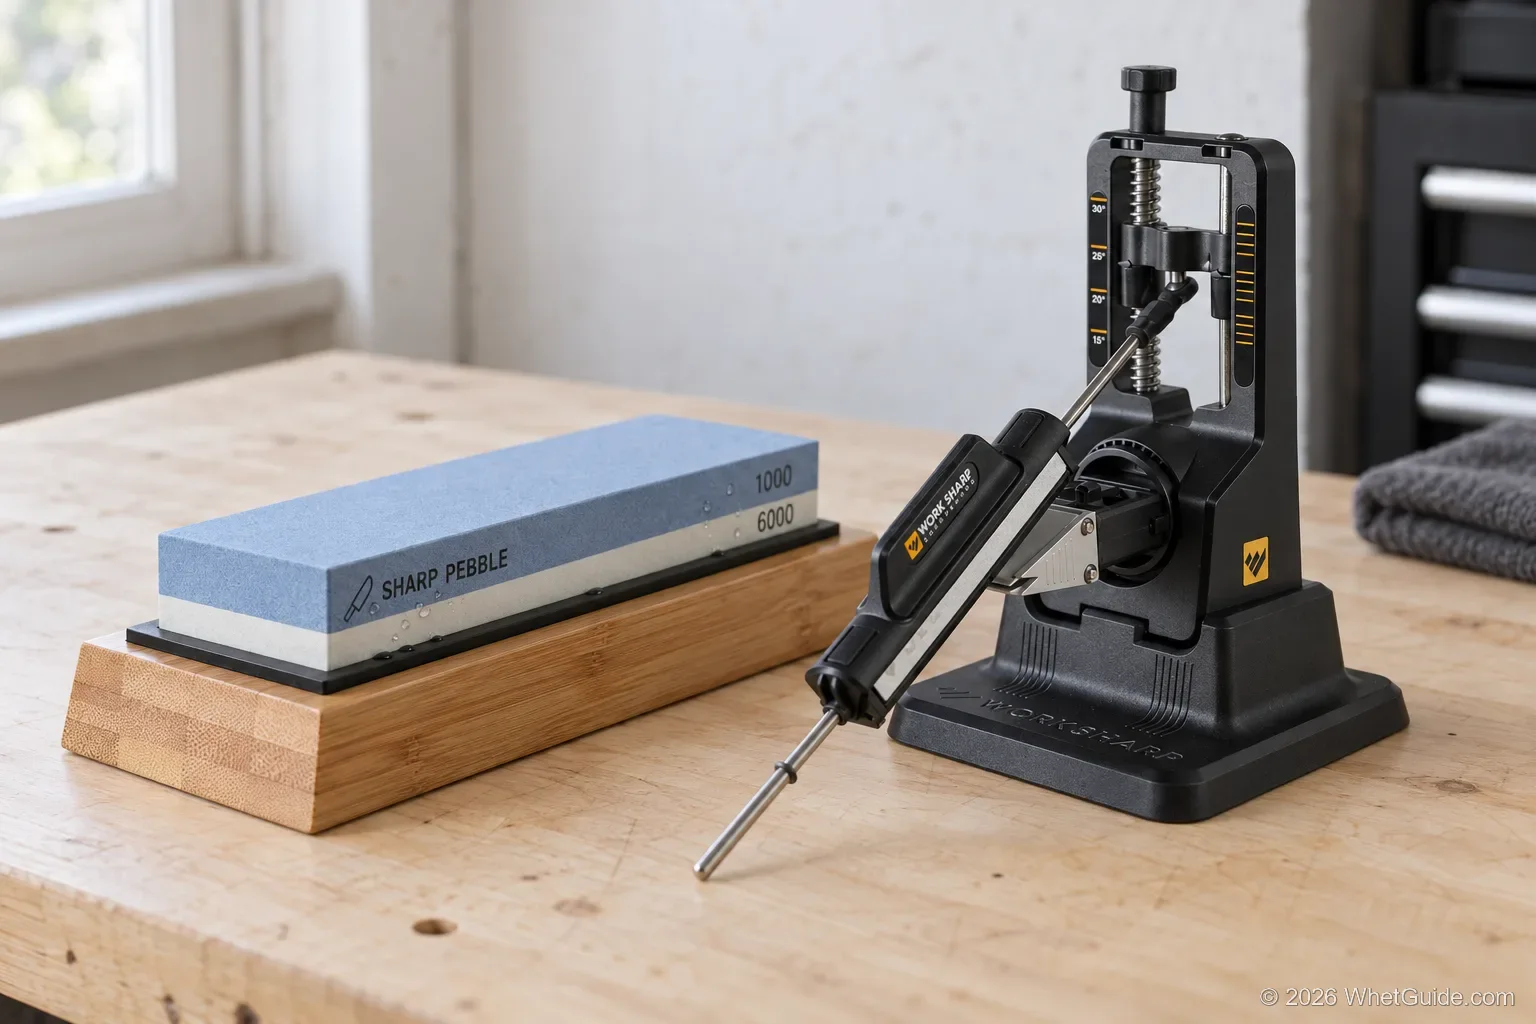
Which sharpening system fits which job
Best knife sharpening system for beginners
The Work Sharp Precision Adjust. The clamp does the angle work, and one dial covers 15° to 30°. If your first goal is keeping already-sharp knives sharp, the Spyderco Sharpmaker is the lower-effort alternative. Our best knife sharpener for beginners guide widens the field to non-guided tools.
Best tool sharpening system
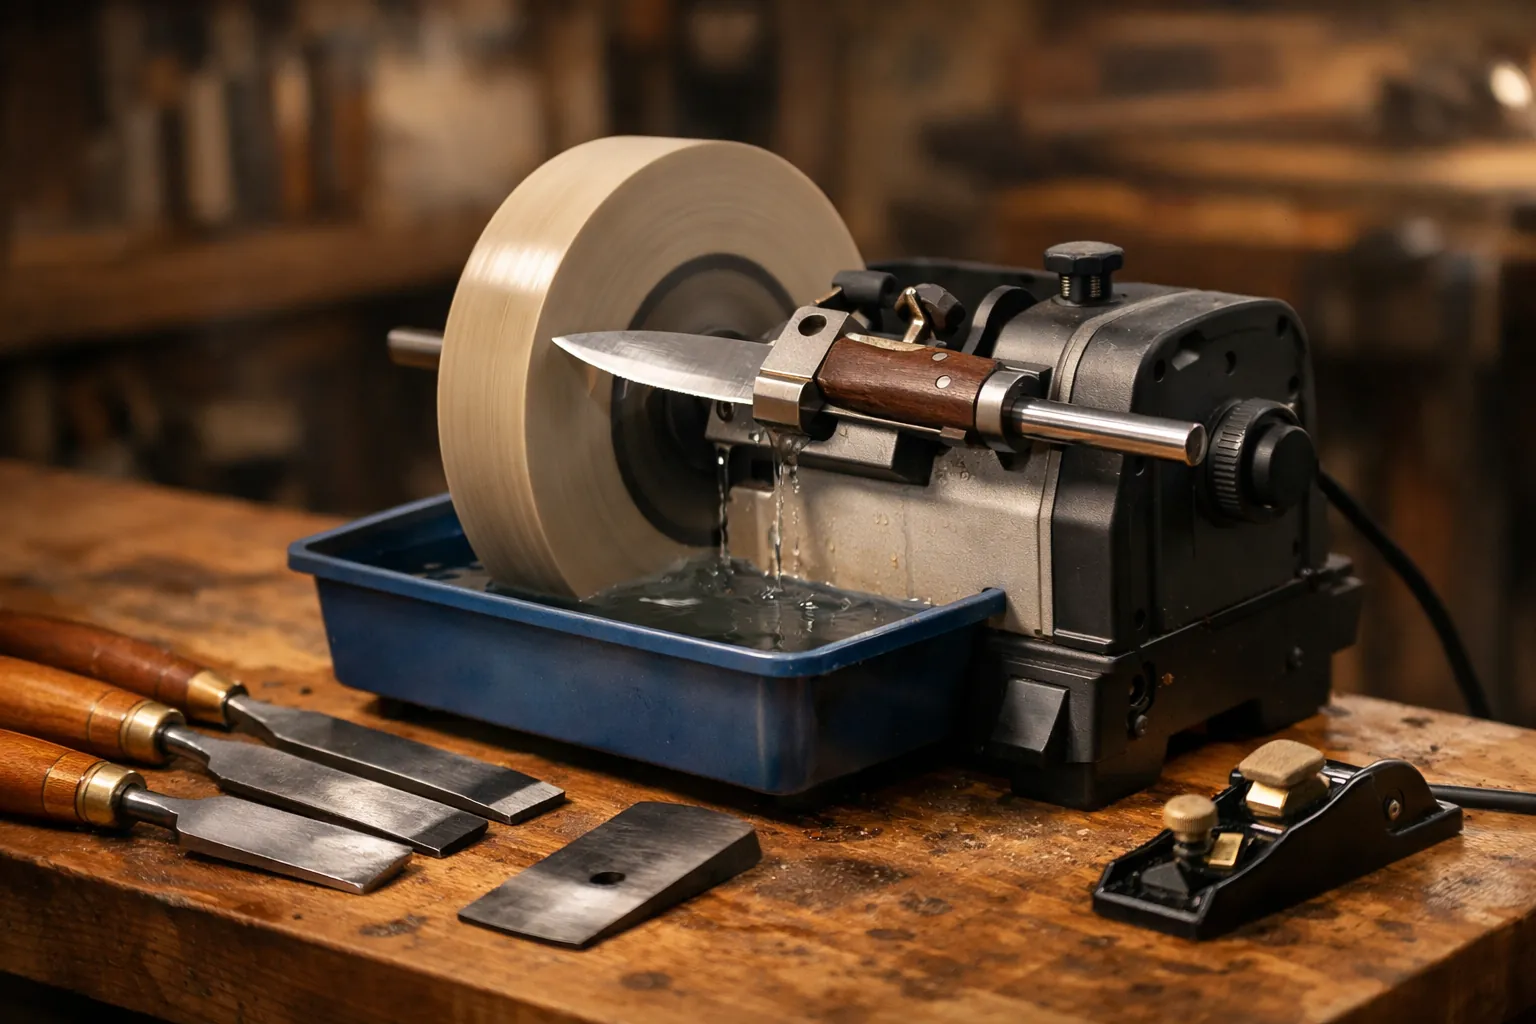
For chisels and plane irons, or for garden tools, look at the water-cooled Tormek line or the Work Sharp MK2 belt machine rather than a knife clamp. Both are described above.
Best system for a whole kitchen block
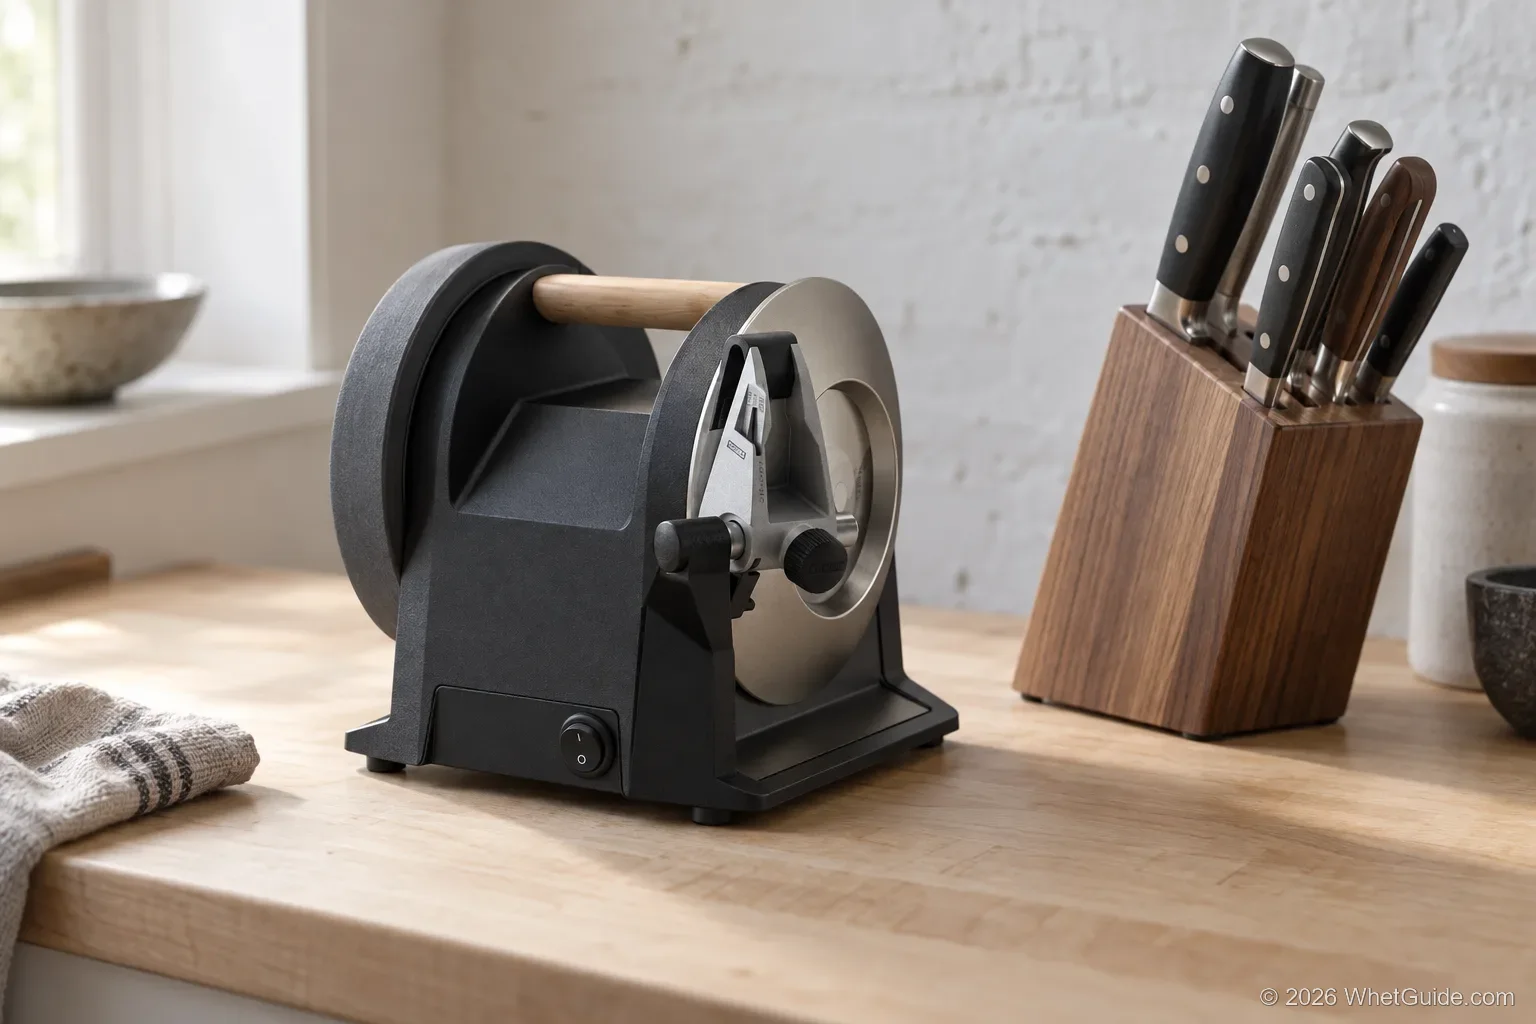
If you sharpen eight or ten kitchen knives at a time, speed matters more than range. The Tormek T-1 is the fastest route to a consistent edge across a block. On a budget, the Precision Adjust handles the same block more slowly.
Best system to keep in the truck
The Work Sharp Guided Field Sharpener. It's flat and light, and it carries its own angle guides, two diamond grits, a ceramic rod and a strop.
Is a guided system the same as a professional one?
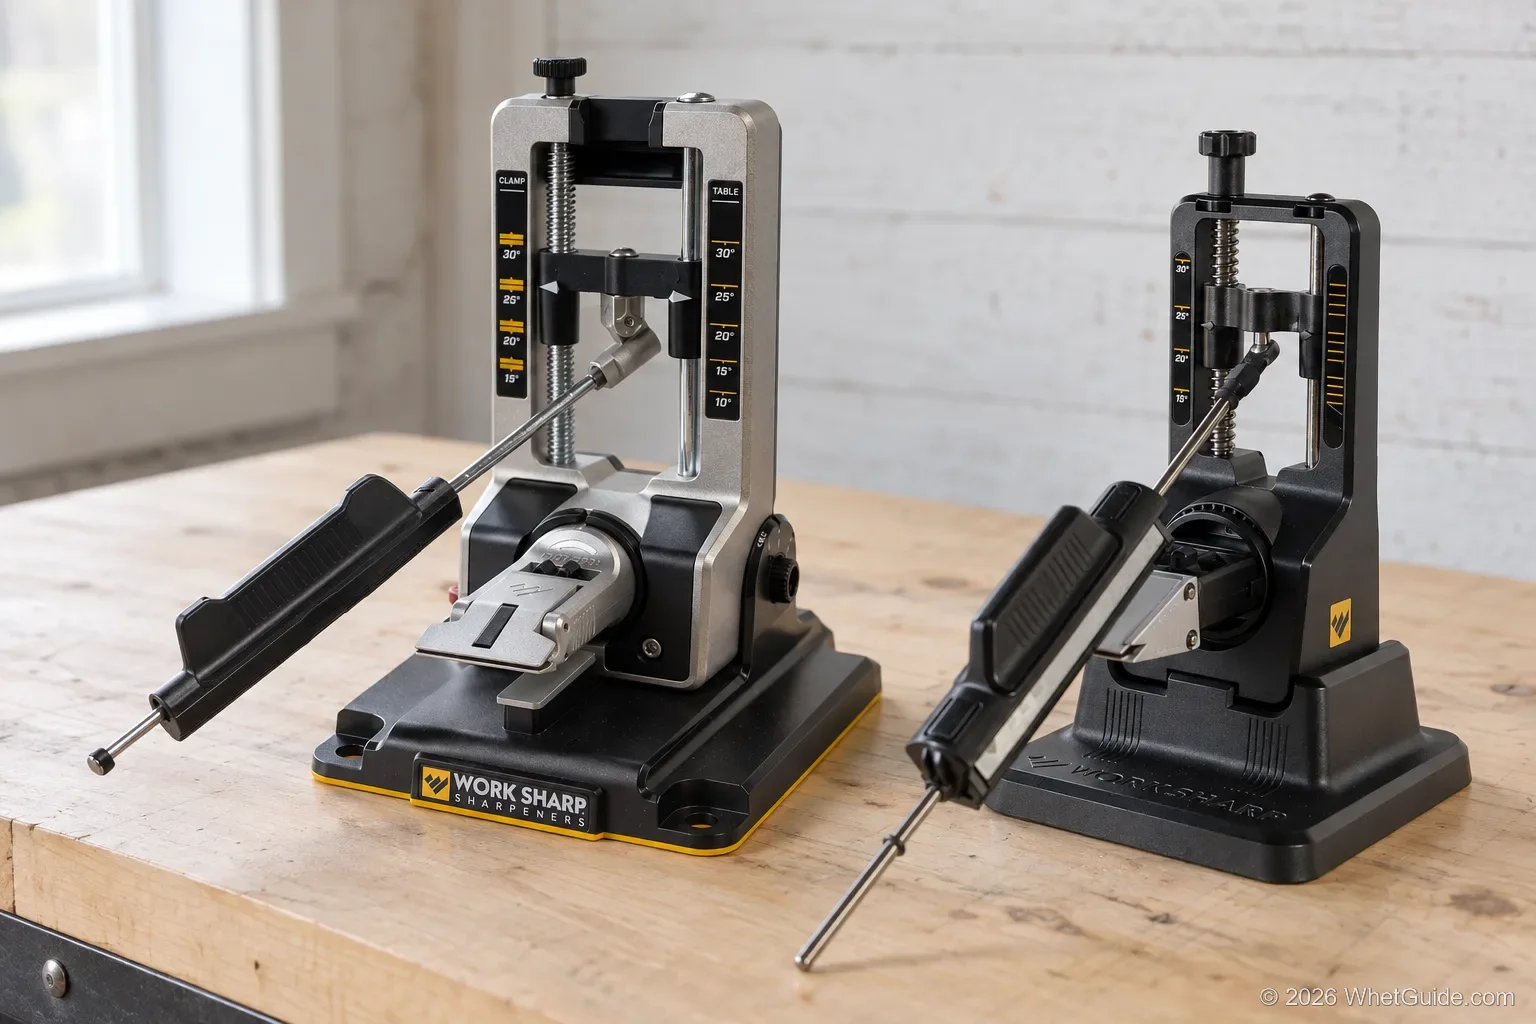
Not quite. "Professional" usually means more abrasive steps and a sturdier frame, as on the Work Sharp Professional Precision Adjust, or a dual-arm system such as Wicked Edge. The method is the same: a fixed guide holds the angle.
↑ Back to all sectionsHow to choose
Match the angle range to your knives
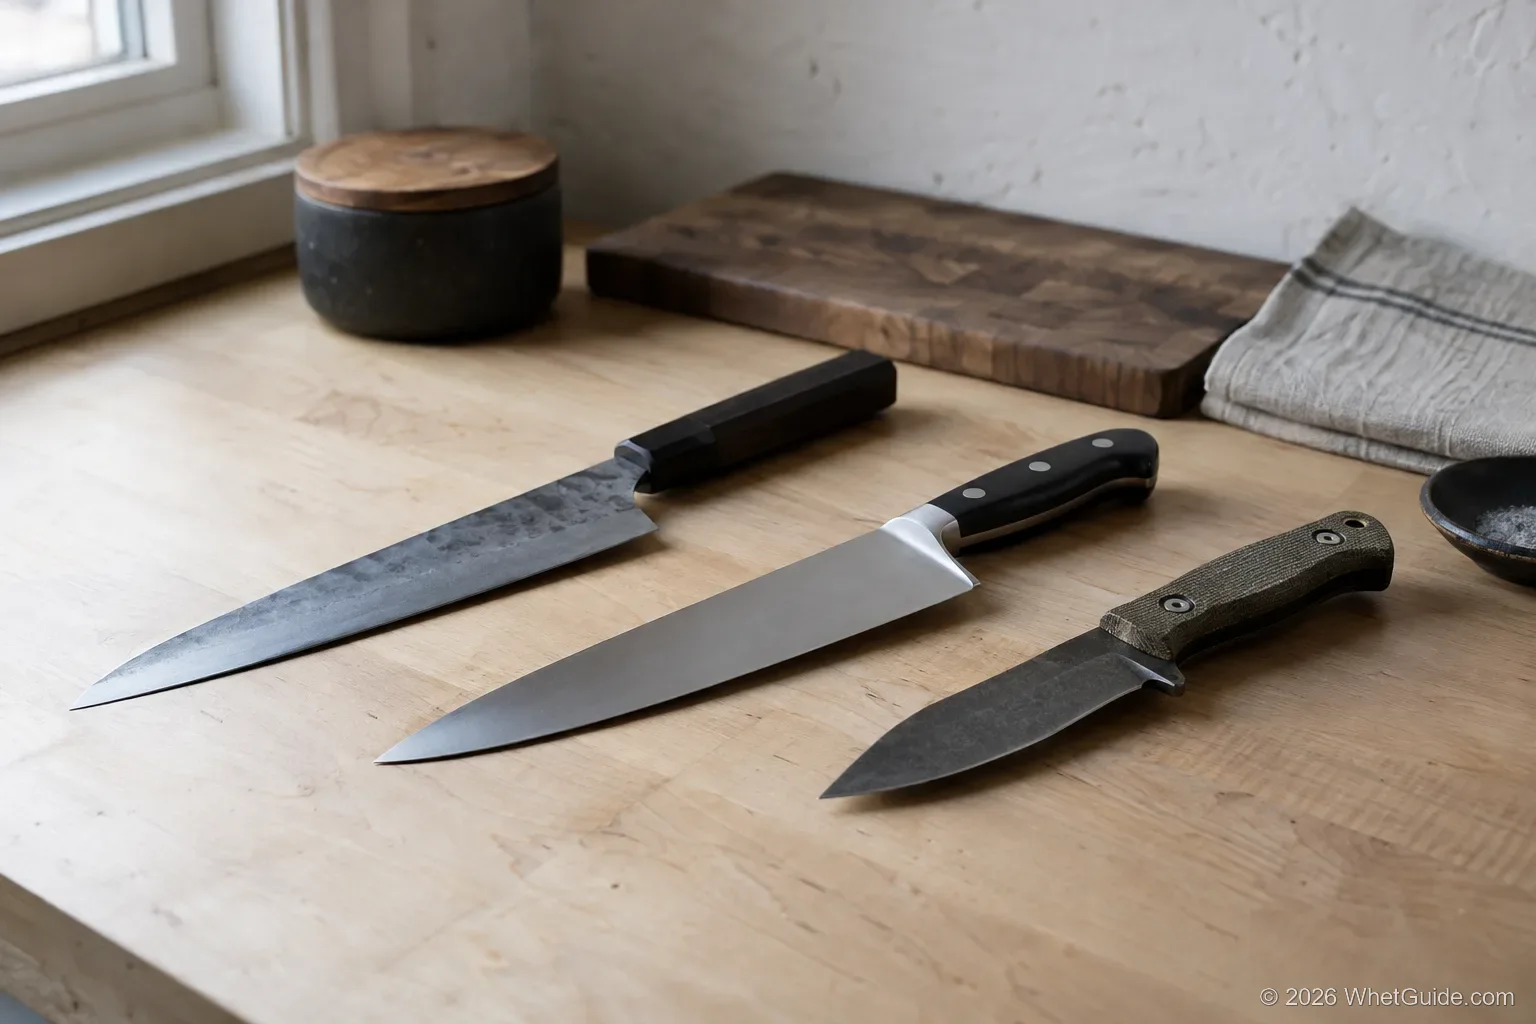
Japanese kitchen knives often sit around 15° per side. German and other Western knives are usually near 20°, and pocket and hunting knives run 20° to 25°. Check what your knife maker recommends, then buy a system that reaches those angles. The angle chart lists more knives.
Decide how much repair work you'll do
Chipped or neglected knives need a coarse abrasive. That means Lansky's 70-grit hone, the Professional Precision Adjust's 220 diamond, or the diamond stones for the Sharpmaker. Knives that are merely dull will do fine on any system here.
Think about serrated knives
The Sharpmaker handles serrations best; the Work Sharp Elite and Lansky Professional add dedicated serrated rods or hones. For the technique, how to sharpen a serrated knife has the steps.
Woodworking and garden tools
Chisels and plane irons usually go on a water-cooled machine with jigs, such as the Tormek T-4 or T-8, and so do turning tools. The Work Sharp MK2 covers many garden tools.
Wet, oiled or dry
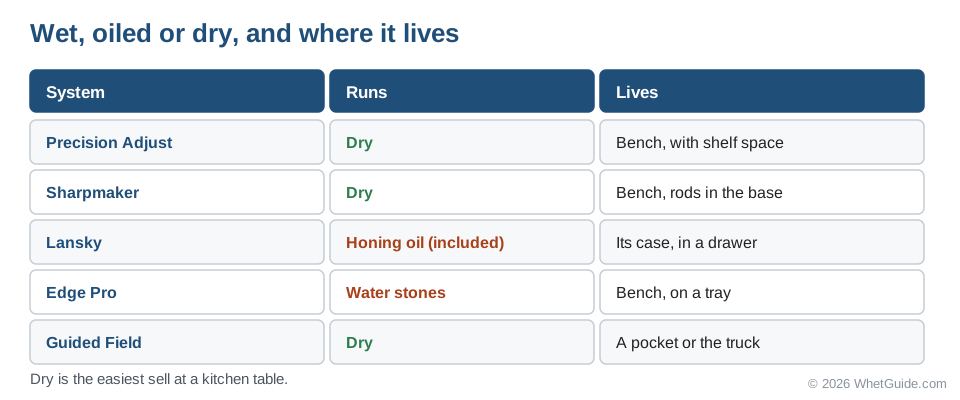
The Precision Adjust and Sharpmaker run dry, which is the tidiest option for a kitchen counter. The Lansky uses the honing oil it ships with. The Edge Pro uses water stones. If you'll sharpen at the kitchen table, dry is the easier sell to everyone else in the house.
Where it will live
A benchtop clamp needs a stable surface and some storage space; a Lansky lives in a case in a drawer; a Guided Field lives in a pocket. Buy the one that will actually come out of the cupboard.
Setting up the bench
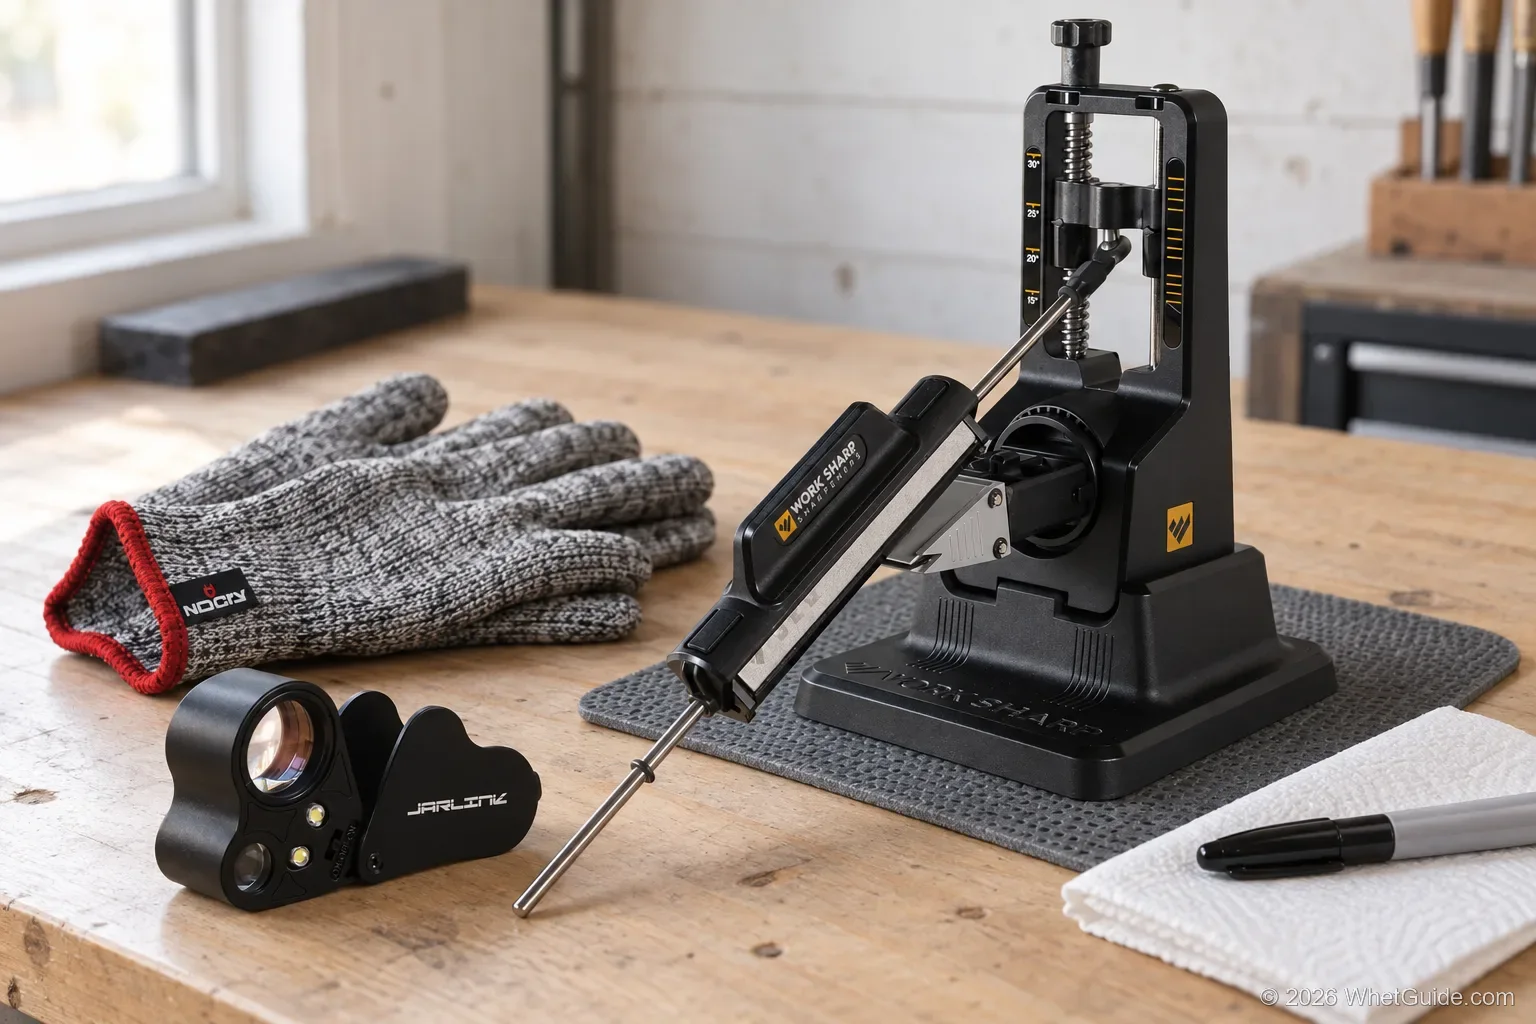
A guided system is only as steady as what it sits on. A wobbly table moves the base, and a moving base changes the angle you paid to fix.
- Use a flat, solid surface at a comfortable height; a kitchen counter is usually better than a coffee table.
- Put a non-slip mat under the base, even if it has rubber feet.
- Light from one side, not overhead, shows the scratch pattern and makes a burr glint.
- Keep a paper towel or rag at hand to wipe swarf off the blade between grits.
- For oil or water stones, set the system on a tray or old towel; for dry diamond and ceramic, a damp cloth catches the dust.
- Keep the marker and a loupe within reach, and the gloves on.
Belt machines need a bit more room and a spot where sparks and dust won't land on anything you care about. A garage bench is the right place for them.
Safety with a sharpening system
Sharpening is itself a safety job. A dull knife needs more force to get through a tomato skin or an onion, and extra force is what makes a blade skid sideways toward a finger. At the bench, the cuts usually come from a knife that moves while a hand is in the way, or from someone testing the edge with a thumb. A clamp removes the first risk if you use it properly; common sense handles the second.
Five rules. Clamp the knife before the first stroke, never hold it loose against a guided stone. Keep your free hand behind the stone, not beside the edge. Wear cut-resistant gloves, as Bob Vila's guide also recommends alongside a non-slip base. Never test an edge by running a finger along it; slice paper. On a belt machine, wear eye protection and keep loose sleeves clear of the belt.
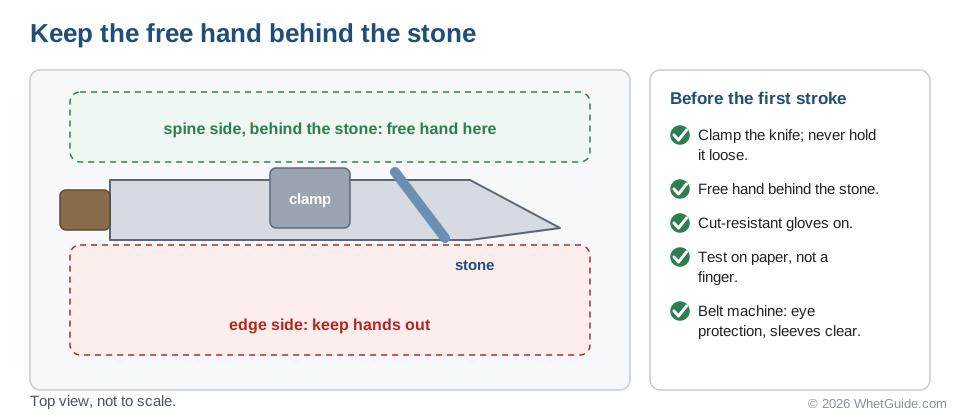
Cut-resistant gloves are cheap (the accessories section lists a pair). They don't make you careless-proof, but they turn a slip on a stone into a scuff instead of a stitch. Take the knife out of the clamp before you walk away from the bench, and put the stones away before children or pets can reach them.
↑ Back to all sectionsCaring for the system itself
A sharpening system wears out slowly, but it does wear out. The abrasives load up with steel and the hones dish. Belts glaze. A clamp collects grit in its threads.
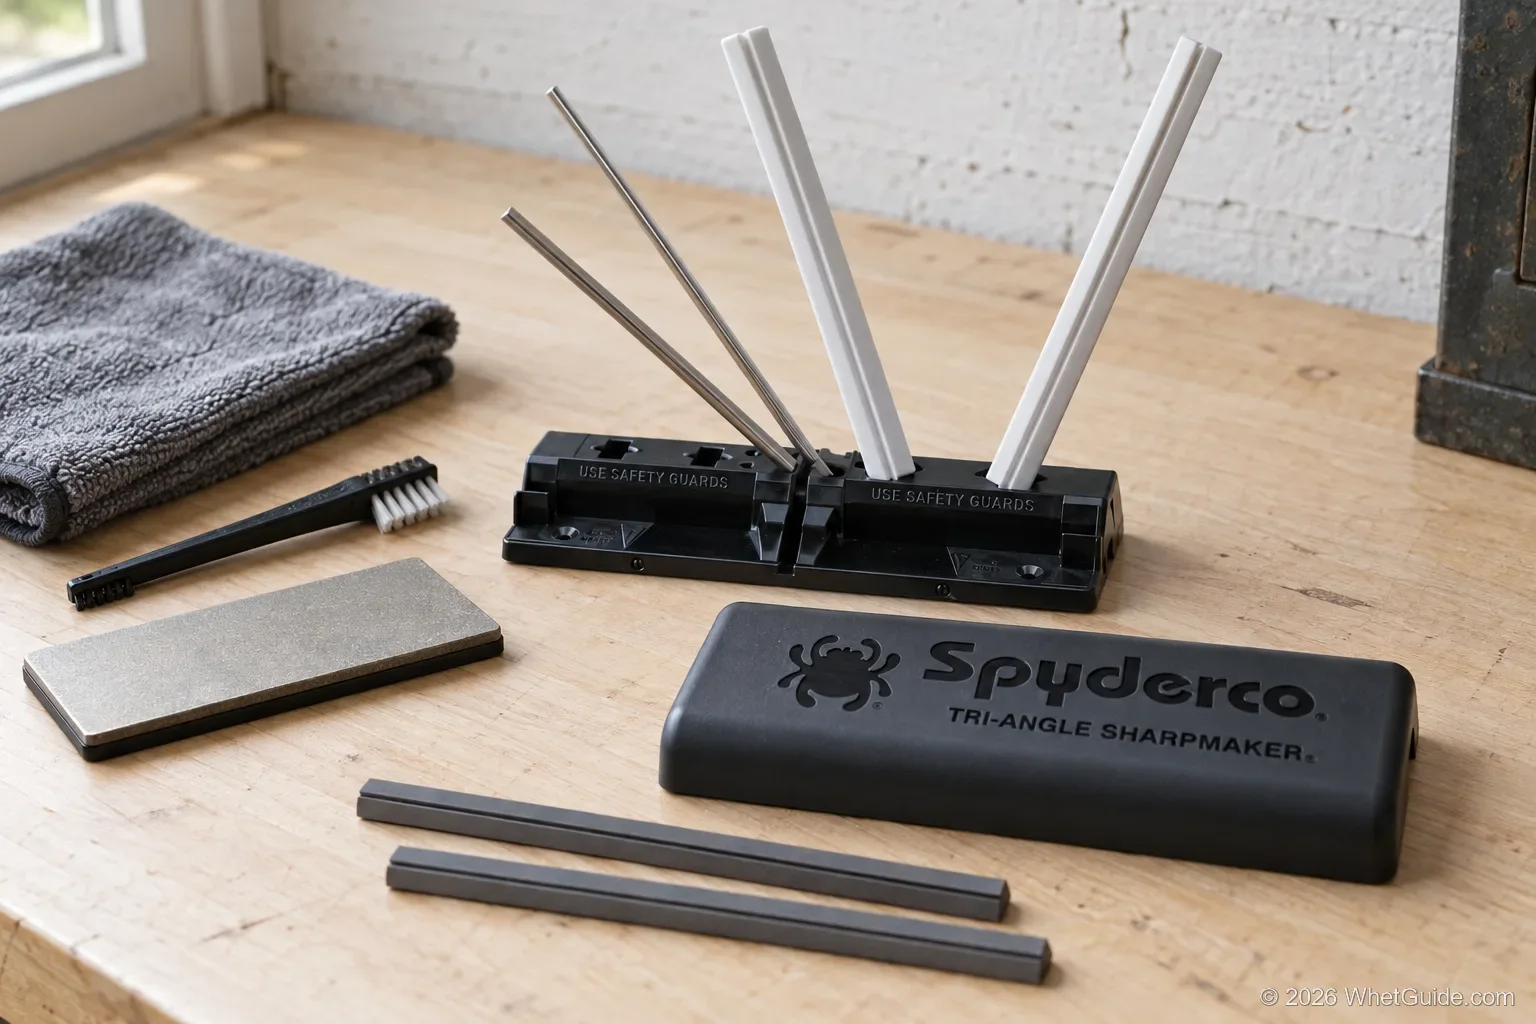
| Part | Care | Replace when |
|---|---|---|
| Diamond plates | Rinse and brush off swarf; dry before storing | Cutting slows and the surface looks bald |
| Ceramic rods | Gray steel buildup scrubs off; Spyderco says to use an abrasive cleanser and water | Rarely; ceramic lasts if it isn't dropped |
| Oil hones (Lansky) | Wipe after use; a fresh drop of honing oil each session | Dished, grooved or glazed |
| Belts | Keep them dry; store flat | Glazed, torn or no longer cutting |
| Strop | Reload compound when it stops darkening | Leather cut or hardened |
| Clamp and pivot | Brush grit out of the threads; a drop of light oil on moving parts | Jaws no longer grip squarely |
Check the angle once a year with a gauge, or whenever a knife that used to take one session suddenly takes two. A drifting pivot or a worn hone shows up as a bevel that looks wider than it should. And store the system where it won't take knocks: a bent guide rod sets the wrong angle without telling you.
↑ Back to all sectionsWhat else you need
A strop finishes any of these systems. The SHARPAL 205H leather strop kit ships with compound and an angle guide, per its listing. For handling a clamped blade or testing an edge, a pair of NoCry cut resistant gloves is cheap insurance. The step up from the base Precision Adjust is the Precision Adjust Elite, which adds plates and a strop, plus a case (see base vs Elite).
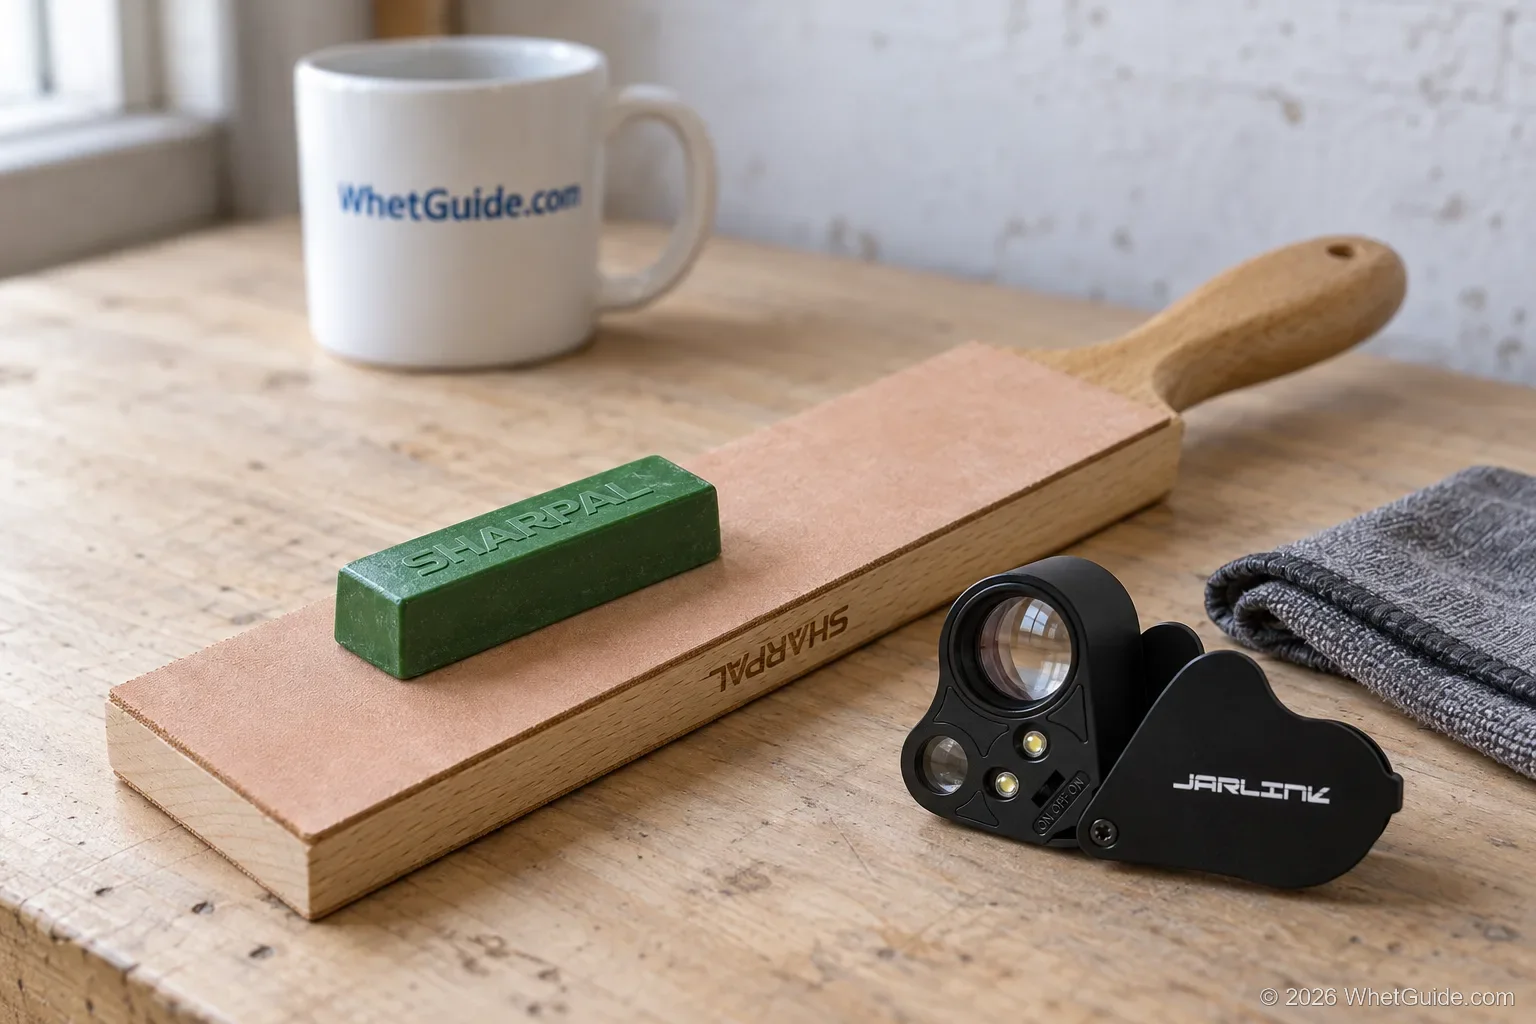
Beyond those, a short list: a permanent marker for the marker method, a jeweler's loupe for checking the burr and the scratch pattern, a refill bar of compound for the strop, and a fine ceramic or diamond honing rod for upkeep between sessions. Our best leather strop and best honing rod guides cover those picks, and diamond honing rods suit very hard steels.
↑ Back to all sectionsIf you don't want a system at all
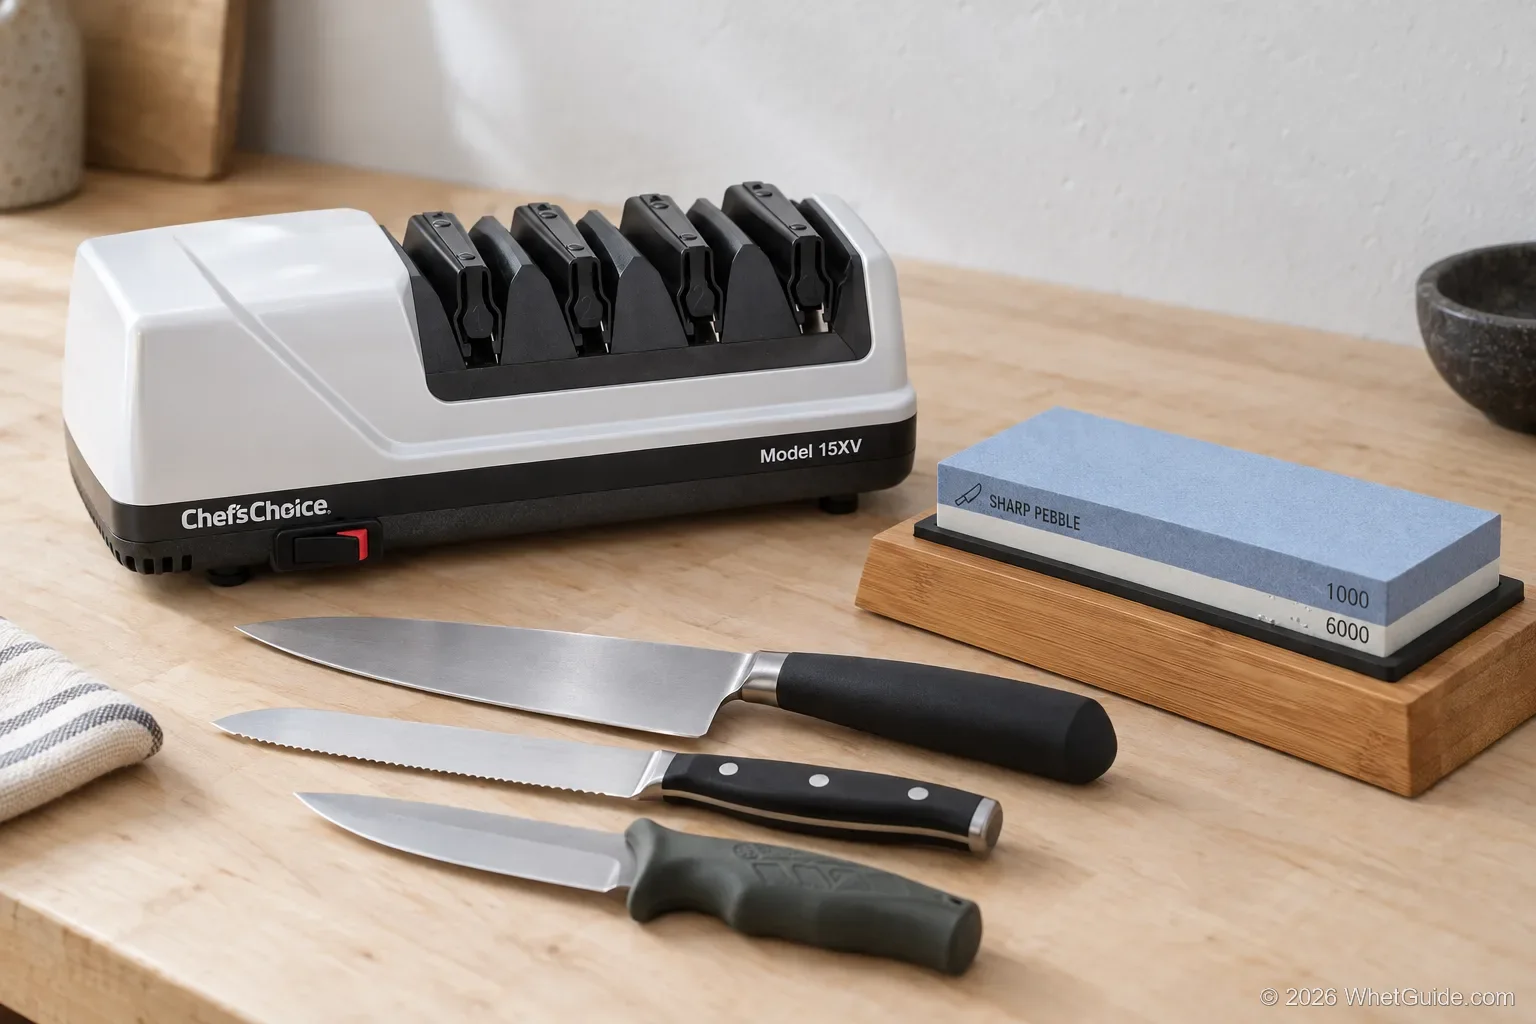
For zero effort on kitchen knives, an electric like the Chef'sChoice 15XV sharpens in about a minute. If you'd rather learn the classic skill, start with a 1000/6000 whetstone and read the best whetstone sets and how to use a whetstone. Buying for someone else? The knife sharpening gift ideas are a good place to start.
Our pick, plainly
Order the Work Sharp Precision Adjust unless one of three things is true. Chipped knives on a tight budget call for the Lansky Deluxe and its 70-grit hone. Half a drawer of serrated knives calls for the Spyderco Sharpmaker. And if you own good kitchen knives and never want to think about angles, the Tormek T-1 is worth its price.
Specs and sales figures come from Amazon listings and Tormek's product pages, checked October 3, 2026, as do the ratings. Price bands come from Amazon listings checked November 14, 2026; we don't quote exact prices, because they change. How we research · Affiliate disclosure